Back to Top

Impossible Burger vs. Beyond Burger: Which Plant-Based Patty Reigns Supreme?

If you’ve ever found yourself in the grocery aisle trying to decide between the Impossible Burger and Beyond Burger, you’re not alone! These two plant-based powerhouses have dominated the vegan and vegetarian burger market, but which one is the right choice for you? In this blog post, we’re breaking down five key comparison points—ingredients, nutritional value, taste, texture, and sustainability. Plus, we’ll share step-by-step instructions on how to cook both burgers perfectly on the Blackstone griddle. Read on to find out which burger reigns supreme!

1. Ingredients: What’s Inside These Patties?

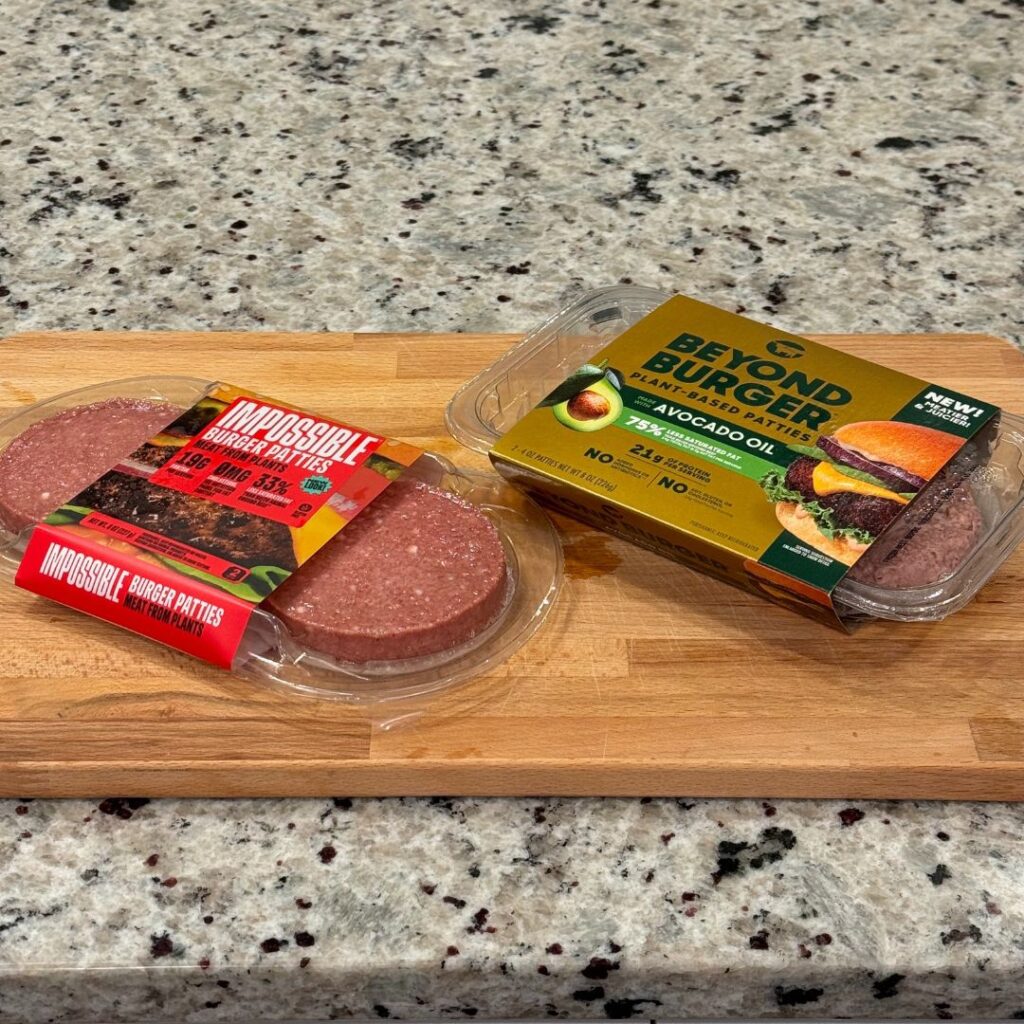
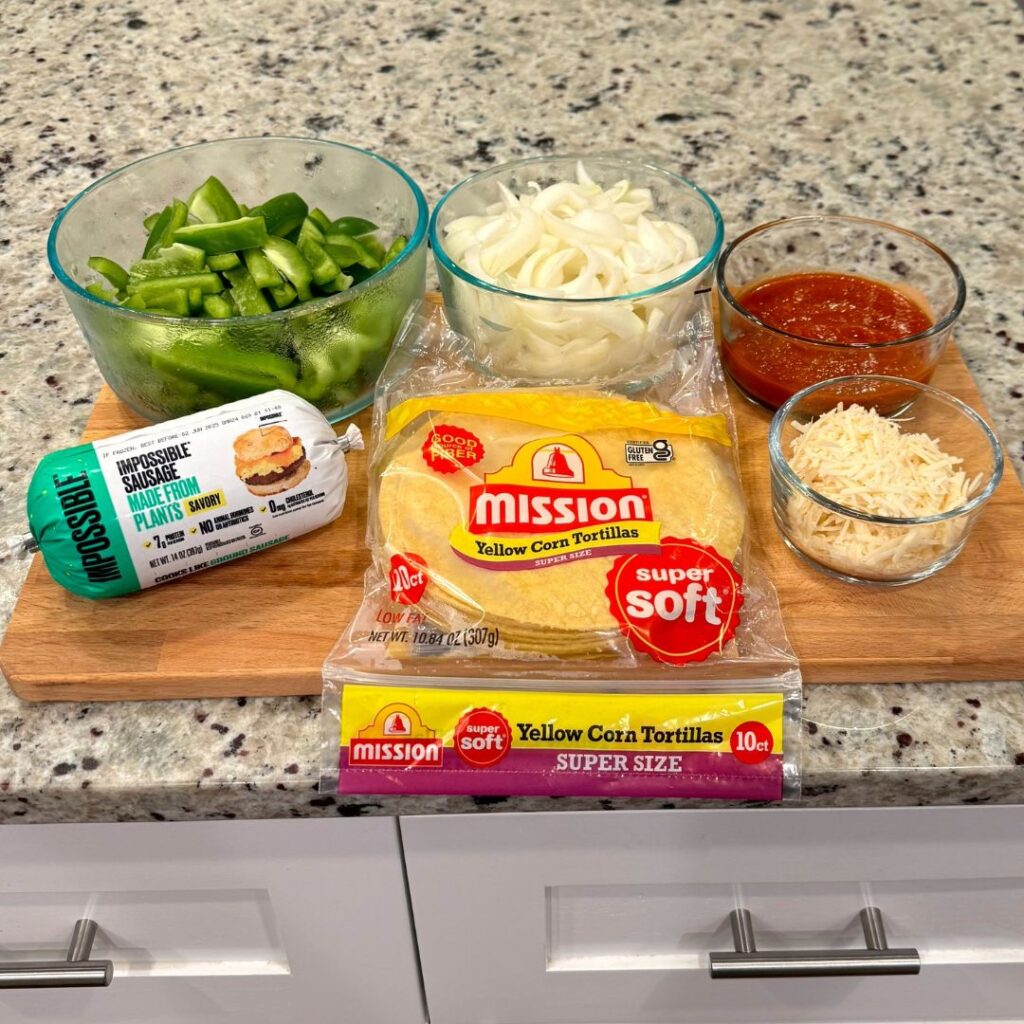
One of the main differences between the Impossible Burger and Beyond Burger is their base ingredients. The Impossible Burger gets its meaty flavor from a unique ingredient called heme, which is found in soy leghemoglobin. This is what gives the Impossible Burger that signature “bleed” when cooked, making it look and taste more like real beef. On the other hand, the Beyond Burger uses pea protein as its base, with beet juice added for color. This makes Beyond a great option for those who are looking to avoid soy in their diet.

Verdict: If you’re sensitive to soy, go for the Beyond Burger. Otherwise, both are packed with plant-based protein.

2. Nutritional Value: How Do They Stack Up?

Let’s take a look at the nutritional breakdown. The Impossible Burger contains 240 calories, 14 grams of fat, and 19 grams of protein per patty. The Beyond Burger comes in slightly lower, with 230 calories, 14 grams of fat, and 20 grams of protein. While they’re almost identical, Beyond edges out with a slight advantage in protein content, which might matter to those tracking their macros closely.

Verdict: If you’re watching your protein intake, Beyond has a slight advantage with 1 more gram of protein per serving.

3. Taste & Texture: Which One Delivers That “Real” Burger Experience?

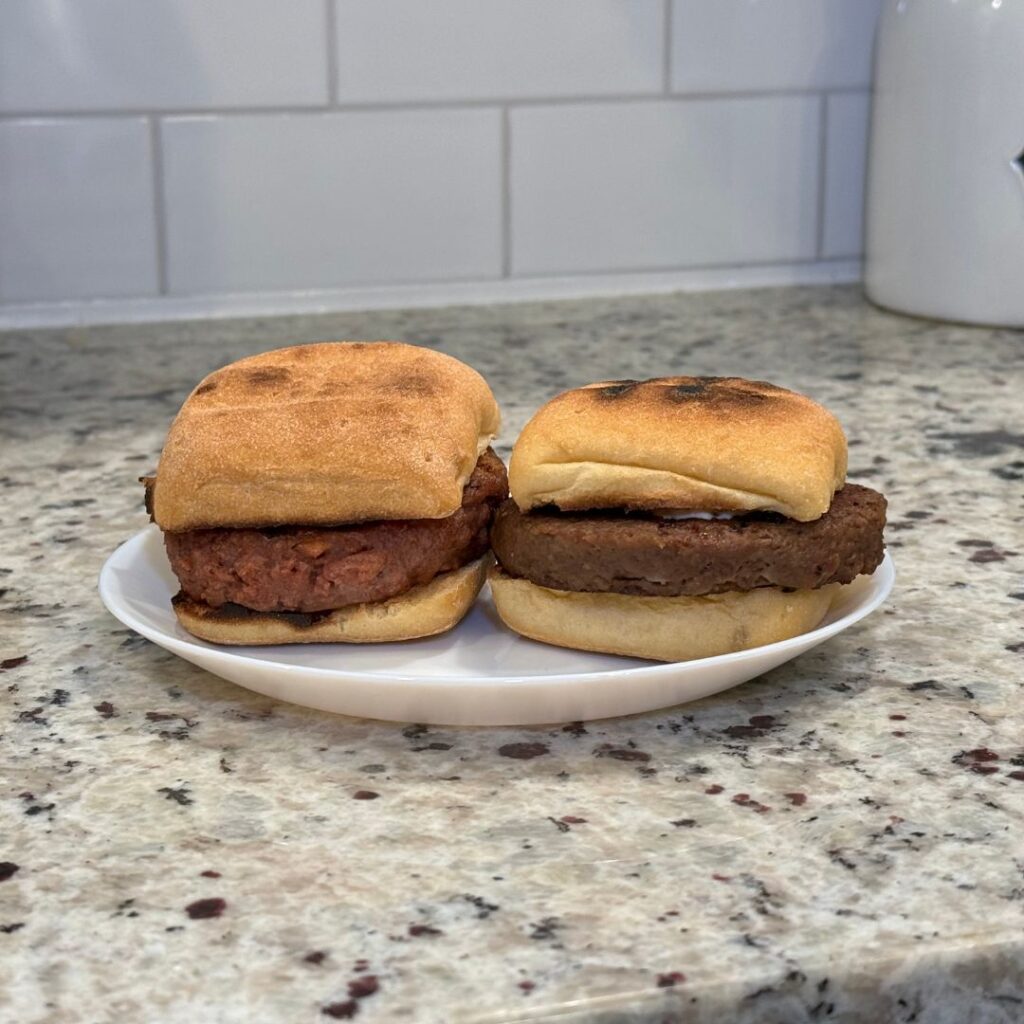
When it comes to taste, both burgers offer a satisfying experience, but with different profiles. The Impossible Burger is known for its juicy, beefy flavor, closely mimicking traditional beef. Its texture is softer, making it perfect for a melt-in-your-mouth experience. The Beyond Burger, however, has a firmer texture with a smokier, grilled flavor that stands out. It even retains a bit of red coloring after cooking, thanks to the beet juice.

Verdict: If you’re after that classic beef burger flavor, Impossible Burger takes the lead. But if you prefer a firmer bite with a smoky, grilled vibe, Beyond Burger wins.

4. Cooking Versatility: Which One Performs Best?

Both the Impossible and Beyond Burgers cook similarly to beef patties, but there are a few nuances. The Impossible Burger is slightly flatter and cooks faster—perfect for a quick meal. Meanwhile, the Beyond Burger is thicker, so it takes a bit longer to cook, but it holds up beautifully on the grill, offering those Instagram-worthy grill marks. Whether you’re pan-frying, grilling, or air-frying, both patties are versatile enough to suit your cooking style.

Verdict: Beyond Burger is ideal for grilling, while the Impossible Burger excels in quick pan-searing.

5. Sustainability: Making a Difference with Every Bite

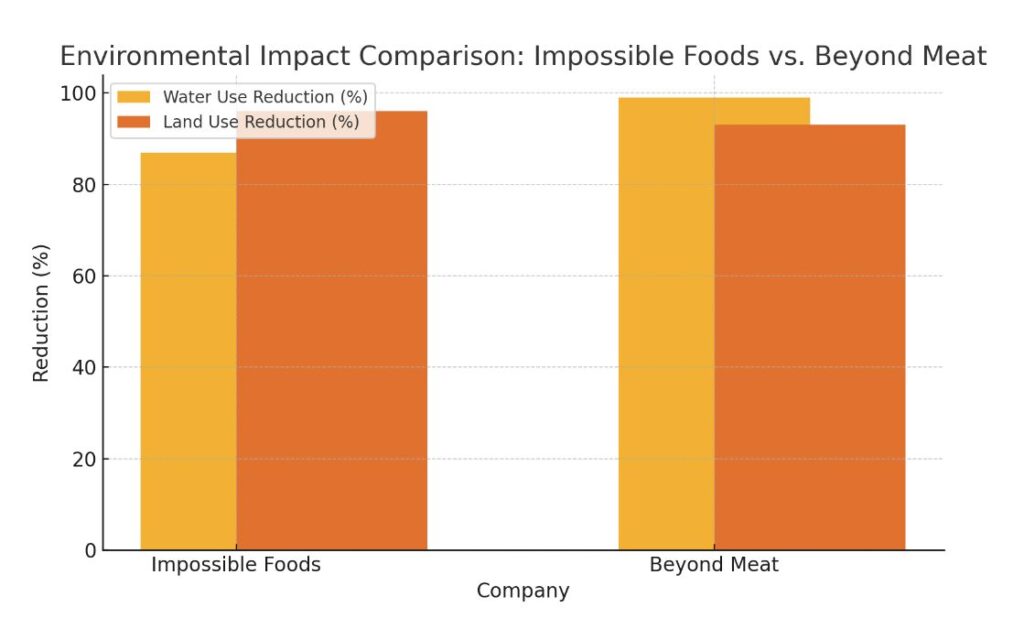
Both brands have made impressive strides in sustainability. Impossible Foods claims that their burger uses 87% less water and 96% less land compared to a traditional beef burger. Beyond Meat boasts even more impressive numbers, using 99% less water and 93% less land. So, whichever one you choose, you’re making a significant environmental impact by opting for a plant-based burger.

Verdict: No matter which one you pick, both are great for the environment!

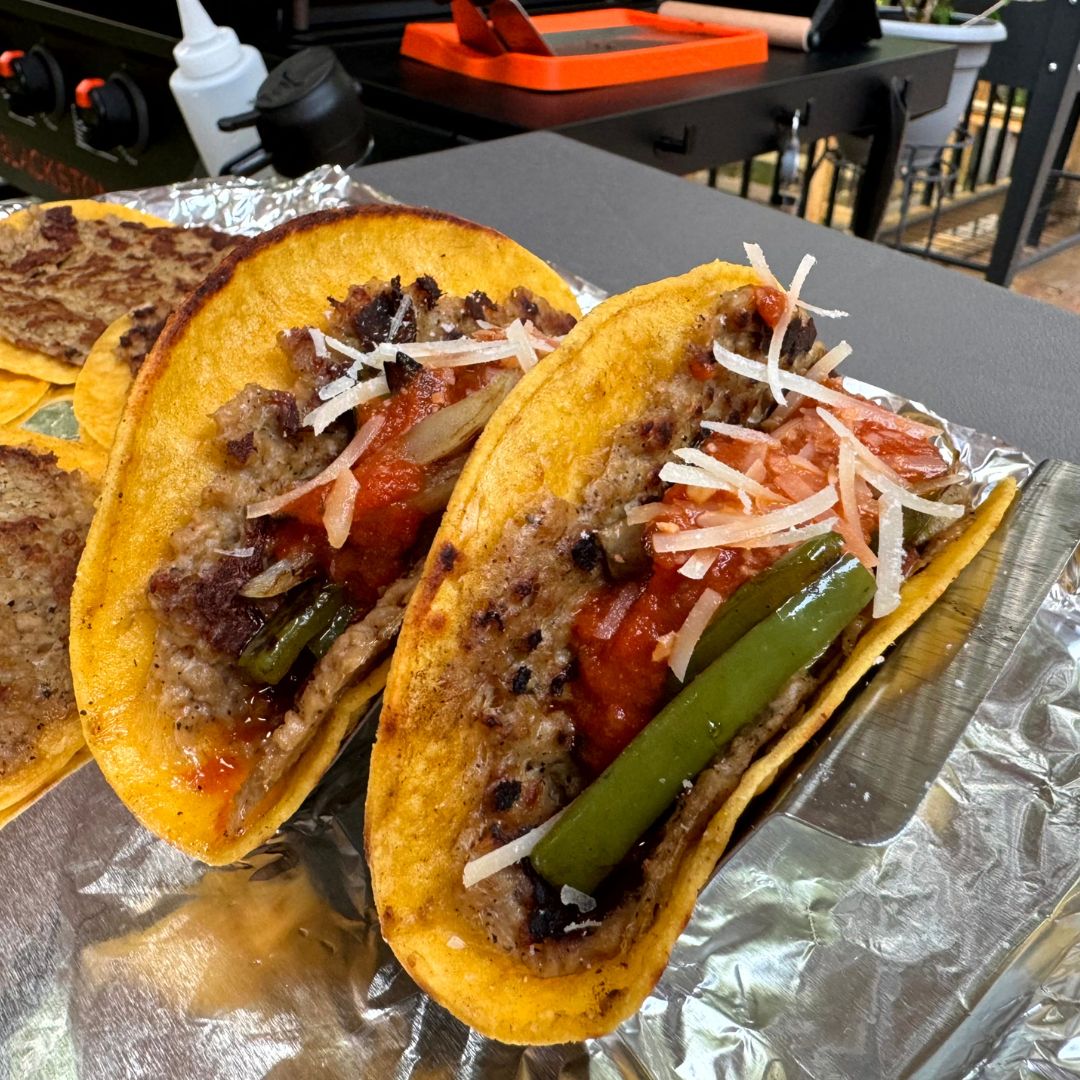
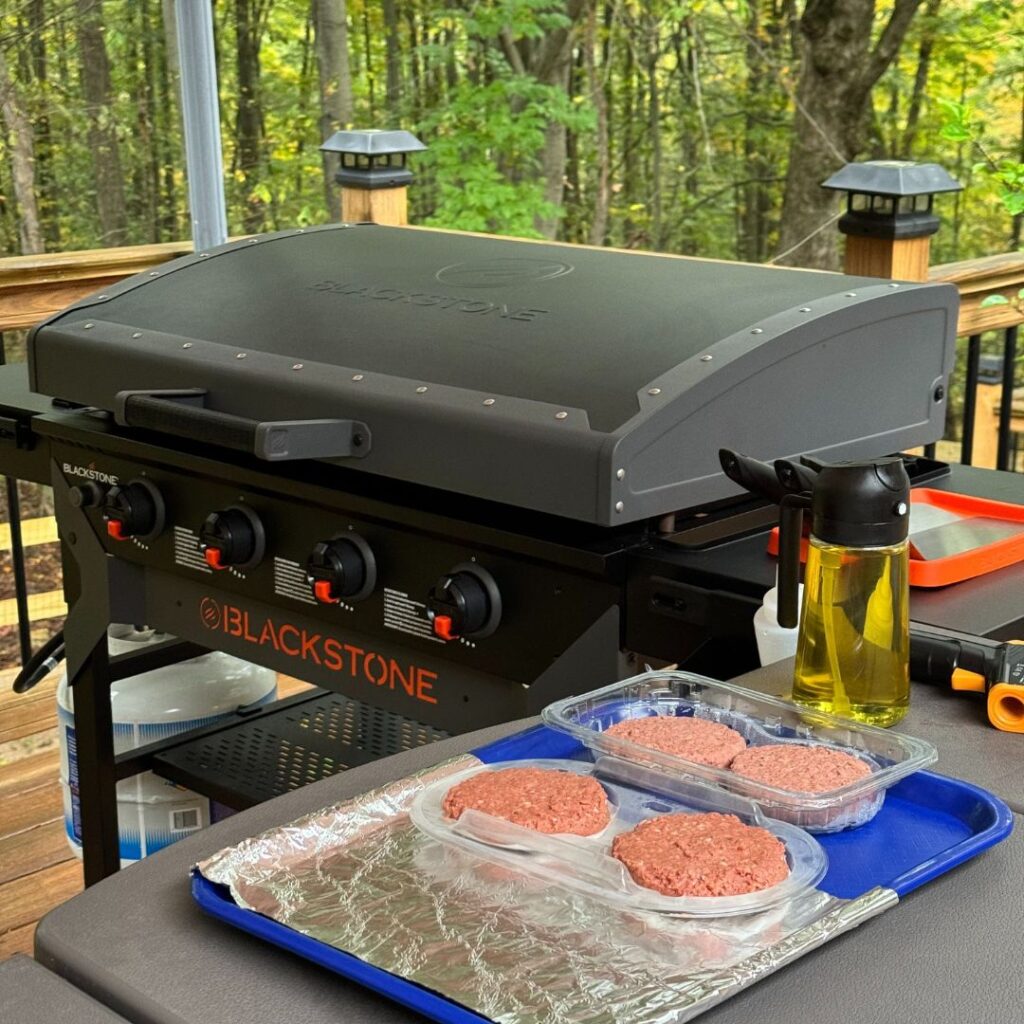
How to Cook Impossible & Beyond Burgers on the Blackstone Griddle

Now that you know the key differences between these two burgers, let’s dive into how to cook them to perfection on a Blackstone griddle.

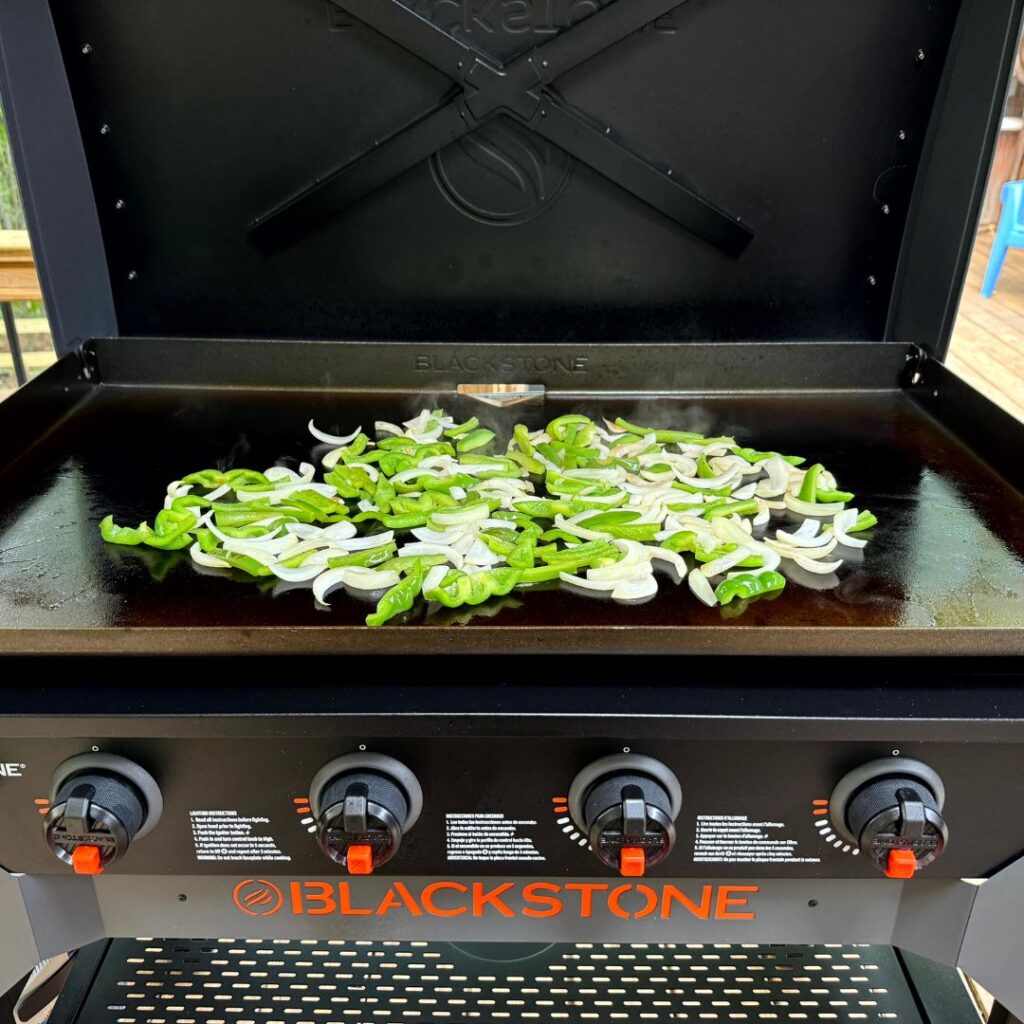
Step 1: Preheat the Griddle
Preheat your Blackstone griddle to medium-high heat, around 375°F to 400°F. You want it hot enough to get a good sear on those patties.

Step 2: Oil the Griddle
Add a bit of avocado oil to the griddle for its high smoke point, ensuring the patties won’t stick.

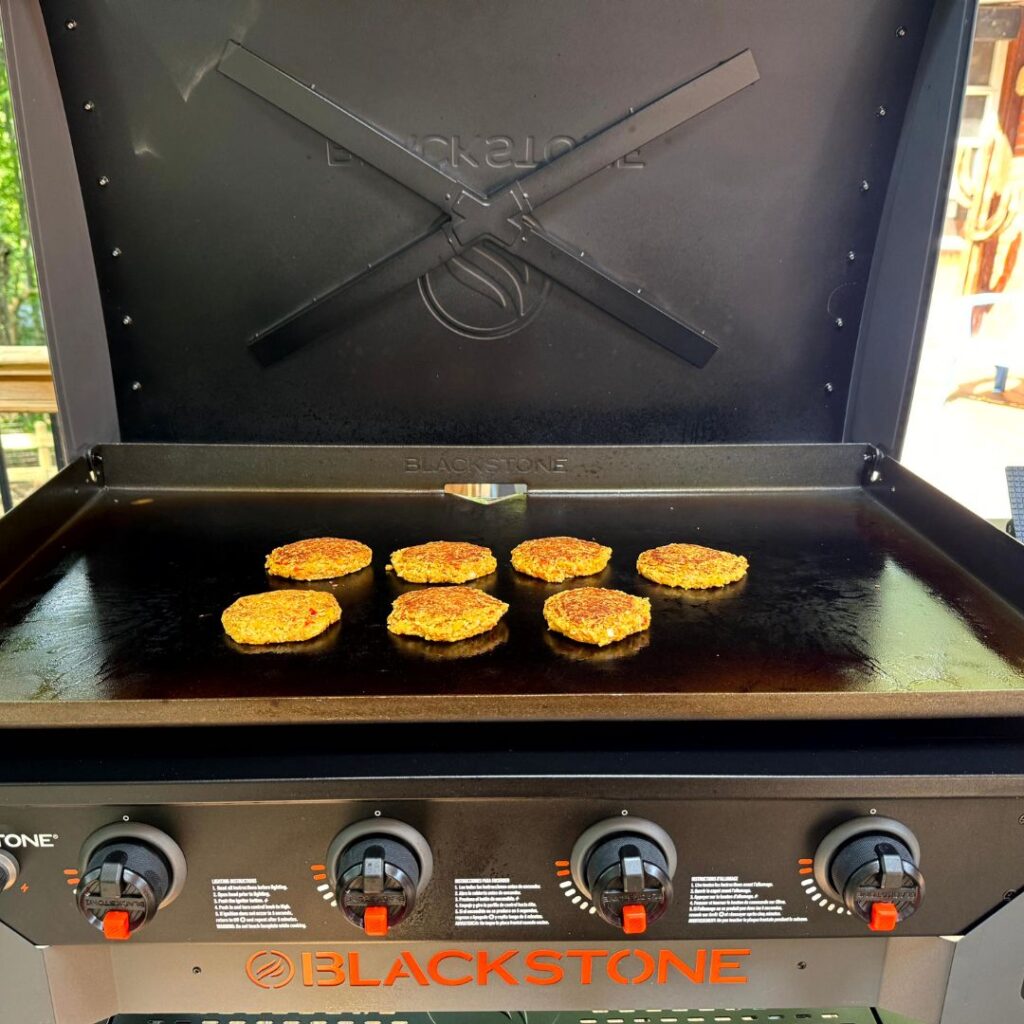
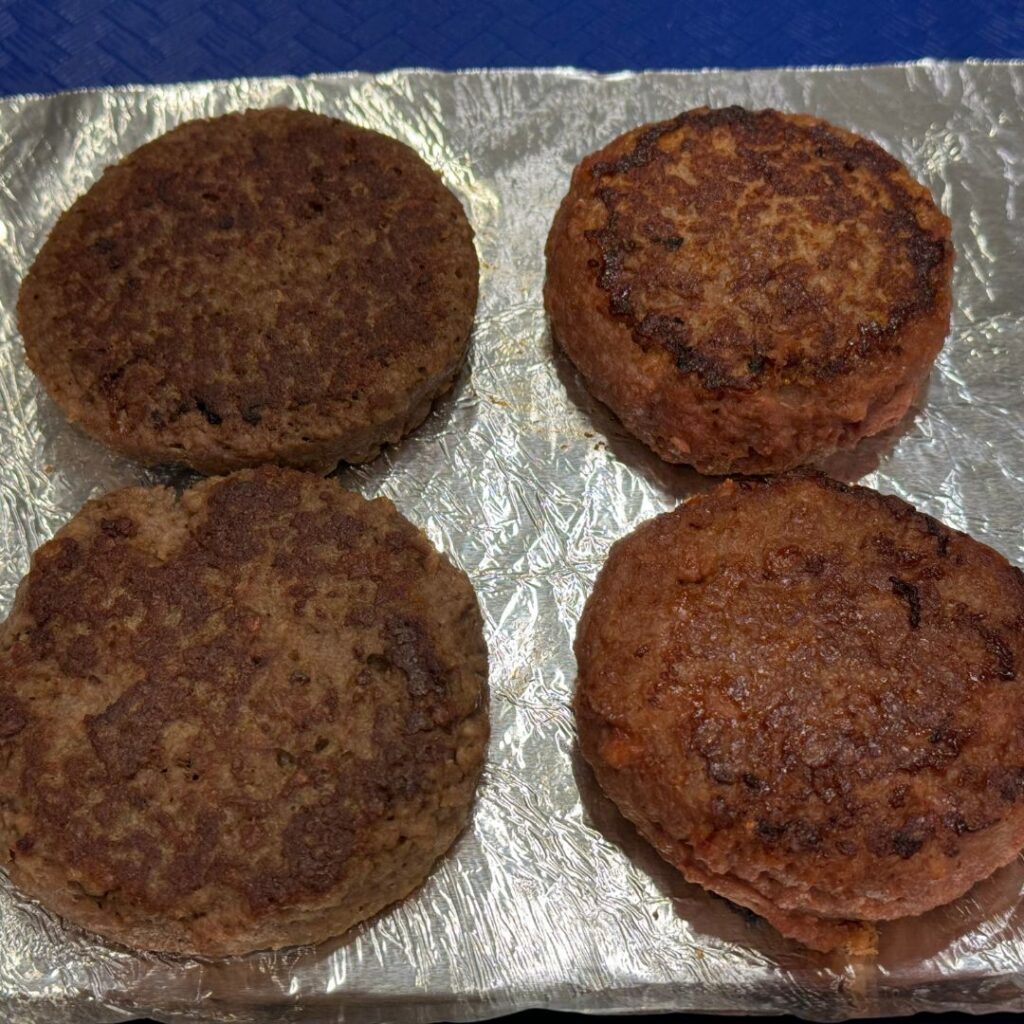
Step 3: Cook the Patties
Place both burgers on the griddle. The Beyond Burger is thicker, so it needs about 3-4 minutes per side, while the Impossible Burger only requires 2-3 minutes per side. Remember, the Beyond Burger will still have a red color when done due to the beet juice, so don’t worry if it looks a bit undercooked.

Step 4: Flip & Finish Cooking
Flip the patties and cook for an additional 5 minutes. For a fully cooked burger, both patties should reach an internal temperature of 165°F. If needed, cover them with a dome for 5 minutes to help cook the insides evenly.

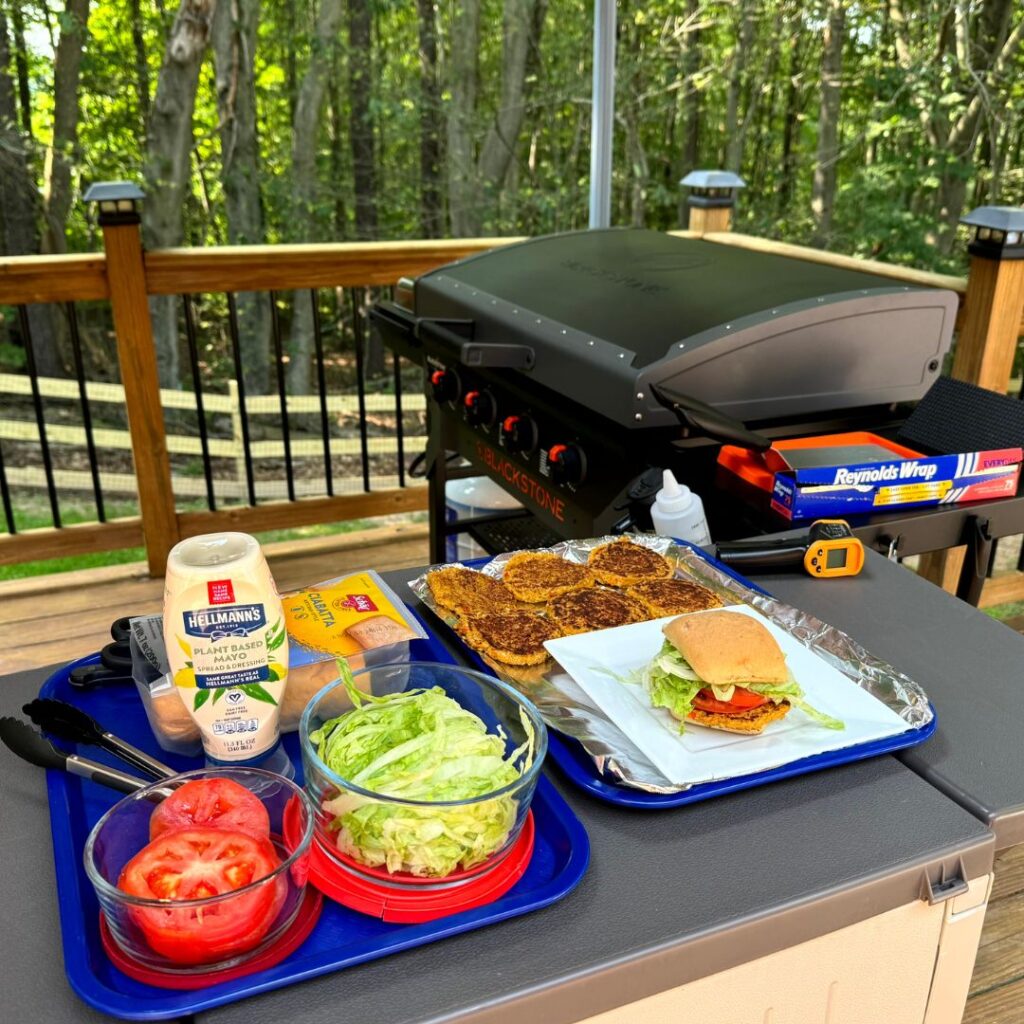
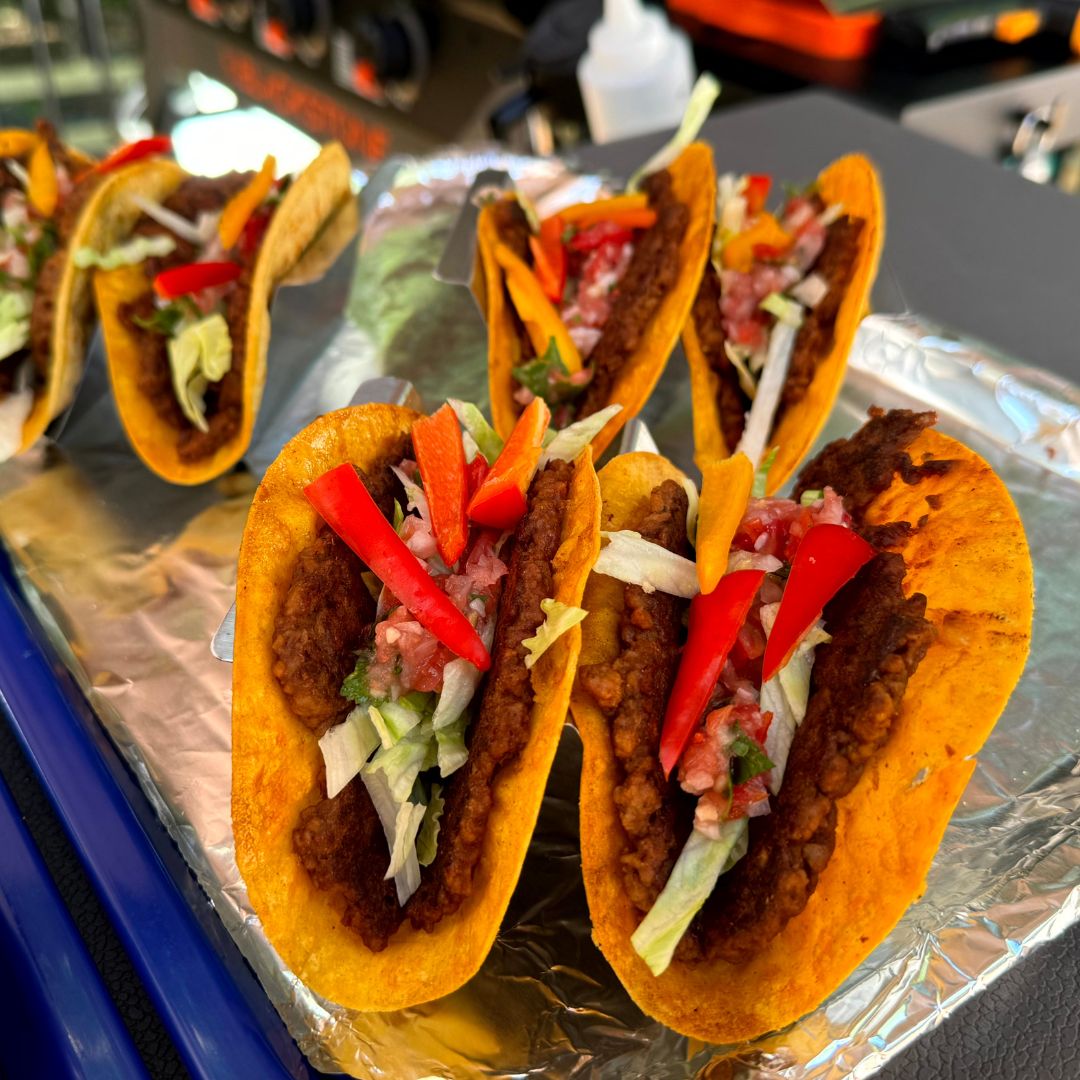
Step 5: Toast the Buns & Assemble
While the patties cook, toast your buns on the griddle for 1-2 minutes. Once everything is ready, assemble with your favorite toppings.

Final Thoughts: Taste Test

After cooking both burgers, we found that each has its unique qualities. The Impossible Burger shines with its juicy, beef-like taste, while the Beyond Burger’s firmer texture and smoky flavor make it a standout option for those who love grilling.

Which one will you try first? Let us know in the comments below! And don’t forget to check out the video for a full cooking tutorial and taste test! For more plant-based recipes and reviews, make sure to subscribe to our YouTube channel. See you next time!

Simplify Your Week with Vegan Gluten-Free Weekly Meal Prep – Episode 3

As fall settles in, my Sunday meal prep routine kicks into high gear. Each week, I carve out time to prepare a few staple dishes that make weekday meals quick, nutritious, and satisfying. My go-to combination usually consists of a soup, a hearty main like risotto, and something versatile like a burger. This way, I can mix and match for lunches and dinners throughout the week. Today, I’m sharing three of my favorite vegan recipes that fit perfectly into this routine: Split Pea Soup, Mushroom Risotto, and Black Bean Burgers.

Split Pea Soup

If you’re craving a warm, filling soup that’s rich in protein and fiber, look no further than my Instant Pot Vegan Split Pea Soup. Although I use my Instant Pot to save time, this recipe can easily be adapted for the stovetop. Simply simmer the split peas with veggies, broth, and seasoning until everything is soft and flavorful. The earthy peas combined with hearty carrots and celery create a deliciously creamy texture without the need for any added cream or thickeners.

This soup is ideal for meal prepping because it stores beautifully in the fridge and gets even tastier as the flavors meld over time. I love pairing it with a slice of gluten-free bread or serving it as a starter for my weekday lunches. Packed with nutrients and comfort, it’s one of those dishes that you’ll keep coming back to all season long.

Mushroom Risotto

For a more decadent yet easy-to-make dish, my Effortless Vegan Mushroom Risotto is always a hit. While the recipe uses the Instant Pot for convenience, it can be made just as well on the stovetop with a little patience and stirring. Arborio rice, sautéed mushrooms, and savory seasonings come together in a creamy, flavorful risotto that feels like a special treat any day of the week.

This risotto also holds up well as leftovers, making it a great dish to prepare ahead of time. It’s perfect for lunches or dinners when you want something rich and satisfying. I like to pair it with roasted vegetables or a simple side salad to balance the richness, but it also stands on its own as a filling meal.

Black Bean Burgers

Finally, for a meal-prep-friendly main course, I recommend my Quick and Easy Vegan Black Bean Burgers. These burgers are simple to make and store well in the fridge or freezer for a quick grab-and-go meal. They’re made with black beans and a variety of spices, creating a flavorful patty that pairs perfectly with your favorite gluten-free buns, lettuce wraps, or even crumbled into a salad.

I love preparing these burgers ahead of time and having them on hand for quick lunches or dinners. They can be pan-fried on the stove or tossed on the griddle for an added smoky flavor. Add your favorite toppings, like avocado, salsa, or Violife shredded mozzarella, and you’ve got yourself a delicious, nutritious meal in no time.

I hope you find these recipes as helpful and delicious as I do for your weekly meal prep. Feel free to share your thoughts or ask any questions in the comments below—I’d love to hear how you’re incorporating these meals into your routine!

What I Ate in Davis, West Virginia on a Gluten-Free, Vegan Diet During a Half Marathon Weekend

Last weekend, I ran a half marathon in Davis, West Virginia, and let me tell you, it was an adventure both on the trail and in the kitchen! While I was excited about the race, I quickly realized that finding local gluten-free, vegan food in such a remote area would be nearly impossible. We were staying in a small hotel with no kitchen, so I had to be prepared with all my meals. Here’s a rundown of what I ate and how I managed to stay fueled and energized for the big race.

On the Road – Harrisburg, PA Pit Stop

Before we even made it to West Virginia, we took a break in Harrisburg, Pennsylvania. Luckily, we found a Red Robin on the way. If you follow a gluten-free, vegan diet, you probably already know how tricky it can be to eat out, but Red Robin is a great option. I ordered their veggie burger with a gluten-free bun, and topped it with pickles, lettuce, tomato, and ketchup. The best part? Their endless fries, which are also vegan and gluten-free! This was the perfect road trip meal to keep me satisfied until we arrived at our hotel.

Breakfast – Tofu Scramble with Gluten-Free Wraps

Once we arrived in Davis, I knew I had to stick to my pre-planned meals since there were no local restaurants catering to my dietary needs. For breakfast, I made a tofu scramble ahead of time and brought gluten-free wraps with me. The scramble was packed with fresh vegetables like peppers and kale to keep things nutritious and flavorful. I quickly heated the wraps in a microwave, stuffed them with the tofu scramble, and had a delicious, filling breakfast each morning. This meal was packed with protein and fiber, which helped me stay energized throughout the day, especially before the race. You can find the full tofu scramble recipe on my blog for all the details!

Lunch – 7 Bean Burgers

Lunch was all about convenience, and I found a fantastic option in the 7 bean burger mix by Augason Farms. It’s a dehydrated mix that only requires water. After adding water and allowing it to hydrate, I cooked the burgers in a nonstick pan until they were crispy and browned on both sides. These bean burgers were perfect for a quick, hearty lunch in the hotel, and they packed a ton of flavor. The best part? You can make these at home, too! Check out my blog for step-by-step instructions.

Dinner – 4-Ingredient Taco Mix

For dinner, I kept things super simple but incredibly tasty. I made a 4-ingredient taco mix using black beans, corn, diced tomatoes, and a taco seasoning packet. This versatile mix can be used in a gluten-free wrap, like a taco, or eaten on its own as a bowl, similar to chili. Either way, it was a delicious, warming dinner after a long day. Plus, it was easy to store in the mini-fridge in our hotel room.

Snack – Fresh Mango

Lastly, for a sweet and refreshing snack, I cut up two ripe mangos before the trip. Mangos are a great portable option, and they were the perfect snack to satisfy my sweet tooth after meals or during breaks between race prep.

Staying Fueled While Traveling

While Davis, West Virginia didn’t have many local food options that fit my gluten-free, vegan diet, I was able to stay on track by planning ahead and preparing all of my meals. It’s not always easy to find plant-based and gluten-free food in remote areas, but with a little prep work, you can still enjoy delicious, nutritious meals no matter where your travels take you. If you want to recreate any of these meals, check out my blog for all the recipes!

Let me know in the comments if you’ve ever been in a similar situation, and how you managed your diet while traveling. Happy eating and running!

What I Ate Gluten-Free and Vegan in Sedona, AZ

If you’re a gluten-free vegan like me, you know the struggle of finding a restaurant that offers delicious, safe options while traveling. That’s why I was thrilled to find Picazzo’s Italian Kitchen in Sedona, Arizona, a true gem for plant-based diners. After spending the day hiking the gorgeous red rocks, my appetite was in full swing, and Picazzo’s did not disappoint.

Hiking Adventures in Sedona

Let’s backtrack a little. My day started with some incredible hikes in Sedona’s scenic desert landscape. If you’ve ever been, you know just how jaw-dropping the views are—towering red rocks, open skies, and peaceful trails. Sedona has some of the most breathtaking hikes I’ve ever done, so by the time dinner rolled around, I was ready for a feast.

Discovering Picazzo’s Italian Kitchen

After a long day outdoors, I headed over to Picazzo’s Italian Kitchen, which has an entire plant-based vegan menu. Yep, you read that right—an entire menu dedicated to plant-based eaters with plenty of gluten-free options. I practically hit the menu lottery!

It’s not often that I find a restaurant that caters to both my vegan and gluten-free lifestyle, so I was beyond excited to explore their offerings. Picazzo’s prides itself on serving organic, wholesome dishes, and it shows in the quality of their food.

The Appetizer: Gluten-Free Cheese Bread

To start off, I couldn’t resist ordering the gluten-free cheese bread. Now, if you’ve been gluten-free for a while, you know how hard it is to find safe, delicious bread at a restaurant, let alone cheese bread! This was a major treat for me—it was perfectly crispy on the outside and gooey with melted vegan cheese on the inside. I can’t even remember the last time I was able to safely enjoy cheese bread at a restaurant. The flavor and texture were spot on. It truly set the tone for the rest of the meal.

The Main Course: Vegan Chick’n Parm

For the main course, I went with their vegan chick’n parm, which came with gluten-free rigatoni pasta and garlic butter French green beans with almonds. Let me tell you, this dish was an absolute dream! The vegan chick’n was perfectly breaded and crispy, the pasta was cooked to perfection, and the green beans added a delicious crunch with a buttery garlic flavor. Every bite was a reminder of why I wished we had a Picazzo’s back home in Pennsylvania!

Dessert: Vegan Cheesecake to Go

I was so full by the time dessert came around, but I couldn’t resist ordering their vegan cheesecake to take back to my Airbnb. Later that evening, I finally dug into the cheesecake, and it did not disappoint! The creamy texture and slight tanginess were everything I had hoped for. It was the perfect way to end an already amazing dining experience.

Why You Should Visit Picazzo’s

If you’re ever in Sedona, Picazzo’s Italian Kitchen is a must-visit spot for gluten-free vegans. The extensive plant-based menu, paired with a warm and welcoming atmosphere, makes it the perfect stop after a day of hiking. Whether you’re craving comfort food like vegan chick’n parm or something lighter, they’ve got you covered.

Sedona is a stunning place, and with food this good, I’m already planning my next trip back!

Air Fryer Vegan Red Pepper Stuffed Mushrooms

Looking for a delicious and easy vegan appetizer? These Vegan Red Pepper Stuffed Mushrooms are a crowd-pleaser! Filled with a savory mixture of red sweet peppers, garlic, and melted vegan mozzarella, they’re perfect for any gathering or even as a tasty snack. Plus, they’re cooked in the air fryer, making them quick and convenient.

Mushrooms are not only delicious but also a great source of vitamin D, which can be challenging to get on a vegan diet. They help support bone health, immune function, and overall well-being. Including mushrooms in your meals is a simple way to add this essential nutrient to your diet, especially if you’re enjoying these stuffed mushrooms as part of your regular recipe rotation.

To make this recipe, I use a few of my favorite kitchen tools that make preparation a breeze. I highly recommend using the Insta Air Fryer for perfectly cooked stuffed mushrooms every time. Lining the basket with these parchment liners makes cleanup quick and easy. A good pair of tongs helps with handling the hot mushrooms, and these spatulas are perfect for mixing and stuffing. For the filling, I use the Ninja BN601 Professional Plus Food Processor to get everything finely chopped and well-blended.

For this recipe, I love using Violife shredded mozzarella as the cheese of choice. It has a wonderful flavor and texture that complements the stuffed mushrooms perfectly. Just keep in mind that vegan cheese often takes a little longer to melt than traditional cheese. So, if you notice the cheese isn’t fully melted after the recommended cooking time, feel free to leave the mushrooms in the air fryer for an extra minute or two.

Air Fryer Vegan Red Pepper Stuffed Mushrooms

Filled with a savory blend of red sweet peppers, garlic, and dairy-free mozzarella, this recipe is sure to impress both vegans and non-vegans alike.
Prep Time 10 minutes
Cook Time 10 minutes
Total Time 20 minutes
Course Appetizer
Servings 4

Equipment

  • 1 Air fryer
  • 1 Food Processor

Ingredients
  

  • 24 oz. white mushrooms
  • 4 small sweet peppers or 1 cup chopped red peppers
  • 1 tbsp garlic minced
  • 1/2 cup non-dairy shredded mozzarella Violife recommended
  • 5-8 mushroom caps from reserved mushrooms

Instructions
 

  • Clean the Mushrooms: Submerge the mushrooms in a bowl of water to remove any dirt. Once clean, either allow them to air dry or gently pat them dry with a towel.
  • Prepare the Mushroom Caps: Remove the stems from all the mushrooms. Set aside 5-8 caps for the stuffing mixture and reserve the rest for filling.
  • Chop the Peppers: Clean and roughly chop the red sweet peppers into large chunks.
  • Make the Stuffing: In a food processor, combine the chopped red peppers, minced garlic, reserved mushroom caps, and shredded mozzarella. Process until the mixture is finely chopped and well-combined, making it easy to stuff into the mushrooms.
  • Stuff the Mushrooms: Spoon the stuffing mixture into each of the reserved mushroom caps, pressing lightly to ensure they are well-filled.
  • Preheat the Air Fryer: Preheat your air fryer to 375°F (190°C) for about 3-5 minutes.
  • Air Fry the Mushrooms: Place a piece of parchment paper in the air fryer basket and arrange the stuffed mushrooms in a single layer. Depending on the size of your air fryer, you may need to cook them in batches. Cook for 10 minutes, or until the mushrooms are tender and the stuffing is heated through.
  • Serve: Once cooked, remove the mushrooms from the air fryer and serve immediately. For added flavor, you can sprinkle with additional shredded cheese or panko breadcrumbs before air frying.

Notes

  • For extra crispiness, top the stuffed mushrooms with panko breadcrumbs before air frying.
  • If you prefer a more melted cheese texture, you can extend the cooking time by a couple of minutes.
Keyword Mushroom

I hope you give this Vegan Red Pepper Stuffed Mushrooms recipe a try! Let me know how it turned out in the comments below. I’d love to hear your thoughts and any variations you come up with. Enjoy cooking and happy eating!

These are Amazon Affiliate links that incur no additional cost when clicked.

Vegan Gluten-Free Chickpea Burgers on the Blackstone

Looking for a delicious, plant-based option for your next BBQ or family gathering? These Vegan Gluten-Free Chickpea Burgers are a crowd-pleaser! Made with wholesome ingredients and cooked to perfection on the Blackstone, they’re quick to prepare and pack a ton of flavor. Whether you’re planning a backyard barbecue or a cozy dinner, these chickpea burgers are sure to satisfy everyone at the table. Plus, they’re super easy to throw together and perfect for taking to parties or potlucks!

The Health Benefits of Chickpeas

Not only are these burgers tasty, but they’re also packed with chickpeas, a nutritional powerhouse! Chickpeas are an excellent source of plant-based protein and fiber, making them great for digestion and helping you feel full longer. They’re also rich in vitamins and minerals like iron, folate, and magnesium, which are all important for maintaining good health. Including chickpeas in your diet can support heart health, improve blood sugar levels, and boost energy. So, you’re not just indulging in deliciousness—you’re fueling your body with the good stuff!

My Favorite Food Brands for This Recipe

To make these burgers extra special, I love using quality ingredients from my go-to brands. Here’s a list of my must-haves for this recipe:

These brands never let me down when it comes to delivering top-notch, gluten-free ingredients that help take my recipes to the next level.

Essential Equipment for Making These Chickpea Burgers

Having the right tools makes cooking so much more fun and efficient! Here’s what I used to make these chickpea burgers come out perfect every time:

  • 36 in. Blackstone: Get yours here for the perfect grilling experience.
  • Blackstone Silicone Spatula Mat: Find it here to keep your cooking area neat.
  • Blackstone accessory kit: Grab it here for all your grilling needs.
  • Digital Infrared Thermometer Gun: Check it out here for precision temperature control.
  • 16oz Oil Dispenser Bottle: Buy it here to easily apply your avocado oil.
  • WÜSTHOF Gourmet 16-Piece Knife Block Set: Get it here for effortless chopping.
  • Pyrex Simply Store 12-Pack Mixed Sized Glass Food Storage Set: Find them here to store your ingredients neatly.
  • Carlisle FoodService Trays: Check them out here for easy transport.
  • Ninja BN601 Professional Plus Food Processor: Find it here for perfectly blended burger mix.
  • 7 in 1 Hamburger Silicone Mold: Buy it here to shape your patties like a pro.

With this gear, making these burgers is a breeze!

Try It Out!

I hope you give these Vegan Gluten-Free Chickpea Burgers a try! They’re simple, nutritious, and so tasty. Let me know how yours turn out by leaving a comment below. I’d love to hear your feedback and any twists you make to the recipe. Don’t forget to share this post with friends and family who might love it, too!

Vegan Gluten-Free Chickpea Burgers on the Blackstone Grill

These flavorful chickpea burgers are perfect for BBQs, family gatherings, or meal prepping for busy weeks. Packed with plant-based protein, they’re easy to make and cook up beautifully on a flat-top grill. Ready in no time and totally customizable with your favorite toppings!
Prep Time 15 minutes
Cook Time 15 minutes
Course Main Course
Servings 6

Equipment

  • 1 36 in. Blackstone Grill
  • 1 Ninja BN601 Professional Plus Food Processor
  • 1 7 in 1 Hamburger Silicone Mold

Ingredients
  

Burger Ingredients

  • 1 tbsp Bob's Red Mill GF Egg Replacer
  • 2 tbsp water
  • 1 cup Bob's Red Mill Old Fashioned GF Rolled Oats
  • 15 oz. chickpeas can rinsed and drained
  • 2 tbsp garlic minced
  • 1 tbsp Dijon mustard
  • 1 tbsp soy sauce gluten free
  • 1 tsp Italian Seasoning
  • 1 tbsp avocado oil for the flat-top grill
  • 1/2 cup red bell peppers chopped
  • 1 package Schar GF ciabatta rolls

Toppings

  • 1 Roma tomato sliced
  • 2 cups iceberg lettuce thinly sliced
  • Hellmann’s Plant-Based Mayo Dressing

Instructions
 

  • Prepare the Egg Replacer: In a small bowl, mix 1 tbsp Bob's Red Mill GF Egg Replacer with 2 tbsp water. Stir well and set aside. This is an excellent binder for your chickpea burgers.
  • Prep the Veggies: Chop ½ cup of red bell pepper and 2 tbsp garlic into bite-sized pieces. If you're in a rush, simply pulse them in the food processor before adding the rest of the ingredients.
  • Make the Burger Mix: In a food processor, add: 1 cup GF rolled oats, 15 oz. chickpeas, rinsed and drained, chopped red bell pepper, garlic, 1 tbsp Dijon mustard, 1 tbsp gluten-free soy sauce, 1 tsp Italian seasoning
    Pulse until the mixture is thick but not completely smooth. You want to keep some texture!
  • Add Egg Replacer: Use a spatula to scrape down the sides, then add your egg replacer mixture. Blend again briefly, until everything is combined.
  • Shape the Patties: Form the mixture into burger patties using your hands or a burger mold. Line a tray with parchment paper for easy cleanup.
  • Grill the Burgers: Preheat your Blackstone grill to 350°F. Spray a generous amount of avocado oil and place the burgers directly onto the grill. Cook each side until golden brown (about 3-4 minutes per side).
  • Build Your Burger: Toast the Schar GF ciabatta rolls on the grill, then assemble your burgers. Add:
    A slice of juicy Roma tomato
    Crunchy iceberg lettuce
    A dollop of Hellmann’s Plant-Based Mayo Dressing
Keyword Burgers, Chickpeas

This post combines great recipe tips, health info, and useful links to make your blog post both informative and engaging!

Vegan Gluten-Free Pasta Salad: The Perfect Dish for Your Next Party

If you’re looking for a delicious and easy dish to bring to your next barbecue or family party, this Vegan Gluten-Free Pasta Salad is a fantastic option. It’s light, refreshing, and packed with flavor, making it a great addition to any summer gathering. Plus, it’s both vegan and gluten-free, so everyone can enjoy it!

When working with gluten-free pasta, it’s important to keep an eye on the cooking time. Gluten-free pasta can be a bit delicate and tends to fall apart if overcooked. To avoid this, be sure to follow the package instructions closely and rinse the pasta with cold water immediately after draining. This will stop the cooking process and keep the pasta firm, so it holds up beautifully in your salad.

One of the best things about this pasta salad is its versatility. You can get creative with the veggies you add! While the classic combination of cherry tomatoes, sweet peppers, and black beans is always a hit, feel free to mix in other favorites like cucumbers, avocado, or even roasted corn. The more color and texture, the better!

To tie all these flavors together, I love using Hellmann’s Vegan Dressing. It’s creamy, tangy, and the perfect complement to the fresh veggies and pasta. The best part? You can snag the best deal on Amazon with a 3-pack, so you’ll always have some on hand for this recipe and other salads throughout the week.

To make this recipe even easier, here are some of my favorite kitchen tools that I always use:

Vegan Gluten-Free Pasta Salad

It's light, refreshing, and packed with flavor, making it a great addition to any summer gathering.
Prep Time 50 minutes
Cook Time 15 minutes
Course Side Dish

Ingredients
  

Pasta

  • 12 oz. Ronzoni Gluten Free Elbow Pasta
  • 1 tsp salt

Veggies & Mix-Ins

  • 1 cup red onion chopped
  • 1 cup celery chopped
  • 1 cup carrots sliced
  • 2 cups sweet peppers chopped
  • 2 cups sweet gherkins sliced

Dressing

  • 1/2 cup Hellmann's Plant-Based Mayo Dressing
  • 2 tbsp apple cider vinegar

Instructions
 

Cook the Pasta

  • Bring a pot of water to a boil and add 1 tsp of salt.
  • Add the Ronzoni Gluten Free Elbow Pasta and cook according to package directions (about 8 minutes).
  • Once the pasta is cooked, drain it and rinse with cold water to stop the cooking process. Set aside.

Prep the Veggies

  • Chop the red onion into small pieces.
  • Clean and chop the celery into bite-sized pieces.
  • Clean and slice the carrots.
  • Clean and chop the sweet peppers.
  • Drain and slice the sweet gherkins pickles.

Portion & Mix

  • Measure out ½ cup of Hellmann's Plant-Based Mayo Dressing and 2 tbsp of apple cider vinegar.
  • n a large mixing bowl, combine the cooled pasta, chopped red onion, celery, carrots, sweet peppers, pickles, mayo, and vinegar.
  • Mix everything together until evenly coated.

Chill & Serve

  • Transfer the pasta salad to a storage container and refrigerate for at least 30 minutes to let the flavors meld.

Notes

Tips:
  • For added crunch, sprinkle in some chopped walnuts or sunflower seeds before serving.
  • This salad is perfect as a side dish or a light lunch!
Keyword pasta salad

I hope you give this Vegan Gluten-Free Pasta Salad a try at your next event! It’s easy, delicious, and sure to be a hit with everyone. Don’t forget to leave a comment and let me know how it turned out. Happy cooking!

Smashed Sausage & Peppers Tacos on the Blackstone

Looking for a crowd-pleasing, easy-to-make dish to bring to your next barbeque or family party? Look no further than these vegan Smashed Sausage & Peppers Tacos cooked on the Blackstone griddle. This recipe combines savory Impossible sausage, fresh bell peppers, and onions for a flavorful taco experience everyone will love. Plus, it’s quick to prepare and a surefire hit for any gathering!

To start, prep your Impossible sausage by weighing out six equal portions, about 2.3 ounces each. Place each portion onto a Mission Yellow Corn Tortilla and use a spatula to spread the sausage evenly across the surface. This step ensures that every bite of your taco is packed with that savory sausage flavor, making each taco the perfect handheld treat.

Next, it’s all about getting those veggies ready. Slice up your green peppers and white onion – these will add a fresh, vibrant crunch to your tacos. Heat up 2 cups of Roasted Garlic Pasta Sauce in the microwave to have it ready for drizzling. With minimal prep, you’re on your way to creating a delicious meal in no time.

When it comes to cooking on the Blackstone, having the right tools is key. I always use my trusty 36 in. Blackstone griddle for even cooking and perfect results every time. The Blackstone accessory kit is a must-have for handling all your grilling needs, and I can’t live without the Blackstone Silicone Spatula Mat to keep my workspace clean. For precise temperature control, I rely on a Digital Infrared Thermometer Gun. Don’t forget to have a 16oz Oil Dispenser Bottle handy for quick oiling, and if you’re making breakfast on the griddle too, the Blackstone 4-Piece Griddle Breakfast Kit is a game-changer. For prep and storage, I recommend the WÜSTHOF Gourmet 16-Piece Knife Block Set and Pyrex Simply Store 12-Pack Mixed Sized Glass Food Storage Set. Don’t forget your Carlisle FoodService Trays to transport everything from the kitchen to the grill with ease.

Vegan Smashed Sausage & Peppers Tacos

This recipe brings together the savory taste of Impossible sausage, the vibrant crunch of green peppers and onions, and the zesty punch of roasted garlic pasta sauce—all wrapped up in crispy corn tortillas.
Prep Time 10 minutes
Cook Time 15 minutes
Total Time 25 minutes
Course Main Course
Servings 6

Equipment

  • 1 Blackstone

Ingredients
  

  • 1 Large onion Sliced
  • 2 Green peppers Sliced
  • 14 oz. Impossible Savory Ground Sausage Meat
  • 6 Misson Yellow Corn Tortillas
  • 2 cups Pasta Sauce
  • 1/4 cup Dairy-Free Shredded Parm Cheese

Instructions
 

Step 1: Prep the Veggies and Sauce

  • Start by cleaning and slicing your green peppers, then move on to slicing the large white onion. These will add a fresh, crunchy texture to your tacos. While you're at it, portion out your 2 cups of Roasted Garlic Pasta Sauce and pop it in the microwave to heat up.

Step 2: Prepare the Impossible Sausage

  • Now it's time to get the Impossible sausage ready. Open the tube and weigh out six roughly 2.3 oz. portions. Place each portion on a Mission Yellow Corn Tortilla and use a spatula to spread the sausage evenly across the tortilla. This ensures every bite of your taco is loaded with savory goodness.

Step 3: Get Ready to Grill

  • With your veggies prepped and the sausage spread on the tortillas, it’s time to head to the grill. Use trays to transport everything outside—your peppers, onions, tortillas, and shredded parm cheese. Preheat your grill to 350-375°F and spray some avocado oil across the center of the grill top.

Step 4: Cook the Peppers, Onions, and Tortillas

  • Once the grill is heated, add the peppers and onions, cooking them until they’re softened. Use a dome and a spritz of water to speed up the cooking process. When they’re ready, remove them from the grill and set them aside in a bowl.
  • Next, spray a bit more oil on the grill and add your tortillas, backside down first, to create a crunchy outside. After a minute, flip the tortillas so the sausage side is facing down. Let them simmer for a moment, then press down on each taco with your grill press to form a good crust.

Step 5: Assemble and Serve

  • When the tortillas have a nice crust, remove them from the grill and place them in taco holders, bending them down the center. Fill each taco with the grilled peppers and onions, drizzle on the heated pasta sauce, and sprinkle a bit of dairy-free shredded parm cheese on top. Serve immediately and enjoy!
Keyword blackstone, tacos

I hope you give these Smashed Sausage & Peppers Tacos a try at your next BBQ or family get-together! They’re a delicious, easy-to-make option that’s sure to impress. If you try the recipe, I’d love to hear how it turned out – leave a comment below and let me know your thoughts! Happy cooking!

Smashed Vegan Tacos on the Blackstone: A Flavorful Party Favorite

If you’re looking for a crowd-pleasing, easy-to-make dish for your next barbeque or family gathering, these Smashed Vegan Tacos are a game-changer! Made on the Blackstone griddle, these tacos combine the savory goodness of Impossible Meat with fresh pico de gallo, all wrapped in a crispy corn tortilla. Whether you’re hosting or bringing a dish to share, these tacos are sure to be a hit with everyone.

Before firing up the griddle, you’ll want to get your ingredients prepped. Start by marinating the Impossible Meat with taco seasoning and water. Let it chill in the fridge while you prepare the pico de gallo, which is a vibrant blend of diced Roma tomatoes, onion, garlic, lime juice, and cilantro. Once everything is ready, you’re set to take your cooking outdoors.

Using a taco seasoning packet is not only convenient but also ensures you get consistent, delicious flavor every time. Of course, if you prefer to create your own spice blend, that’s a fantastic option as well! You can portion out your favorite spices, adjusting the heat and flavor to your liking.

When it comes to cooking on the Blackstone, having the right tools makes all the difference. Here are some of my must-haves for this recipe:

Smashed Mexican Vegan Tacos Recipe

Made on the Blackstone griddle, these tacos combine the savory goodness of Impossible Meat with fresh pico de gallo, all wrapped in a crispy corn tortilla.
Prep Time 30 minutes
Cook Time 10 minutes
Course Main Course
Servings 6

Equipment

  • 1 Blackstone griddle

Ingredients
  

  • 12 oz. Impossible Meat
  • 6 Mission Yellow Corn Tortillas
  • 1 oz. Taco Seasoning Packet
  • 1/4 cup Water
  • 1 cup Shredded Iceberg Lettuce
  • 1 cup Sliced Sweet Peppers (raw)

Pico de Gallo

  • 1 Roma Tomatoes (seeded and diced)
  • 1/2 Small White Onion (diced small)
  • 1 clove Garlic (minced)
  • 1 tbsp Lime Juice
  • 2 tbsp Cilantro (diced)
  • 1/2 tsp Kosher Salt

Optional Toppings

  • 1 Jalapeño (diced)
  • Shredded Vegan Cheese
  • Cabbage Slaw

Instructions
 

Prep the Impossible Meat

  • In a bowl, mix the taco seasoning with 1/4 cup of water.
  • Thoroughly mix in the Impossible Meat.
  • Place in the fridge to marinate while you prep the other ingredients.

Prep the Vegetables

  • Shred the iceberg lettuce.
  • Slice the sweet peppers.
  • Dice 1/2 of a small onion and deseed and dice the Roma tomatoes.

Prepare the Pico de Gallo

  • In a food processor, chop the tomatoes, garlic, and onions.
  • Transfer the mixture to a bowl.
  • Mix in lime juice, cilantro, and kosher salt. Set aside.

Assemble the Tacos

  • Portion the marinated Impossible Meat into 2 oz. clumps.
  • Place each clump on a corn tortilla.
  • Use a spatula to spread the meat evenly across the tortillas.

Grill the Tacos

  • Preheat the grill to 350-375°F.
  • Spray avocado oil on the grill's top center.
  • Place the tortillas meat-side up on the grill to crisp the outside.
  • After a minute, flip the tortillas meat-side down.
  • Use a press to firmly press down on the tortillas until a good crust forms.

Serve

  • Remove the tacos from the grill and place them in taco holders, bending them down the center.
  • Fill each taco with pico de gallo, shredded lettuce, and sweet peppers.
  • Add optional toppings like diced jalapeños, shredded vegan cheese, or cabbage slaw.
  • Serve immediately and enjoy!
Keyword pico, tacos

I hope you give these Smashed Vegan Tacos a try at your next gathering! They’re easy to make, packed with flavor, and sure to impress. Let me know in the comments how they turned out for you or if you added your own twist—I’d love to hear from you!

Southwest Pasta Salad: A Vibrant, Easy Dish for Your Next Barbecue

If you’re looking for a quick, easy, and crowd-pleasing dish to bring to your next barbecue or family party, look no further than this Southwest Pasta Salad. It’s a delightful combination of fresh veggies, hearty gluten-free pasta, and zesty seasoning that will leave everyone asking for seconds. The best part? It comes together in a snap, making it the perfect addition to any gathering.

This salad is bursting with vibrant colors and bold flavors, thanks to a mix of black beans, corn, cherry tomatoes, sweet peppers, black olives, and cilantro. The combination of these ingredients not only creates a beautiful presentation but also ensures each bite is packed with a variety of textures and tastes. The juicy tomatoes, crunchy peppers, and creamy black beans come together perfectly to create a fresh and satisfying dish that everyone will love.

One of the things that makes this Southwest Pasta Salad so convenient is the use of a taco seasoning pack. It’s a quick and easy way to infuse the salad with all the flavors you love from your favorite Southwest dishes. If you prefer to customize your seasoning, you can easily mix your own blend of spices like cumin, chili powder, garlic powder, and paprika. But when you’re in a hurry, a pre-made taco seasoning packet is a lifesaver!

I love using my favorite kitchen tools to make this recipe even easier. Whether you’re a seasoned cook or just starting out, these supplies are must-haves for your kitchen:

Southwest Pasta Salad

Gluten-Free | Vegan | Fresh & Flavorful
Total Time 25 minutes
Course Side Dish
Cuisine Mexican
Servings 10

Ingredients
  

Pasta

  • 12 oz. Jovial Gluten-Free Brown Rice Farfalle

Veggies & Mix-Ins

  • 1 cup black beans rinsed and drained
  • 1 cup corn fresh or thawed if frozen
  • 2 cups cherry tomatoes
  • 1 cup sweet peppers chopped
  • 1/2 cup black olives
  • 1/4 cup shallots or red onions
  • 1/4 cup fresh cilantro chopped

Sauce

  • 1 packet taco seasonings 1 oz.
  • 3 tbsp extra virgin olive oil
  • 1 half juice from lime

Instructions
 

  • Cook the Pasta: Prepare the Jovial Gluten-Free Brown Rice Farfalle according to the package instructions. Once cooked, drain the pasta and rinse it with cold water to stop the cooking process and keep it firm.
  • Prep the Veggies: While the pasta cools, chop the sweet peppers, black olives, shallots or red onions, and cilantro. Rinse and prepare the black beans, corn, and cherry tomatoes.
  • Make the Sauce: In a small bowl, combine the taco seasoning, extra virgin olive oil, and lime juice. Stir until well mixed.
  • Assemble the Salad: In a large bowl, combine the cooked pasta with all the veggies and mix-ins. Pour the sauce over the top and toss everything together until evenly coated.
  • Chill & Serve: Refrigerate the salad for 30 minutes to allow the flavors to meld. Serve chilled and enjoy this vibrant, zesty dish!

Notes

Tips:
For added heat, mix in some chopped jalapeños or a dash of hot sauce.
This salad pairs perfectly with grilled veggies or as a side to your favorite summer dishes.
Keyword pasta salad

I hope you give this Southwest Pasta Salad a try at your next gathering! It’s a fresh, delicious option that’s sure to be a hit. Don’t forget to leave a comment and let me know how it turned out. Happy cooking!