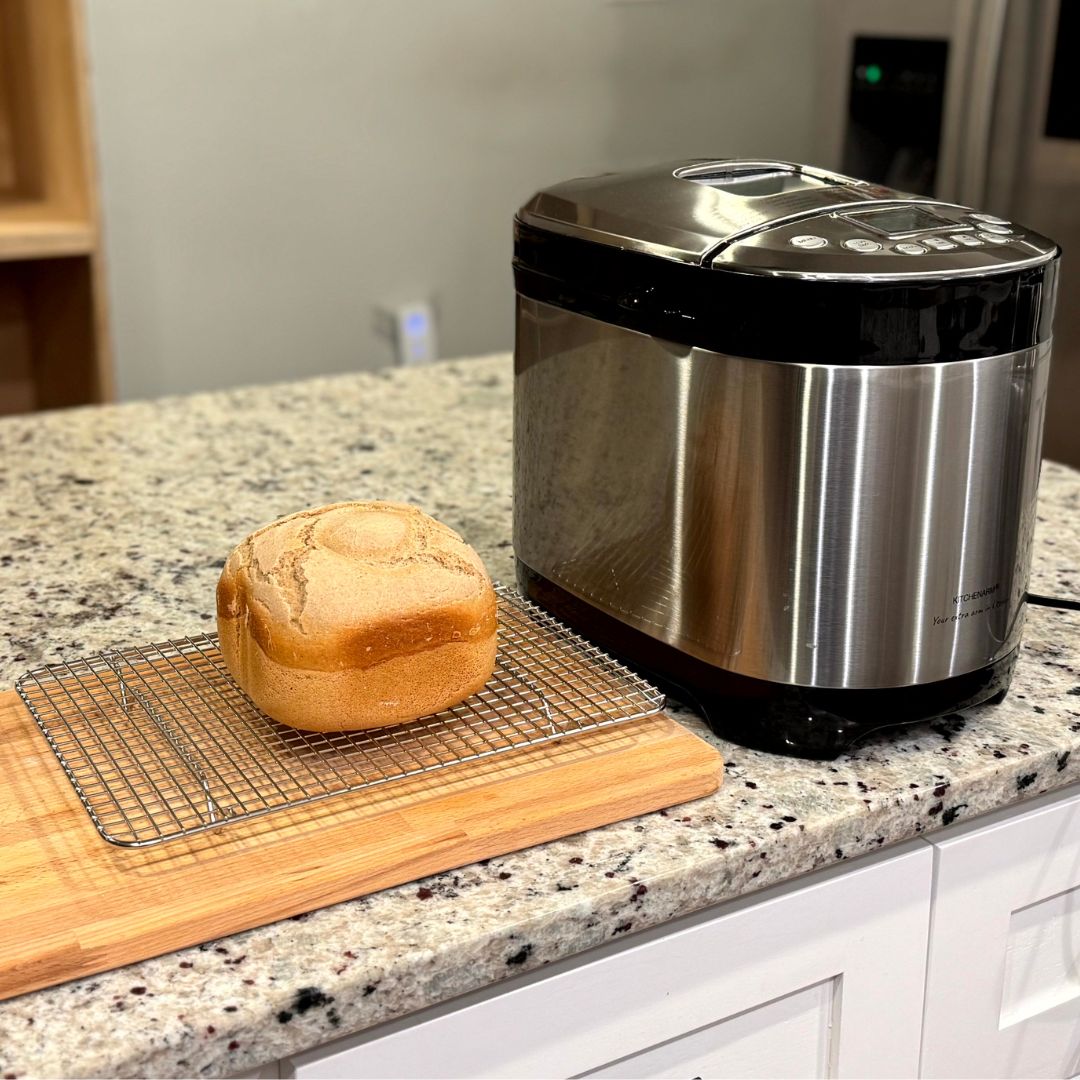
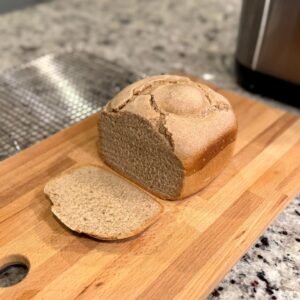
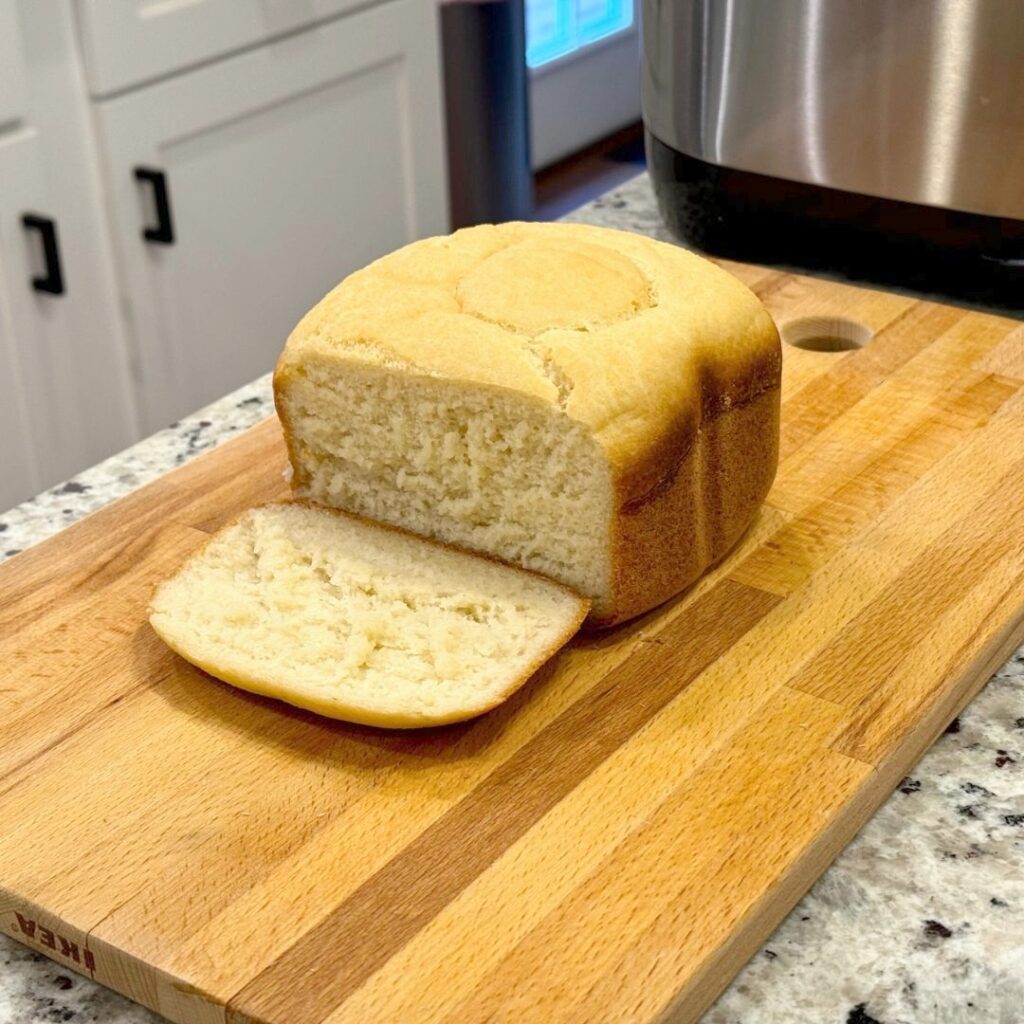
There’s nothing like the smell of fresh bread filling your kitchen, and when it’s homemade, gluten-free, and vegan, it’s even better! This Gluten-Free Vegan Almond Flour Bread is one of my new go-to recipes because it’s simple, soft, and sliceable—perfect for everything from toast in the morning to hearty sandwiches. Plus, with the bread machine doing most of the heavy lifting, it’s basically a “set it and forget it” recipe. In the step-by-step YouTube video below, I walk you through exactly how to make this loaf from start to finish so you can bake along with me.
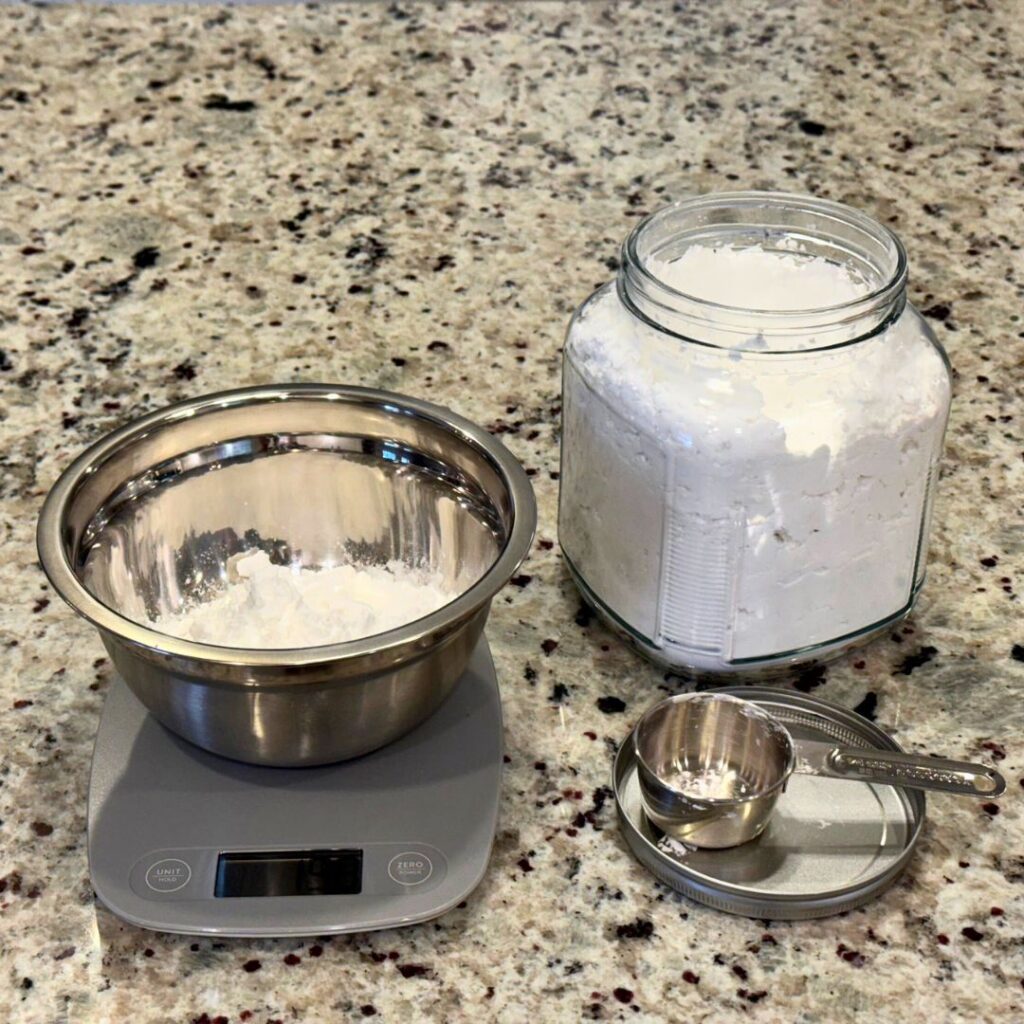
One of the most important things to remember in gluten-free baking is accuracy in measurements. Unlike traditional wheat bread, gluten-free loaves depend on a very specific ratio of starches and flours to get the right rise and crumb. Scooping flour with a measuring cup can lead to inconsistencies, and that’s where a digital kitchen scale comes in. Measuring in grams ensures that every single loaf comes out the same—light, fluffy, and delicious. Once I made the switch to weighing my flours, my bread machine recipes became reliable every time. If you’ve had issues with gummy or sunken loaves in the past, I highly recommend giving this technique a try.
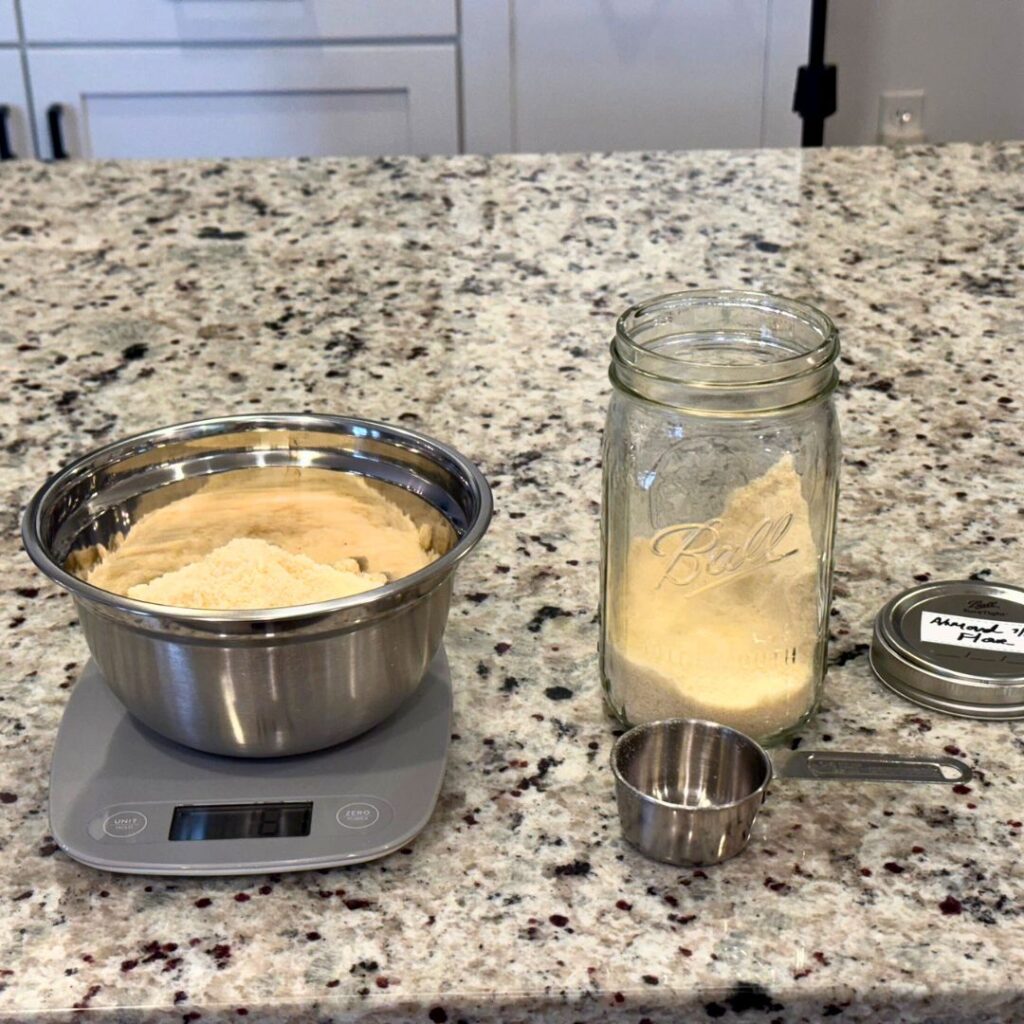
Now let’s talk about almond flour. It’s no secret that almond flour can be expensive, which is why buying in bulk is the way to go. For this video, I used Trader Joe’s almond flour because it’s easy to grab locally and works beautifully in this recipe. However, when I stock up, I plan on buying the Blue Diamond Almonds Almond Flour, Gluten Free. The 3 lb. bag comes out to just 24 cents an ounce, which is a great price compared to smaller bags you’ll find in stores. Almond flour not only adds a rich, nutty flavor to this bread, but it also gives it a wonderful softness that makes every slice satisfying.
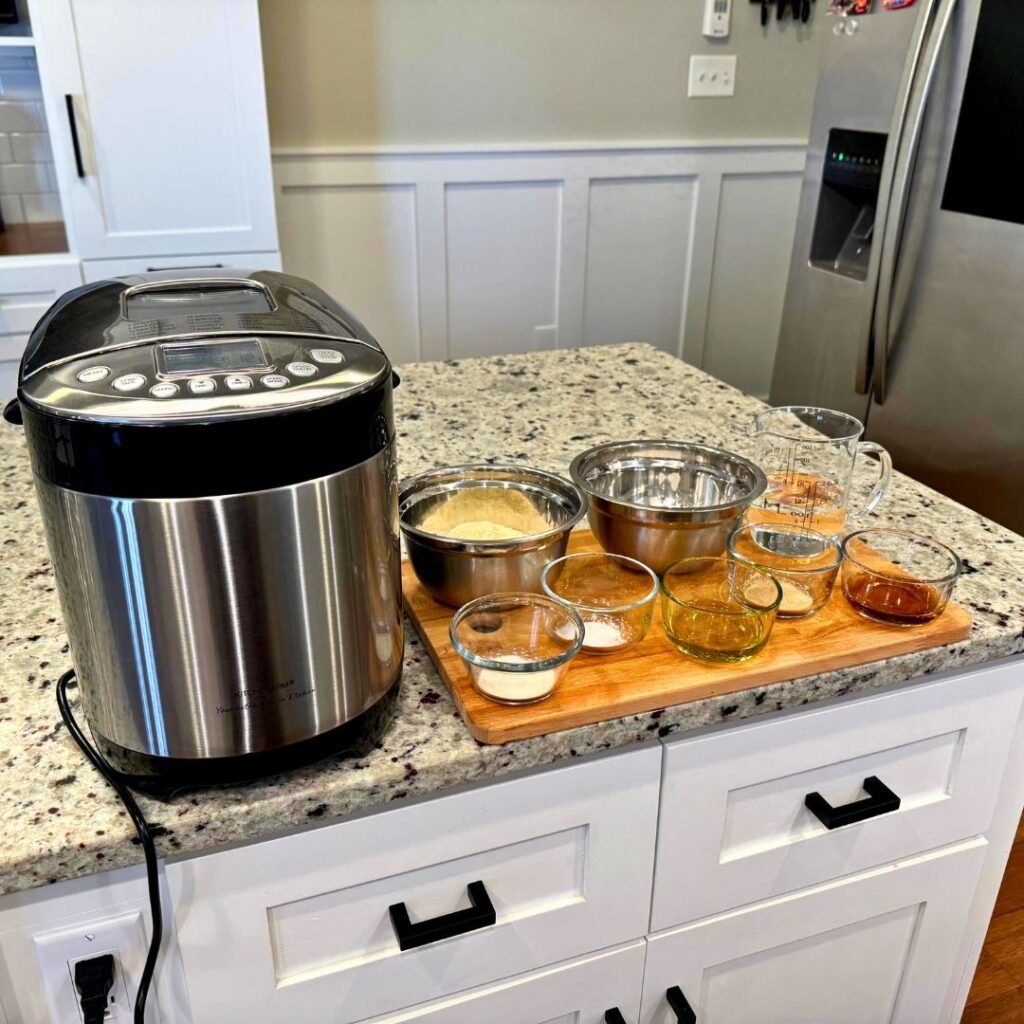
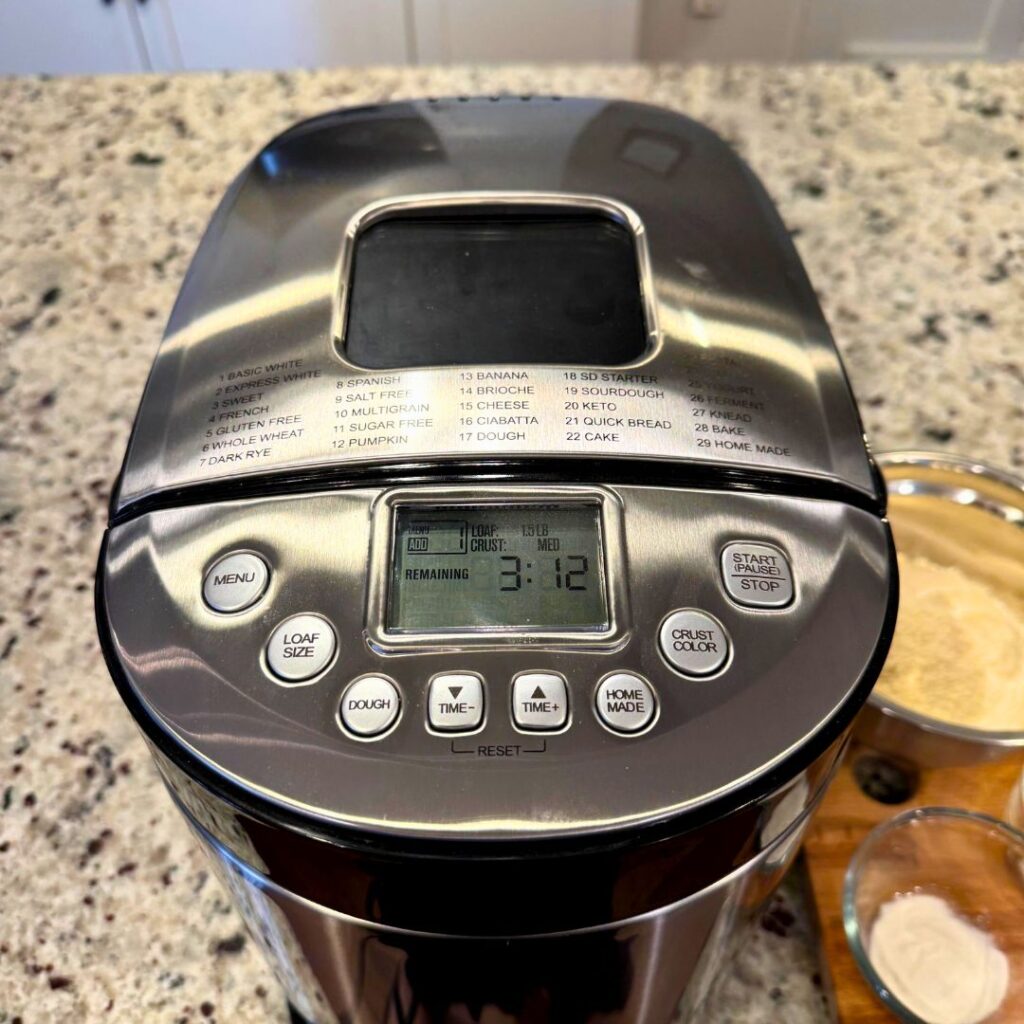
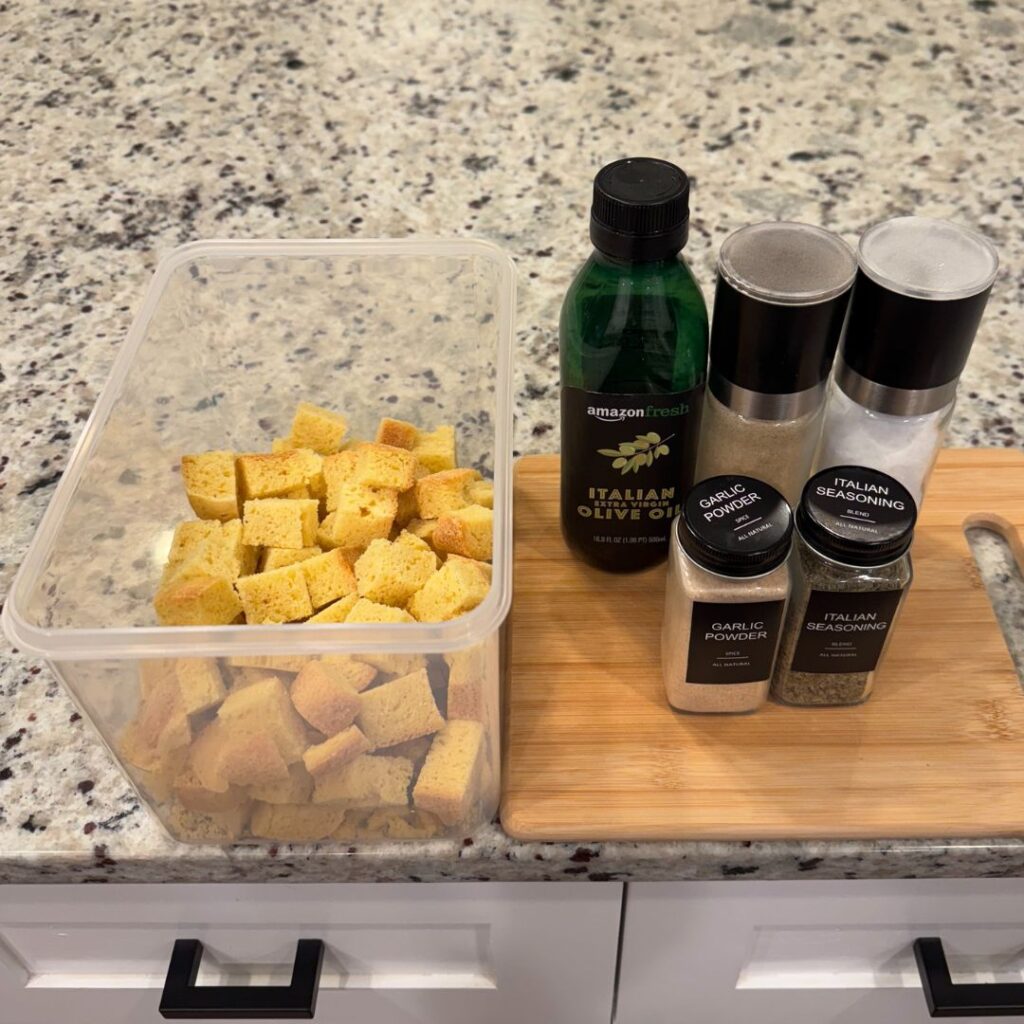
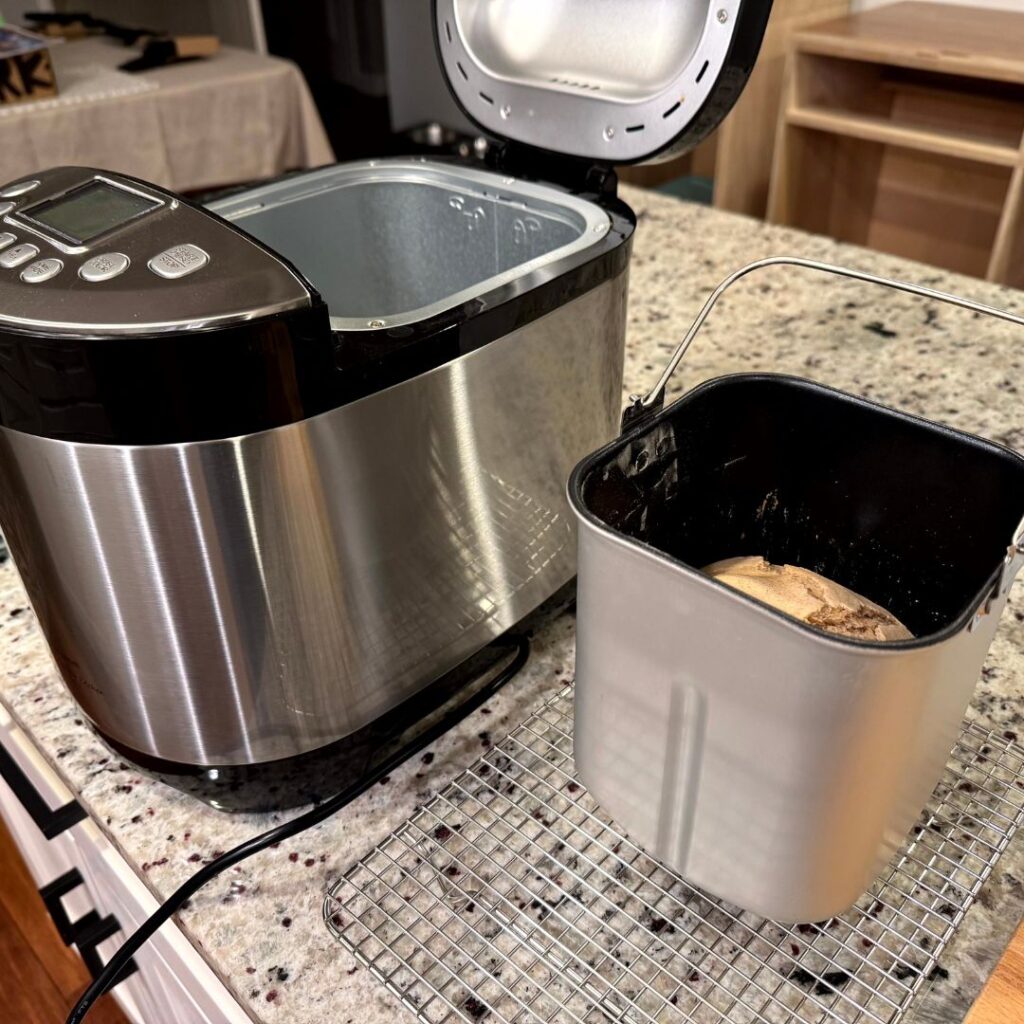
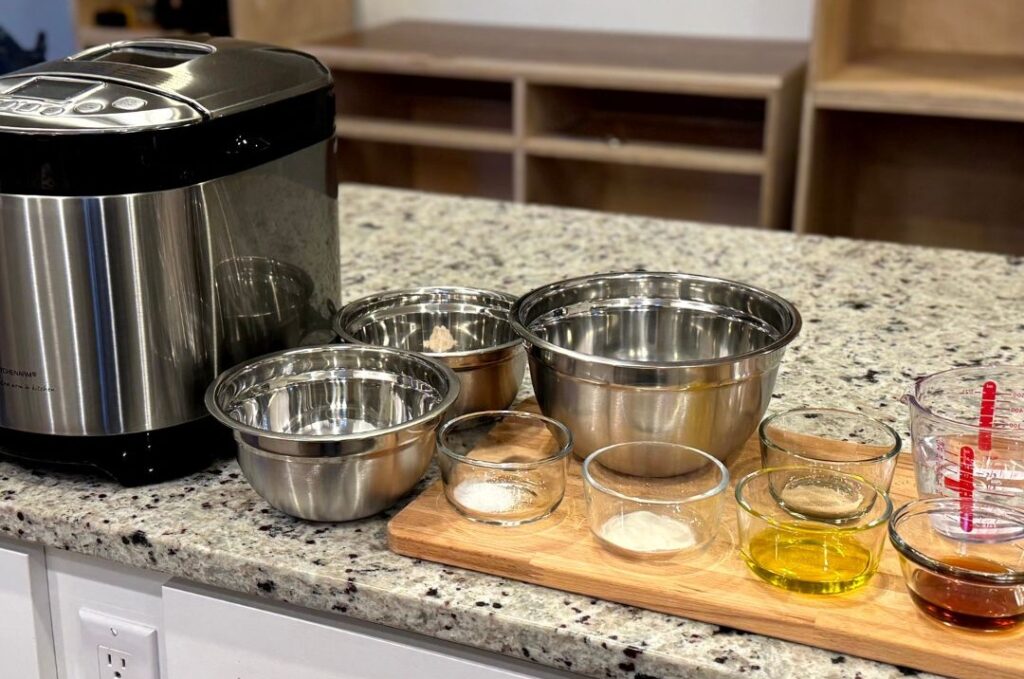
Here’s a quick look at the tools and ingredients I used for this recipe, in case you want to follow along with the same setup. My bread machine of choice is the KITCHENARM 29-in-1 SMART Bread Machine, which has a dedicated gluten-free setting that makes baking so much easier. For starches and flours, I like Food to Live Organic Potato Starch and Blue Diamond Almond Flour. To measure everything out, I rely on my kitchen scale, along with this measuring cup set and Prep Stainless Steel Mixing Bowls. Once the bread is baked, I let it cool completely before storing it in a Tafura Bread Container, which keeps it fresh for up to three days. I also love using a wide-mouth 32 oz. canning jars to store extra flours and starches in my pantry, sealed up tight with an Electric Mason Jar Vacuum Sealer. Having the right tools really makes gluten-free bread baking smoother and more enjoyable.

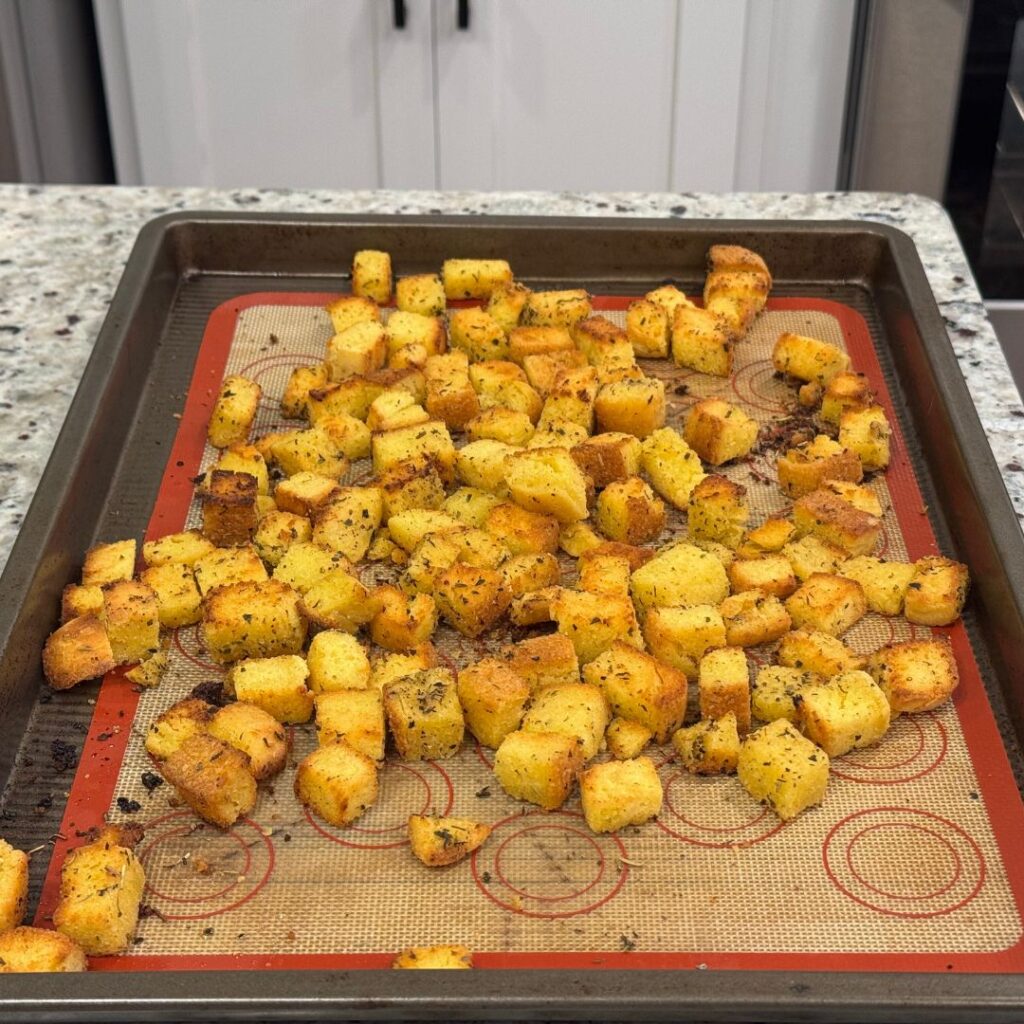
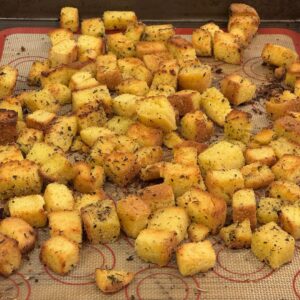
Of course, like most homemade breads, this loaf is best enjoyed within the first few days. After about three days, it starts to lose that soft, fresh quality and becomes a little denser. That’s when I turn my leftovers into crispy, flavorful croutons! If you haven’t already, check out my recipe for Homemade Italian Croutons. It’s the perfect way to give stale bread new life, and those crunchy golden cubes are amazing on top of soups and salads.

Bread Machine Gluten-Free Vegan Almond Flour Bread
Equipment
- 1 Bread machine with gluten-free setting
Ingredients
Liquids
- 1 1/4 cup water room temperature (300 ml or 300 grams)
- 2 1/2 tbsp. olive oil
- 2 tbsp. maple syrup room temperature
Dry Ingredients
- 199 grams potato starch 1 3/8 cups
- 181 grams almond flour 1 1/2 cups
- 1 tsp. salt
- 1 3/4 tsp. xanthan gum 5.3 grams
- 1 tsp. instant active yeast 3 grams
Instructions
- Prep Like a ProMeasure the maple syrup and water first, and allow them to come to room temperature. Cold ingredients can mess with the rise.For best results, weigh your flours and starch using a digital kitchen scale. Trust me, it makes a huge difference in gluten-free baking!
- Secure the PaddleDouble-check that the paddle is locked in place at the bottom of your bread maker’s pan. You don’t want to forget that step.
- Layer the Ingredients – In Order!First, the liquids: water, maple syrup, and olive oil.Next, the dry ingredients: potato starch, almond flour, salt, and xanthan gum.Last but not least: sprinkle the yeast right in the center, on top of the flour. Avoid letting it touch the liquid—this helps control the rise time.
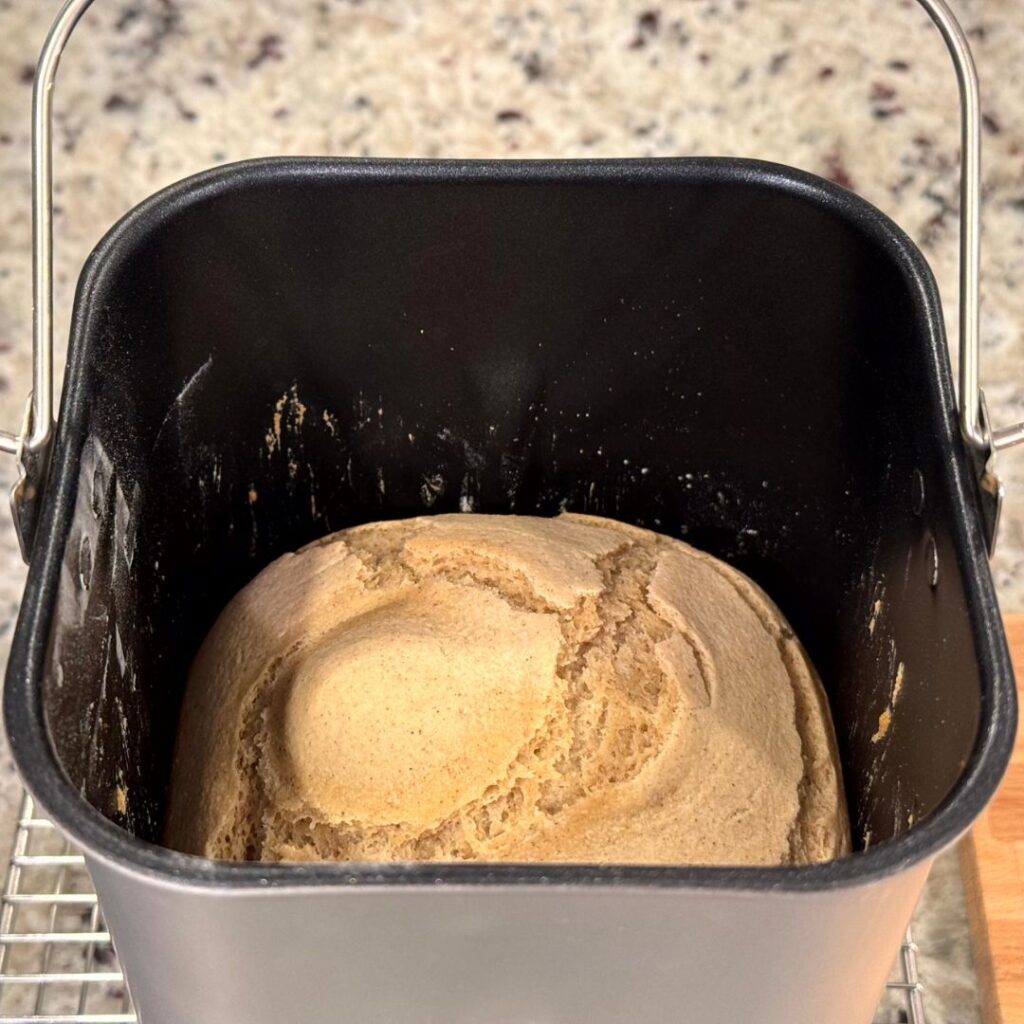
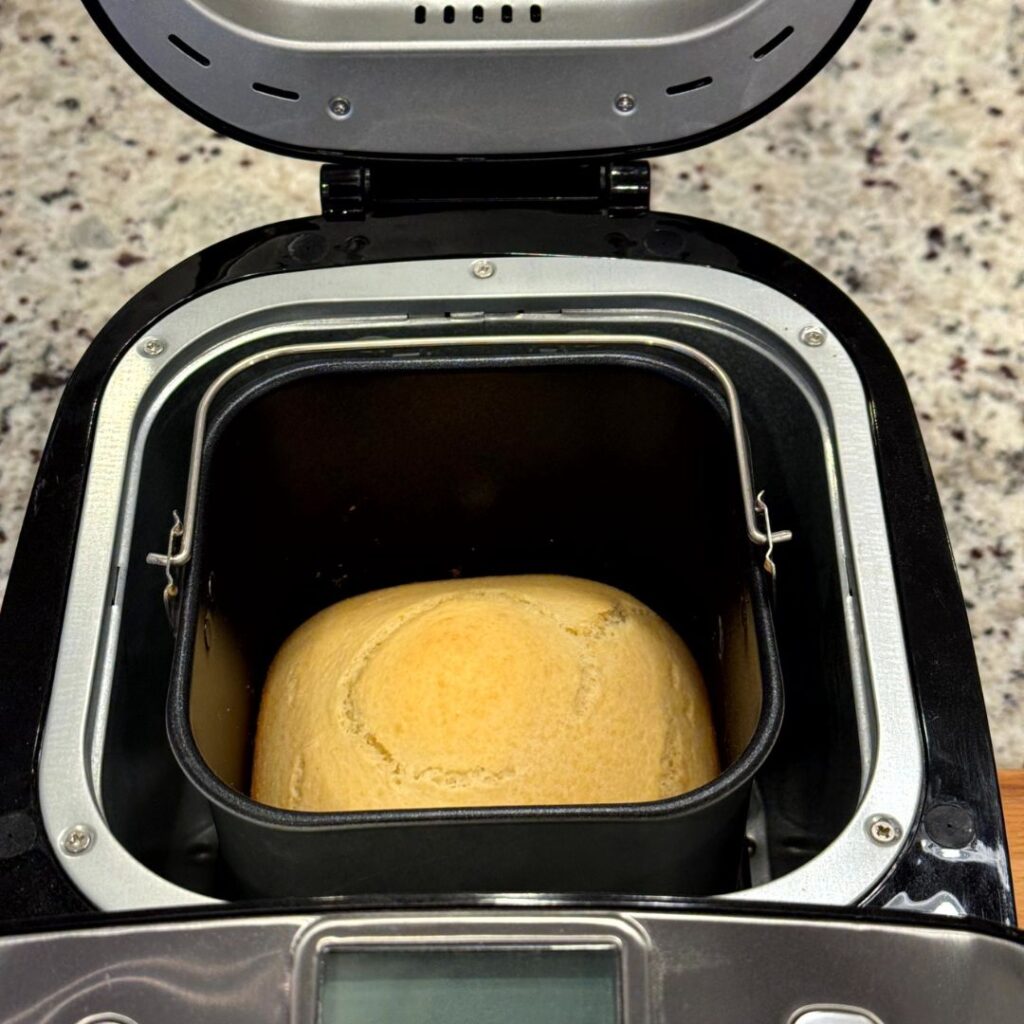
- Set It and Forget It (Almost)Select the gluten-free setting on your bread machine. Be sure to set it to a 1.5 lb loaf. I also like to choose the dark crust option for a little extra texture. Hit start and let your machine do the work: mix, rise, and bake!Tip: After the first mix, use a spatula and push down any excess up to high; this will allow the loaf to bake uniformly.
- Cool and ServeWhen the cycle is complete, let the bread sit in the pan with the lid open for a few minutes. Carefully remove the pan using oven mitts—it's hot! Flip the pan and gently shake the loaf out. Use the metal hook (if provided) to remove the paddle from the bottom. Let the loaf cool completely on a wire rack before slicing or storing.
Notes
I hope you give this Gluten-Free Vegan Almond Flour Bread a try! It’s a simple, reliable bread machine recipe that delivers a soft loaf every time, and once you try it, I think it’ll become a regular part of your baking rotation. Don’t forget to watch the video below for step-by-step guidance, and let me know in the comments how your loaf turns out. Happy baking!