Back to Top

Flavorful Lentil Sloppy Joes: A Vegan Twist on a Classic Favorite

Are you craving a hearty, satisfying meal that’s also packed with nutritious ingredients? Look no further than these Lentil Sloppy Joes! This vegan twist on the classic favorite is sure to become a staple in your recipe collection. Loaded with minced carrots, peppers, onions, and protein-rich lentils, these Sloppy Joes are bursting with flavor and texture. Plus, they’re gluten-free, making them suitable for those with dietary restrictions.

Favorite Meal Prep Main Equipment & Supplies

Gluten Free Lentils: Arrowhead Mills Organic Lentils, Green, 16 Ounce. Buy in bulk and save $$ like I do for my dry pantry. Not all lentils are gluten free, make sure to check the package before buying.

Vegan Gluten Free Worcestershire Sauce: The Wizard’s Sauce Organic Gluten Free & Vegan Worcestershire Sauce. This one jar has lasted me six months.

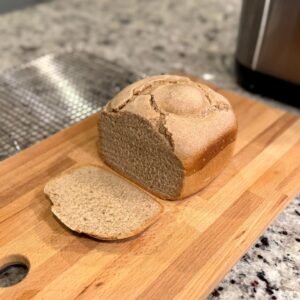
Gluten Free Buns: Schar – Ciabatta Rolls – Certified Gluten Free. These rolls taste best when toasted.

Instant Pot: When it comes to meal preparation methods, although I have a personal preference for using the Instant Pot, all recipes shared are suitable for stove-top cooking as well. When I opt for stove-top preparation, I typically utilize a 6.4 cups Dutch oven for soups. Both methods will have printable recipes available below to cater to different preferences.

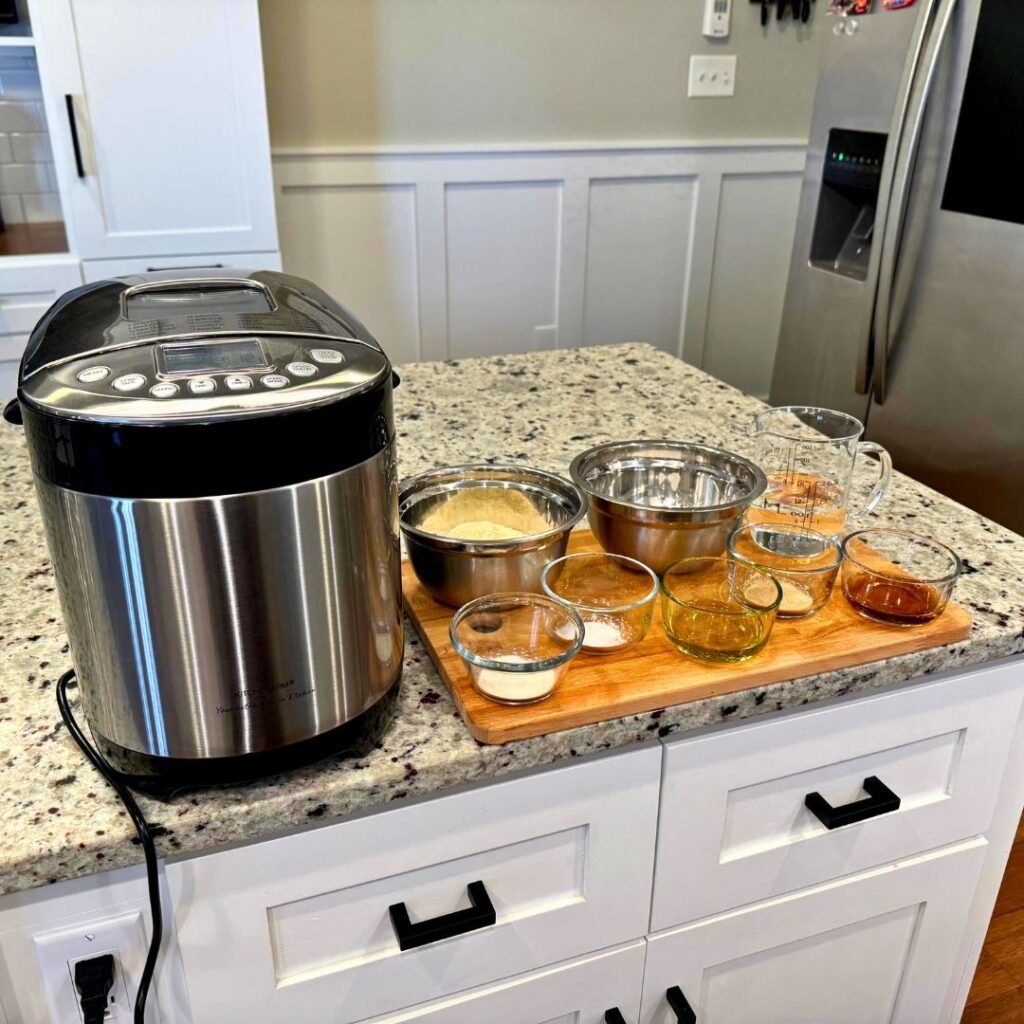
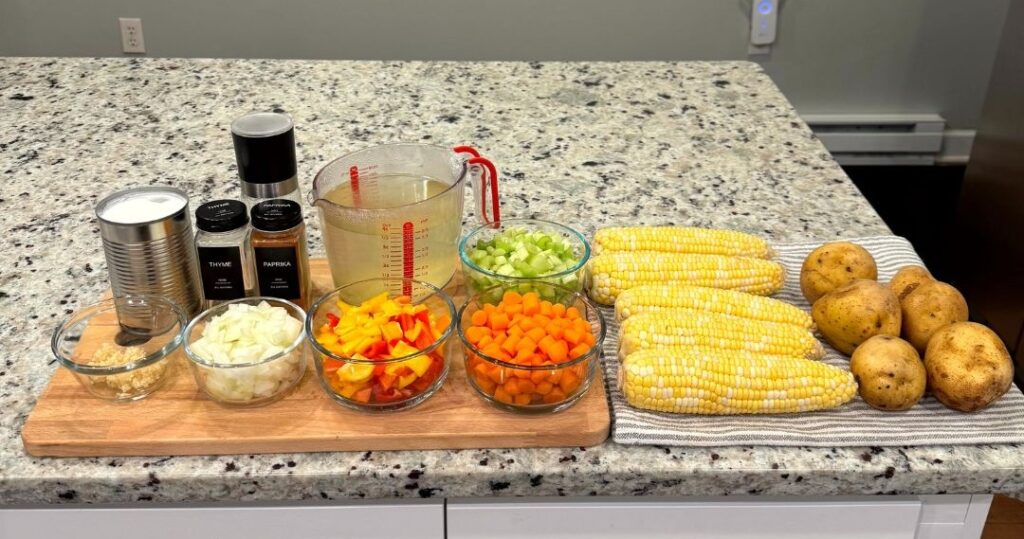
Pyrex bundle: Before starting the cooking process, it’s recommended to gather and portion out all necessary ingredients, ideally completing some preparatory steps the night before to streamline the process. Using Pyrex containers not only makes storage easier but also doubles as a way to measure ingredients, reducing the need for repeated use of measuring cups. Furthermore, making sure the dishwasher is empty before starting helps speed up the cleanup after cooking.

Vegetable broth: In an effort to optimize cost-effectiveness, I have found purchasing vegetable broth cubes in bulk from online retailers such as Amazon to be a prudent alternative to carton-packaged broth. These cubes can be easily dissolved using an electric kettle and measuring cup set, providing a convenient solution for meal preparation. This equals $0.20 a cup.

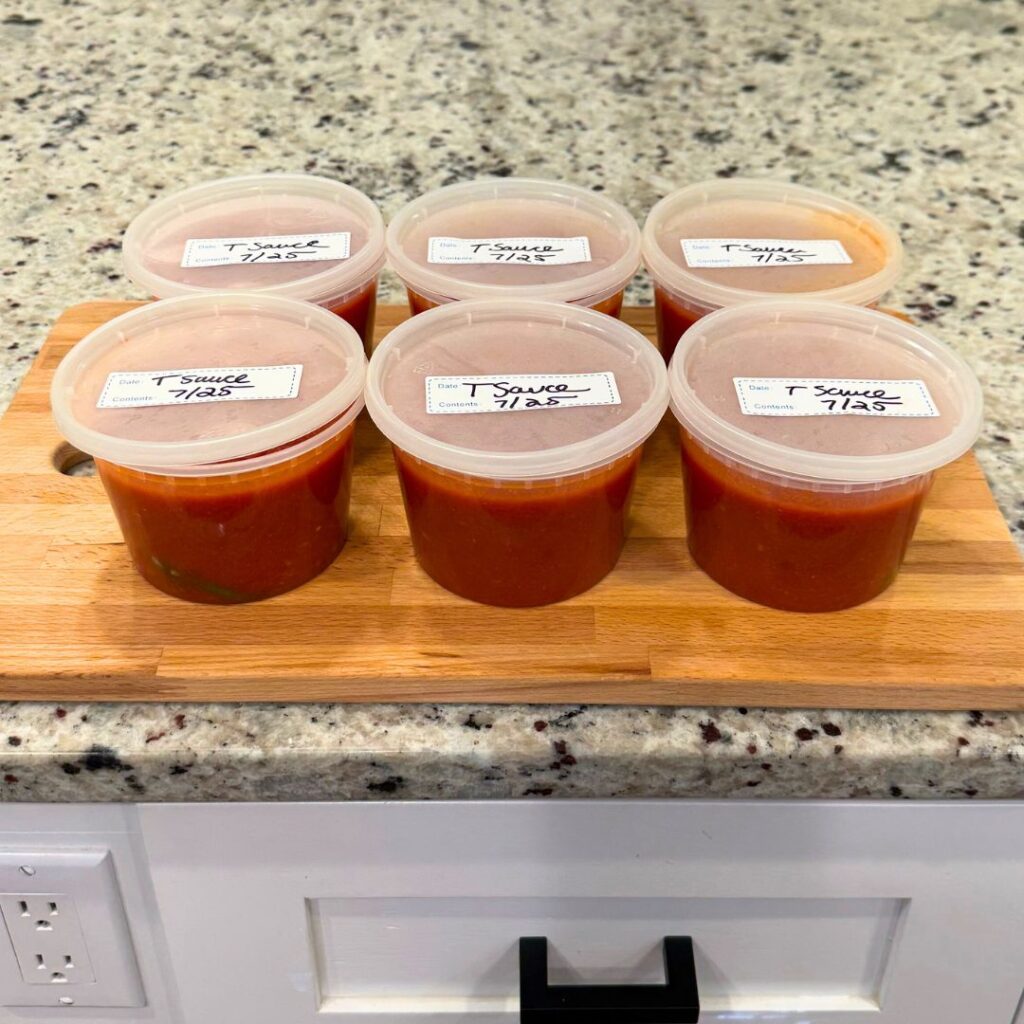
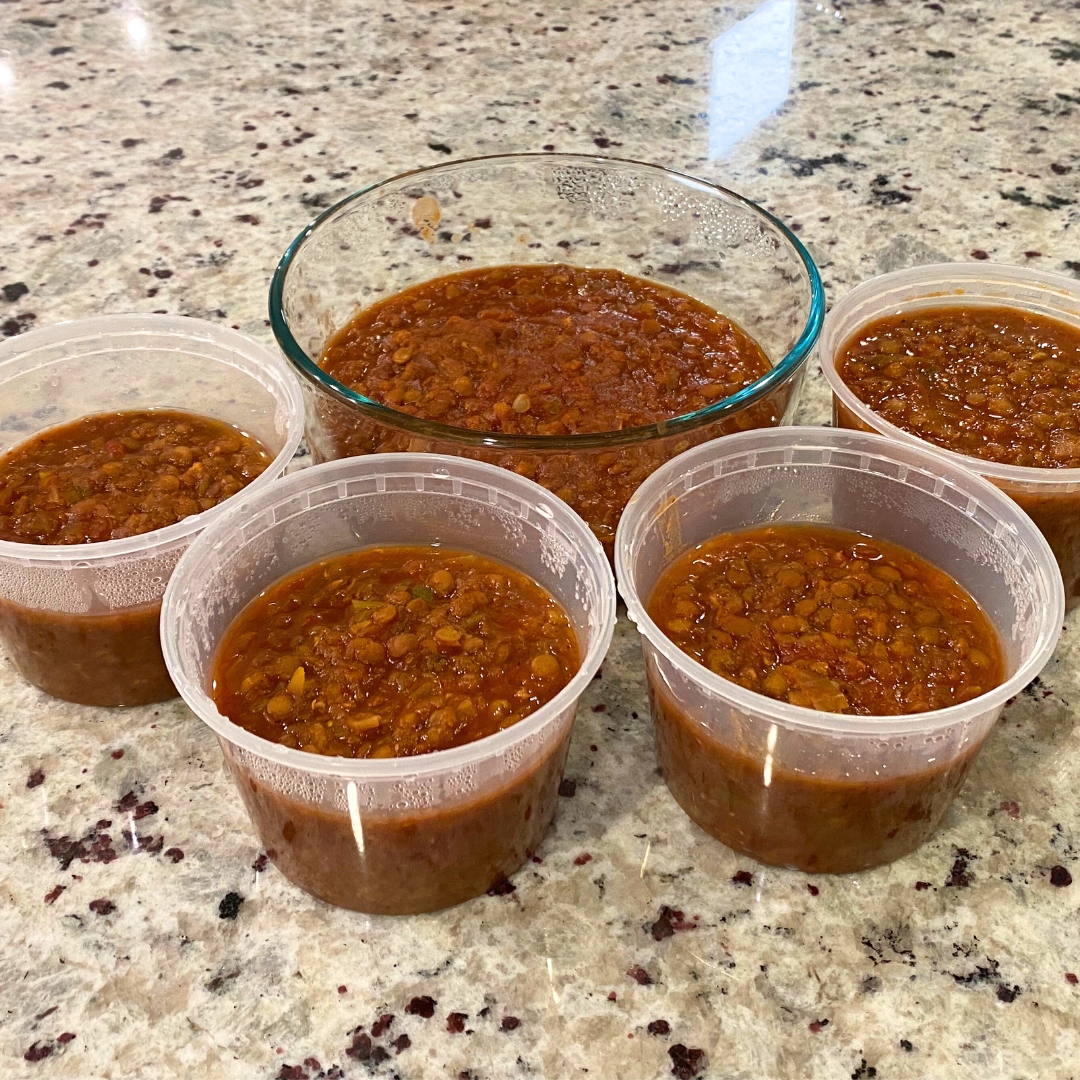
16 oz. pint containers: For meal portioning, I suggest using 16 oz plastic pint containers, which provide an appropriate serving size without encouraging overconsumption. These containers, conveniently sold in packs of 50 on Amazon, are dishwasher-safe and freezer-compatible, providing versatile storage options.

With its hearty texture and robust flavors, these Lentil Sloppy Joes are sure to satisfy even the pickiest of eaters. Whether you’re following a vegan diet or simply looking to incorporate more plant-based meals into your routine, this recipe is a winner. Give it a try for your next meal – you won’t be disappointed!

Here are two ways to make the soup, either using the Instant Pot or on the stove top.

Vegan Gluten Free Lentil Sloppy Joes: Instant Pot

Are you craving a hearty, satisfying meal that's also packed with nutritious ingredients? Look no further than these Lentil Sloppy Joes!
Prep Time 20 minutes
Cook Time 30 minutes
Course Main Course
Servings 10

Equipment

  • 1 Instant Pot

Ingredients
  

  • 1 cup carrots minced
  • 1 cup celery minced
  • 1 cup green peppers minced
  • 1 cup onions minced
  • 2 tbsp garlic minced
  • 1/4 cup tomato paste
  • 2 cups tomato sauce 15 oz. can
  • 4 1/2 cups vegetable broth
  • 2 tbsp vegan gluten free Worcestershire sauce
  • 1/4 cup organic sugar
  • 1 tbsp apple cider vinegar
  • 2 1/4 cup green lentils rinsed
  • 1 tbsp chili powder
  • 1/2 tsp paprika
  • 1/2 tsp black pepper
  • 1 pack Gluten Free Buns substitute pita or wraps

Instructions
 

  • Rinse and drain the lentils.
  • Hit the sauté function on your Instant Pot and add ½ cup of vegetable broth. Let it warm for a few minutes.
  • Add the garlic, diced onions, carrots, and celery. Let them simmer for a few minutes until softened.
  • Stir in all the spices: chili powder, paprika, black pepper, Worcestershire sauce, and apple cider vinegar.
  • Turn off the Instant Pot and add the remaining 4 cups of broth, tomato sauce, sugar, tomato paste, and lentils.
  • Secure the lid and set the Instant Pot to bean-chili 25 minutes, with a 10-minute natural pressure release.
  • Once the pressure has been released, open the lid and mix the ingredients well.
  • Serve the lentil mixture on your choice of bread product – whether it's gluten-free buns, pita breads, or wraps.

Notes

  • These Lentil Sloppy Joes are great for meal prep! After enjoying them for a few days, you can freeze any leftovers to keep them fresh for longer.
  • Feel free to customize the recipe to suit your taste preferences. You can adjust the spices or add additional vegetables for extra flavor and nutrition
Keyword Lentils, Sandwiches

Vegan Gluten Free Lentil Sloppy Joes: Stove Top

This stove top version of Lentil Sloppy Joes offers the same flavorful experience with minimal fuss.
Prep Time 20 minutes
Cook Time 30 minutes
Course Main Course
Servings 10

Equipment

  • 1 Dutch Oven

Ingredients
  

  • 1 cup carrots minced
  • cup celery minced
  • 1 cup peppers minced
  • 1 cup onion minced
  • 2 tbsp garlic minced
  • 1/4 cup tomato paste
  • 2 cups tomato sauce 15 oz. can
  • 4 1/2 cups vegetable broth
  • 1/4 cup organic sugar
  • 2 tbsp vegan gluten free Worcestershire sauce
  • 1 tbsp apple cider vinegar
  • 2 1/4 cups green lentils rinsed
  • 1 tbsp chili powder
  • 1/2 tsp paprika
  • 1/2 tsp black pepper
  • 1 pack gluten free buns substitute pitas and wraps

Instructions
 

  • Heat a large pot or Dutch oven over medium heat.
  • Add a splash of vegetable broth to the pot.
  • Once the pot is hot, add the minced carrots, peppers, garlic, and onion. Sauté for about 5-7 minutes until the vegetables are softened.
  • Stir in the tomato paste, chili powder, paprika, black pepper, Worcestershire sauce, and apple cider vinegar. Cook for another minute, allowing the spices to become fragrant.
  • Add the tomato sauce, remaining vegetable broth, rinsed lentils, and organic sugar to the pot. Stir well to combine all the ingredients.
  • Bring the mixture to a simmer, then reduce the heat to low.
  • Cover the pot and let the lentils cook for about 25-30 minutes, stirring occasionally, until they are tender and the mixture has thickened.
  • Once the lentils are cooked to your liking and the sauce has thickened, taste and adjust the seasoning as needed.
  • Serve the Lentil Sloppy Joes on your choice of gluten-free buns, pita breads, or wraps.

Notes

  • If the mixture becomes too thick while cooking, you can add a splash of vegetable broth or water to thin it out to your desired consistency.
  • Feel free to customize the recipe by adding extra vegetables such as diced celery or mushrooms for added flavor and texture.
  • Leftovers can be stored in an airtight container in the refrigerator for up to 3-4 days or frozen for longer storage.
Keyword Lentils, Sandwiches

With its hearty texture and robust flavors, these Lentil Sloppy Joes are sure to satisfy even the pickiest of eaters. Whether you’re following a vegan diet or simply looking to incorporate more plant-based meals into your routine, this recipe is a winner. Give it a try for your next meal – you won’t be disappointed!

Bread Machine Gluten-Free Vegan Almond Flour Bread

There’s nothing like the smell of fresh bread filling your kitchen, and when it’s homemade, gluten-free, and vegan, it’s even better! This Gluten-Free Vegan Almond Flour Bread is one of my new go-to recipes because it’s simple, soft, and sliceable—perfect for everything from toast in the morning to hearty sandwiches. Plus, with the bread machine doing most of the heavy lifting, it’s basically a “set it and forget it” recipe. In the step-by-step YouTube video below, I walk you through exactly how to make this loaf from start to finish so you can bake along with me.

One of the most important things to remember in gluten-free baking is accuracy in measurements. Unlike traditional wheat bread, gluten-free loaves depend on a very specific ratio of starches and flours to get the right rise and crumb. Scooping flour with a measuring cup can lead to inconsistencies, and that’s where a digital kitchen scale comes in. Measuring in grams ensures that every single loaf comes out the same—light, fluffy, and delicious. Once I made the switch to weighing my flours, my bread machine recipes became reliable every time. If you’ve had issues with gummy or sunken loaves in the past, I highly recommend giving this technique a try.

Now let’s talk about almond flour. It’s no secret that almond flour can be expensive, which is why buying in bulk is the way to go. For this video, I used Trader Joe’s almond flour because it’s easy to grab locally and works beautifully in this recipe. However, when I stock up, I plan on buying the Blue Diamond Almonds Almond Flour, Gluten Free. The 3 lb. bag comes out to just 24 cents an ounce, which is a great price compared to smaller bags you’ll find in stores. Almond flour not only adds a rich, nutty flavor to this bread, but it also gives it a wonderful softness that makes every slice satisfying.

Here’s a quick look at the tools and ingredients I used for this recipe, in case you want to follow along with the same setup. My bread machine of choice is the KITCHENARM 29-in-1 SMART Bread Machine, which has a dedicated gluten-free setting that makes baking so much easier. For starches and flours, I like Food to Live Organic Potato Starch and Blue Diamond Almond Flour. To measure everything out, I rely on my kitchen scale, along with this measuring cup set and Prep Stainless Steel Mixing Bowls. Once the bread is baked, I let it cool completely before storing it in a Tafura Bread Container, which keeps it fresh for up to three days. I also love using a wide-mouth 32 oz. canning jars to store extra flours and starches in my pantry, sealed up tight with an Electric Mason Jar Vacuum Sealer. Having the right tools really makes gluten-free bread baking smoother and more enjoyable.

Of course, like most homemade breads, this loaf is best enjoyed within the first few days. After about three days, it starts to lose that soft, fresh quality and becomes a little denser. That’s when I turn my leftovers into crispy, flavorful croutons! If you haven’t already, check out my recipe for Homemade Italian Croutons. It’s the perfect way to give stale bread new life, and those crunchy golden cubes are amazing on top of soups and salads.

Bread Machine Gluten-Free Vegan Almond Flour Bread

Soft, sliceable, and perfect for toasting. A weekend staple in our home!
Prep Time 15 minutes
Cook Time 3 hours
Total Time 3 hours 15 minutes
Course Baking

Equipment

  • 1 Bread machine with gluten-free setting

Ingredients
  

Liquids

  • 1 1/4 cup water room temperature (300 ml or 300 grams)
  • 2 1/2 tbsp. olive oil
  • 2 tbsp. maple syrup room temperature

Dry Ingredients

  • 199 grams potato starch 1 3/8 cups
  • 181 grams almond flour 1 1/2 cups
  • 1 tsp. salt
  • 1 3/4 tsp. xanthan gum 5.3 grams
  • 1 tsp. instant active yeast 3 grams

Instructions
 

  • Prep Like a Pro
    Measure the maple syrup and water first, and allow them to come to room temperature. Cold ingredients can mess with the rise.
    For best results, weigh your flours and starch using a digital kitchen scale. Trust me, it makes a huge difference in gluten-free baking!
  • Secure the Paddle
    Double-check that the paddle is locked in place at the bottom of your bread maker’s pan. You don’t want to forget that step.
  • Layer the Ingredients – In Order!
    First, the liquids: water, maple syrup, and olive oil.
    Next, the dry ingredients: potato starch, almond flour, salt, and xanthan gum.
    Last but not least: sprinkle the yeast right in the center, on top of the flour. Avoid letting it touch the liquid—this helps control the rise time.
  • Set It and Forget It (Almost)
    Select the gluten-free setting on your bread machine. Be sure to set it to a 1.5 lb loaf. I also like to choose the dark crust option for a little extra texture. Hit start and let your machine do the work: mix, rise, and bake!
    Tip: After the first mix, use a spatula and push down any excess up to high; this will allow the loaf to bake uniformly.
  • Cool and Serve
    When the cycle is complete, let the bread sit in the pan with the lid open for a few minutes. Carefully remove the pan using oven mitts—it's hot! Flip the pan and gently shake the loaf out. Use the metal hook (if provided) to remove the paddle from the bottom. Let the loaf cool completely on a wire rack before slicing or storing.

Notes

Store your cooled loaf in an airtight container at room temperature for up to 3 days.
After day 3, it starts to get a little dense—perfect time to cube it up for homemade croutons or toast!
Want a tighter crumb for sandwiches? Let the loaf cool completely before slicing, and use a serrated knife for clean, even cuts.
Keyword Bread

I hope you give this Gluten-Free Vegan Almond Flour Bread a try! It’s a simple, reliable bread machine recipe that delivers a soft loaf every time, and once you try it, I think it’ll become a regular part of your baking rotation. Don’t forget to watch the video below for step-by-step guidance, and let me know in the comments how your loaf turns out. Happy baking!

Turn Stale Bread Into Crispy Homemade Italian Croutons

If you’ve ever had a loaf of bread start to go stale, don’t toss it! With just a few simple ingredients, you can transform almost-stale bread into delicious, crispy homemade Italian croutons. These croutons are perfect for adding crunch to salads, soups, or even enjoying as a snack. Follow my step-by-step YouTube video to see just how easy it is to make this simple, flavorful treat.

If you love baking your bread, you know that homemade loaves usually lack preservatives, which means they start to firm up after just a few days. Check out my collection of bread recipes here. When your bread starts to go stale, usually after three days, it’s the perfect opportunity to salvage it by making croutons. Not only does this reduce waste, but it also gives you a tasty kitchen staple that keeps well in an airtight container.

Here’s the simple recipe. Feel free to experiment with additional herbs or spices to match your flavor preference.

Homemade Italian Croutons

Crispy, flavorful, and perfect for salads, soups, or snacking!
Prep Time 5 minutes
Course Salad

Equipment

  • 1 oven
  • 1 baking pan

Ingredients
  

  • 1 loaf bread (10-12 oz), cut into 1-inch cubes
  • 1/4 cup olive oil
  • 2 tsp Italian seasoning
  • 1 tsp garlic powder
  • 1/2 tsp salt
  • 1/2 tsp black pepper

Instructions
 

  • Preheat your oven to 400°F (200°C).
  • Cut your bread into 1-inch cubes. Almost stale bread works best—it soaks up the seasoning without becoming soggy.
  • In a large mixing bowl, toss the bread cubes with olive oil, Italian seasoning, garlic powder, salt, and black pepper until evenly coated.
  • Spread the seasoned bread cubes on a baking sheet in a single layer. Bake at 400°F for 10 minutes.
  • Carefully switch to the broiler on high for 1-2 minutes to get a golden-brown, crispy finish. Watch closely to prevent burning.
  • Allow croutons to cool completely. Store in an airtight container for up to one week.

Notes

  • Use sourdough, baguette, or gluten-free bread for different textures and flavors.
  • Add dried herbs like thyme, rosemary, or basil for a custom twist.
  • Sprinkle with vegan parmesan after baking for extra indulgence.

Save this recipe so you’ll always have a go-to way to turn leftover bread into something amazing. Homemade Italian croutons are quick, versatile, and utterly irresistible!

Homemade Red Tomato Sauce

There’s nothing quite like a big pot of homemade red tomato sauce simmering on the stove—it fills your kitchen with comforting aromas and instantly elevates any dish you pair it with. This naturally vegan and gluten-free red sauce recipe has become a staple in my kitchen. Whether you’re tossing it with your favorite gluten-free pasta, spreading it over a pizza crust, layering it in a lasagna, or using it as a base for soup or stuffed cabbage, this recipe is a flavorful go-to. Be sure to check out my step-by-step video on YouTube to see exactly how I make it.

Why I Use San Marzano Tomatoes

The real magic of this sauce starts with the tomatoes. I only use San Marzano whole peeled tomatoes, which are grown in the rich volcanic soil of Italy’s San Marzano region near Mount Vesuvius. Their naturally sweet flavor and low acidity make them perfect for tomato sauce. You won’t need to add any sugar—these tomatoes are sweet on their own. If you’ve ever wondered why some sauces taste bright and balanced while others fall flat or turn too tangy, it often comes down to the tomatoes. These are worth every penny. I use Cento Certified San Marzano Whole Peeled Tomatoes and always keep several cans in my pantry.

Inspired by Italian Family Traditions

When developing my recipe, I watched dozens of videos and tutorials, but what really stuck with me were the Italian families making their seasonal red sauce. Their approach is so beautifully simple—just tomatoes, salt, and fresh basil. That’s it. And while I’ve added a few aromatics of my own, that simplicity is still at the heart of my version. I use this sauce on everything: a pizza base, over pasta, inside lasagna, and even stuffed cabbage rolls. It’s endlessly versatile and always delicious.

The Secret to the Flavor: Aromatics & Fresh Basil

While the tomatoes are the star, the supporting flavors really help build that rich, slow-cooked taste. I blend together onion, fresh garlic, and carrots using my food chopper to form a fine base. Carrots add a hint of natural sweetness, so there’s no need for sugar—something I personally don’t like in sauce. Once the sauce is done simmering, I always toss in fresh basil. It infuses the sauce as it cools, adding that herbal brightness that makes everything taste fresh and alive.

Use a Stainless Steel Pot

If there’s one piece of kitchen advice I can give: always cook your tomato sauce in a stainless steel pot. It doesn’t react with the acidity in the tomatoes like aluminum or nonstick surfaces sometimes do. You’ll get a cleaner, truer tomato flavor every time. I use the Amazon Basics 8-Quart Stainless Steel Stock Pot with Lid. It’s affordable, sturdy, and just the right size for making a large batch that you can store for weeks ahead.

My Favorite Kitchen Tools

Over the years, I’ve found a handful of kitchen tools that make this sauce recipe even easier and more enjoyable to prepare. I always use Cento Certified San Marzano Whole Peeled Tomatoes, and I rely on my Ninja Food Chopper Express Chop to create a smooth base from the garlic, onions, and carrots. My 8-quart Amazon Basics Stainless Steel Stock Pot is ideal for simmering the sauce, and the Bamboo Cutting Board Set is great for prepping all the ingredients. I store my sauce in 16 oz. pint containers from Amazon, which are freezer-safe and easy to label. To strain the tomatoes or rinse basil, I use a Kitchen Colander Bowl Combo Strainer. And to cook and stir the sauce, I love my Cooking Utensils Set of 6—sturdy, heat-resistant, and perfect for everyday use. You can find links to all of these in the description or directly below:

Homemade Red Tomato Sauce Recipe

This homemade red tomato sauce is a simple yet flavorful way to elevate your dishes, from pasta to pizza. Packed with fresh ingredients like San Marzano tomatoes, garlic, onions, and a touch of sweetness from shredded carrots, this sauce is a must-have in your kitchen. Plus, it freezes beautifully, so you can make a large batch and store it for later use.
Prep Time 10 minutes
Cook Time 1 hour 30 minutes
Course Sauces
Servings 6 pints

Equipment

  • 1 Food Processor
  • 1 Stainless steel pot

Ingredients
  

  • 3 28 oz. San Marzano whole tomatoes
  • 2 oz. tomato paste
  • 8 cloves garlic
  • 1 small onion
  • 8 baby carrots
  • 2 tbsp. salt
  • 2 tbsp. olive oil
  • 1 bunch fresh basil

Instructions
 

  • Prep the Ingredients: Start by cleaning 10 fresh basil leaves. Next, peel and chop the garlic and onion.
  • Make the Base: In a food processor, combine the olive oil, garlic, onions, and carrots. Pulse until everything is well processed into a fine mixture. This will form the flavorful base of your sauce.
  • Sauté the Mixture: Heat a stainless steel pot over medium-high heat. Add the processed mixture into the pot and cook, stirring occasionally, until it becomes fragrant and the onions begin to soften, about 5 minutes.
  • Add the Tomatoes: Remove the pot from heat. Open the cans of San Marzano tomatoes and add them to the pot. Use a flat masher to press down on the tomatoes, breaking them into smaller pieces for a smoother sauce. At this point, add the salt and tomato paste.
  • Simmer the Sauce: Bring the sauce to a boil, then reduce the heat to low and let it simmer for about 1.5 hours. Stir occasionally, allowing the flavors to meld and the sauce to thicken.
  • Finish the Sauce: Once the sauce has simmered, remove it from the heat and allow it to cool slightly.
  • Store the Sauce: Add the fresh basil leaves to the empty pint-sized containers. Portion the cooled sauce into pint-sized containers for freezing. Be sure to label each container with the date so you can keep track of freshness. This sauce can be stored in the freezer for up to 3 months.

Notes

Storage: This sauce is perfect for freezing! Simply thaw when you’re ready to use it, and it will taste as fresh as when you made it.
Use the Sauce: This tomato sauce is perfect for pasta, pizza, lasagna, or even as a base for soups and stews.
Keyword pasta salad, red sauce, Tomato

I Hope You Try It!

Whether you use this sauce on pasta, pizza, lasagna, or something more creative, I hope it becomes a staple in your kitchen too. If you give this recipe a try, let me know in the comments! I’d love to hear how you make your version of red sauce and what you pair it with.

One Pot Coconut Chickpea Spinach Stew

This One Pot Coconut Chickpea Spinach Stew is the perfect dish for anyone looking for a wholesome, flavorful meal that’s both comforting and easy to make. Packed with nutrient-rich ingredients like chickpeas, spinach, and turmeric, it’s a complete dish that’s naturally vegan and gluten-free. The rich coconut milk base adds a creamy texture, and the combination of spices brings the perfect balance of warmth and flavor. It’s a simple yet satisfying meal that you can whip up in just one pot, making cleanup a breeze. Be sure to check out my step-by-step YouTube video below, where I walk you through the process. And for the full printable recipe, keep reading below!

A Recipe for Sensitive Stomachs

One of the great things about this stew is how gentle it is on your stomach, making it a great option for anyone who might have a sensitive digestive system. I know that sometimes, certain spices and ingredients can cause discomfort, which is why I’ve kept this recipe simple and soothing. If you have a sensitive stomach like me, you’ll appreciate the subtle flavor profile of this stew—no heavy spices or harsh ingredients here. The turmeric and ginger are gentle, anti-inflammatory ingredients, and coconut milk adds richness without being overwhelming. If you’re feeling adventurous and don’t have any sensitivity issues, I highly recommend adding garlic and a pinch of cayenne pepper to give this dish an extra flavor kick. Garlic will elevate the stew, and cayenne adds a bit of heat without being overpowering. You can always adjust the spices to suit your taste.

Quick, Easy, and All in One Pot

Not only is this stew delicious, but it’s also incredibly easy to make. One of the best parts of this recipe is that it’s made entirely in one pot, meaning there’s minimal cleanup afterward. I love using my COOKLOVER Nonstick Woks and Stir Fry Pan to make meals like this. It’s perfect for sautéing vegetables, simmering soups, and stews, and it distributes heat evenly for the perfect cooking experience. The nonstick surface makes it easy to stir and cook everything without worrying about food sticking to the bottom, ensuring that your stew turns out perfectly every time. This pan is durable, and its large size gives you plenty of room to work with, especially when cooking large meals like this stew. You can find the exact pan I use here: COOKLOVER Nonstick Woks And Stir Fry Pan.

Sourcing Simple, Accessible Ingredients

One of the best parts of this Coconut Chickpea Spinach Stew is that the ingredients are simple, affordable, and easy to find at most grocery stores. Whether you’re shopping at your local supermarket or a natural food store, you should be able to find all the key ingredients without difficulty. Olive oil, coconut milk, vegetable broth, and spinach are pantry staples that are readily available in most stores. Chickpeas, being a versatile and inexpensive protein source, are widely stocked in both canned and dried forms, making them an easy choice for any stew or salad. Fresh turmeric and ginger can be found in the produce section, but powdered forms work just as well for convenience. The beauty of this dish is its flexibility—you can tweak the recipe depending on what’s available in your local store, but it will always turn out delicious. No need to hunt down exotic ingredients—this stew is all about accessible, everyday foods that come together beautifully.

Essential Kitchen Tools for This Recipe

Making this stew is a breeze with the right kitchen tools. Below are some of the items I used for this recipe that make the cooking process even easier and more efficient.

  1. WÜSTHOF Gourmet 16-Piece Knife Block Set: This knife set is perfect for chopping leeks and other vegetables with precision. The sharpness and quality of these knives make prep work much faster and more enjoyable. I highly recommend this set for anyone who loves cooking and wants a reliable set of knives in their kitchen. You can get it here: WÜSTHOF Gourmet 16-Piece Knife Block Set.
  2. COOKLOVER Nonstick Woks And Stir Fry Pan: As mentioned earlier, I use this wok for so many of my meals. It’s perfect for sautéing the leeks, adding the spices, and simmering the stew in one go. It’s a high-quality pan that I can always count on for even cooking and easy cleanup. Check it out here: COOKLOVER Nonstick Woks And Stir Fry Pan.
  3. Kitchen Colander Bowl Combo Strainer: Rinsing the chickpeas and any other ingredients is easy with a colander. This combo strainer is a great way to drain your chickpeas, ensuring that they’re ready to go in the pan without excess liquid. You can find it here: Kitchen Colander Bowl Combo Strainer.
  4. Spice Jars: If you like to keep your spices organized, these spice jars are perfect for storing your turmeric, ginger, and other seasonings. I love how easy it is to find the right spice with these jars. Check them out here: Spice Jars.
  5. 16 oz. Pint Containers: I love to make a big batch of this stew and store it in these 16 oz. pint containers for meal prep. They’re perfect for storing soups, stews, and leftovers, and they stack easily in the fridge or freezer. You can find them here: 16 oz. Pint Containers.
  6. Spatulas: Stirring your stew is a breeze with these spatulas. They’re perfect for mixing the ingredients together and ensuring that everything cooks evenly. You can find them here: Spatulas.
  7. Pyrex Bundle: This set is perfect for storing your rice, stew, or any leftovers. The Pyrex glass containers are durable, microwave-safe, and easy to clean. You can find the set here: Pyrex Bundle.
  8. Electric Kettle: If you want to quickly boil water for your vegetable broth, this electric kettle is a time-saver. I use it to heat my water before adding it to the pan. Get it here: Electric Kettle.
  9. Vegetable Broth Cubes: For convenience, I use vegetable broth cubes that dissolve easily in hot water, providing rich flavor for stews and soups. You can find them here: Vegetable Broth Cubes.
  10. Measuring Cup Set: Accurate measurements are key for a perfect recipe. This set helps ensure I’m using the right amount of each ingredient. Check it out here: Measuring Cup Set.

One Pot Coconut Chickpeas & Spinach Stew

This vibrant Coconut Chickpeas & Spinach Stew is a comforting and wholesome meal that’s packed with flavor and nutrients. With a rich coconut base, fragrant turmeric, and fresh spinach, this stew pairs perfectly with a bed of fluffy Jasmine rice for a fulfilling dish. Perfect for a cozy dinner, this recipe is easy to prepare and is both vegan and gluten-free.
Prep Time 15 minutes
Cook Time 15 minutes
Course Main Course
Servings 6 people

Equipment

  • 1 wok or large pan

Ingredients
  

  • 2 tbsp extra virgin olive oil
  • 1 cups leeks chopped (clean thoroughly before chopping)
  • 2 cans chickpeas drained and rinsed
  • 1 can coconut milk full-fat for creaminess
  • 1 cup vegetable broth
  • 2 cups fresh spinach
  • 1 tsp turmeric
  • 1 tbsp ground ginger
  • 1 tbsp dried parsley
  • 1 cup jasmine rice

Instructions
 

  • Prepare the Jasmine Rice: Start by rinsing the Jasmine rice under cold water to remove excess starch. Cook the rice according to the package instructions, either on the stovetop or in a rice cooker. Set aside when done.
  • Prep the Vegetables: Rinse and drain both cans of chickpeas. Chop the leeks into slices, making sure to remove any dirt or grit after chopping.
  • Cook the Leeks: In a large pan or wok, heat 2 tablespoons of olive oil over medium-high heat. Once the oil is hot, add the chopped leeks to the pan. Sauté for about 5 minutes until the leeks become soft, fragrant, and lightly browned.
  • Add the Spices and Chickpeas: Add the dried parsley, ground ginger, turmeric, and chickpeas to the pan. Stir well to coat everything in the spices. Let the mixture simmer for 5 minutes, allowing the flavors to meld together.
  • Simmer the Coconut Broth: Pour in the coconut milk and vegetable broth. Stir to combine, and bring the mixture to a gentle simmer. Let it cook for another 5-7 minutes, allowing the coconut milk to melt into the stew, creating a creamy and aromatic broth.
  • Add Fresh Spinach: Once the coconut broth has simmered and thickened, add the spinach to the pan. Stir and let the spinach cook down, which should take about 2-3 minutes.
  • Serve: Spoon the coconut chickpea and spinach stew over a generous serving of Jasmine rice. Serve hot, and enjoy the comforting and flavorful meal!

Notes

  • Customize the Greens: Feel free to swap out spinach for other leafy greens like kale or collard greens.
  • For Extra Creaminess: Use full-fat coconut milk for a richer texture.
  • Protein Boost: Add tofu or tempeh for a more protein-packed meal.
This stew is perfect for meal prep and can easily be stored in the fridge for a few days. It’s a nourishing, easy-to-make meal that’s ideal for those busy weeknights or a comforting weekend dinner!
Keyword Chickpeas, Rice, spinach

I hope you give this One Pot Coconut Chickpea Spinach Stew a try! It’s a nourishing, flavorful dish that’s perfect for any time of the year. The combination of coconut milk, turmeric, ginger, and chickpeas makes for a hearty, satisfying meal. If you’re looking for something easy to prepare with minimal cleanup, this is the recipe for you. I’d love to hear how it turns out for you—leave a comment below and let me know your thoughts!

What I Ate Gluten-Free & Vegan in Cleveland, Ohio

Our visit to Cleveland, Ohio, was packed with fun sightseeing and, of course, delicious food. While we were excited to visit iconic spots like the Christmas Story House and the Rock & Roll Hall of Fame, we were just as eager to discover plant-based eats in the area. After a full day of exploring, we found a vibrant vegan spot just outside the city called The Vegan Club CLE — and it turned out to be one of the best meals of our trip.

Colorful Vibes & Warm Hospitality

As we pulled up to The Vegan Club, we were immediately drawn to the welcoming storefront and the cheerful interior. We arrived just before closing time and were lucky enough to be seated and served by the owner himself. The atmosphere was bright and modern, filled with vibrant art and cozy seating — a perfect place to unwind after a day on our feet.

The service was wonderful. The owner was incredibly kind and knowledgeable about the menu, taking extra care to point out the gluten-free options available. It’s always refreshing to dine somewhere that takes dietary needs seriously without compromising flavor or experience.

Our Gluten-Free Vegan Feast

We started by ordering a large bottle of Pellegrino sparkling water to share, which felt like a refreshing reset after a hot afternoon.

My husband ordered the okra fries and the black bean bowl, which came loaded with chili beans, wild rice, vegan crema, pickled veggies, and guacamole. It was hearty, flavorful, and full of nourishing ingredients.

I decided to treat myself to a more indulgent meal and ordered the Szechuan Buffalo Wingz with a side of fresh-cut French fries. These weren’t your typical vegan wings — they were made from crispy oyster mushrooms, battered in rice flour (yes, gluten-free) and tossed in a spicy buffalo sauce. Served with a creamy aioli, they hit that perfect balance of crunchy, spicy, and satisfying.

The French fries were hand-cut and perfectly crispy, lightly seasoned, and served with classic ketchup on the side. It felt like such a treat to be able to enjoy fried food at a restaurant, which is something I rarely get to do on a gluten-free vegan diet.

A Must-Visit for Plant-Based Travelers

If you’re planning a visit to Cleveland and want to find vegan food that’s both delicious and allergy-friendly, I can’t recommend The Vegan Club enough. Whether you’re looking for something nourishing or craving crispy comfort food, they have something for everyone — and they do it with heart.

Have you ever visited Cleveland or tried The Vegan Club? Let me know in the comments below. And don’t forget to check out the reel at the top of this post to see more behind-the-scenes shots of our experience.

The Best Vegan & Gluten-Free Cookout Side Dishes

If you’re hosting or attending a summer cookout and looking for allergy-friendly, crowd-pleasing dishes, I’ve got you covered! These four vegan and gluten-free side dishes are the perfect addition to any backyard BBQ, picnic, or party. Whether you’re plant-based, gluten-free, or just trying to eat more colorful, fresh food — these recipes are easy, delicious, and made with real, simple ingredients. Watch the video below to see all four recipes come together in minutes!

These Four Side Dishes Are Easy to Customize for Any Diet

One of my favorite things about these side dishes is how easy they are to adapt. You can swap the pasta, mayo, or seasoning to suit any dietary need. Want it oil-free? Use a cashew-based dressing. Prefer more heat? Add spicy peppers or chipotle seasoning. Just pick your favorite pasta, your go-to vegan mayo, and you’re good to go. These are the kinds of recipes that work with you — not against you — especially when planning for a group.

Veggie Pasta Salad

Let’s kick things off with the Veggie Pasta Salad — a colorful, classic side dish that’s always the first to go at every cookout! It’s packed with crunchy celery, sweet bell peppers, carrots, red onions, and chopped pickles for a little tang. Tossed in creamy Hellmann’s Vegan Dressing, this salad hits all the right notes: creamy, crunchy, savory, and slightly tangy.

To make it, I used a 12 oz. box of Ronzoni Gluten Free Elbow Pasta, which holds up perfectly in cold salads without turning mushy. I prepped all the veggies using my go-to WÜSTHOF Gourmet 16-Piece Knife Block Set, mixed it all together in my large Winco 30-Quart Stainless Steel Bowl, and stored leftovers in my favorite Pyrex Simply Store 12-Pack Glass Food Storage Set.

Want the full step-by-step instructions, measurements, and tips? Head to the full blog post:
👉 Veggie Pasta Salad Recipe

Southwest Pasta Salad

Next up is the Southwest Pasta Salad, a bold, flavorful twist that’s loaded with black beans, corn, tomatoes, and a zesty taco-seasoned dressing. It’s perfect served cold or at room temperature, and it pairs beautifully with grilled veggies or burgers.

I used the Jovial Whole Grain Brown Rice Pasta Variety Pack for this recipe, which gives a nice bite and works great with southwest flavors. I cooked the pasta in my Anolon Advanced Home Nonstick Pots and Pans Set and drained it with my Kitchen Colander Bowl Combo Strainer. I chopped fresh veggies using my WÜSTHOF Knife Set and tossed it all in a 16″ Stainless Steel Mixing Bowl. The secret to that crave-worthy flavor? A packet of Simply Organic Mild Taco Seasoning added to the creamy dressing.

Get the full recipe, including exact measurements and customization ideas here:
👉 Southwest Pasta Salad Recipe

Potato Salad

A summer cookout wouldn’t be complete without Potato Salad! My version is 100% vegan, made extra hearty with a mix of potatoes, celery, pickles, and crunchy veggies. It’s dressed in a simple plant-based mayo blend that keeps things creamy without any dairy or eggs.

I used this vegan mayo for the dressing, which has just the right texture and tang to make the flavors shine. If you’re meal-prepping ahead of time, this salad stores beautifully for a couple of days and actually gets better as it chills!

Check out the full blog post to get the complete recipe, ingredient swaps, and serving suggestions:
👉 Potato Salad Recipe

Coleslaw

Last but not least, this Super Crunchy Vegan Coleslaw is the side dish that surprises everyone — in the best way! It’s creamy, slightly sweet, and full of that classic coleslaw crunch we all love. Instead of refined sugar, I use a splash of Maple Grove Farms Organic Maple Syrup to naturally sweeten the dressing. And for the creamy base, I reach for Hellmann’s Vegan Mayo.

It comes together in minutes, and it’s the ideal partner to burgers, sandwiches, or tacos. Plus, it stays crisp even when made in advance.

Grab the full recipe with all the tips and tricks right here:
👉 Coleslaw Recipe

Ready to Try These Recipes?

I hope you give one (or all!) of these easy vegan and gluten-free side dishes a try at your next cookout, potluck, or meal prep day. They’re colorful, nourishing, and packed with flavor — without any of the top allergens. If you make one, be sure to leave a comment and let me know how it turned out. I love hearing from you and seeing your creations!

Eating Gluten-Free Vegan at Moe’s in Bloomsburg, PA

On our road trip to Cleveland, Ohio, we made a quick and satisfying stop in Bloomsburg, Pennsylvania, at Moe’s Southwest Grill. It can be tough to find gluten-free vegan food while traveling, but Moe’s really came through. Watch my short video below to see exactly what I ordered and why I think this is a solid option for road trippers with dietary needs like mine!

Finding Healthy Food on the Road
Traveling with dietary restrictions isn’t always easy—especially when you’re trying to stay healthy and fueled for an athletic event. I was on my way to Cleveland to race in a half marathon, and I knew I needed a nutrient-rich meal that wouldn’t upset my stomach. Fast food is often a no-go for those of us avoiding gluten and animal products, so finding a place like Moe’s that offers customizable meals was a huge win. Stay tuned for upcoming blog posts where I share more vegan-friendly stops we discovered during our time in Ohio!

How Moe’s Works – Just Like Chipotle
If you’ve ever been to Chipotle, the setup at Moe’s will feel very familiar. It’s a made-to-order assembly line where you choose your base, protein, toppings, and extras. This kind of layout is perfect for people with dietary restrictions because you get to see exactly what’s going into your meal, and you can easily skip any ingredients that don’t work for your needs. I found the staff at this location to be helpful and patient as I asked questions about ingredients and cross-contamination.

My Vegan and Gluten-Free Bowl at Moe’s
I went with the Build Your Own Bowl option and packed it with satisfying and flavorful ingredients. My base was cilantro lime rice, and I added black beans, grilled peppers and onions, and roasted corn salsa. For protein, I chose the tofu, which was seasoned well and had a great texture. I topped it all off with shredded lettuce, black olives, and a generous scoop of guacamole. On the side, I grabbed their classic tortilla chips with salsa—simple and delicious. For a refreshing drink, I opted for an AHA sparkling water in lemon and lime, which came from their sleek, state-of-the-art drink machine.

Final Thoughts – Would You Try Moe’s?
Overall, Moe’s in Bloomsburg was a great stop. The restaurant was clean, affordable, and quick, and I left feeling full without any stomach issues—a big deal when you’re eating on the go. I love that Moe’s makes it easy to build a meal that fits a gluten-free vegan lifestyle. Have you tried Moe’s? What do you usually order there? Leave a comment below—I’d love to hear your thoughts and any recommendations for other road trip-friendly vegan spots!

Soft, Sliceable & Simple: Bread Machine Gluten-Free Vegan Sorghum Rice Bread

There’s nothing quite like the smell of fresh-baked bread wafting through the kitchen—especially when it’s a soft, gluten-free, and completely vegan loaf that you made yourself with minimal effort. This Bread Machine Gluten-Free Vegan Sorghum Rice Bread has quickly become a weekend ritual in our house. It’s the kind of bread you can rely on for toast in the morning, sandwiches at lunch, or even a warm slice with a little vegan butter when you’re craving comfort food. In the step-by-step YouTube video, I walk you through every part of this recipe—from measuring the flours to setting the bread machine—so you can bake this loaf right along with me.

One of the biggest game-changers in gluten-free baking is using a kitchen scale to measure your ingredients—especially the flours and starches. In traditional baking, scooping a cup of flour might work okay, but gluten-free blends are a little more sensitive. Measuring by weight gives you consistency every single time. One loaf won’t rise beautifully while the next flops—all because of a scooping difference. When it comes to gluten-free bread, grams are your best friend. Once I started using a digital scale, my loaves became so much more reliable—and delicious!

Now, let’s talk ingredients. This recipe keeps things simple but powerful with just a few gluten-free pantry staples. The dry blend includes potato starch, sorghum flour, and brown rice flour—a trio that gives this bread a soft crumb and golden crust. Xanthan gum adds a bit of structure in place of gluten, and instant yeast gives the rise. On the liquid side, we’ve got water, olive oil, and maple syrup, which not only helps with rising but adds just a touch of subtle sweetness. It’s a beautiful balance of whole-grain flavor and light texture—great for everything from avocado toast to hearty sandwiches.

To make this bread, I use the KITCHENARM 29-in-1 SMART Bread Machine. It has a dedicated gluten-free setting that’s been incredibly reliable and easy to use—plus, the dark crust option gives this loaf a gorgeous finish. For flours, I’ve tested several, and love both Food to Live Organic Potato Starch and Bob’s Red Mill Potato Starch as options. For sorghum flour, I’ve used both Food to Live Organic Sorghum Flour and Bob’s Red Mill Sorghum Flour. I’ve also had great results with Bob’s Red Mill Brown Rice Flour. Everything gets portioned out in my trusty stainless steel mixing bowls, and I use this measuring cup set for liquids and smaller ingredients. Once the bread is done, I store it in this airtight Tafura Bread Container to keep it fresh for up to three days—if it lasts that long!

Bread Machine Gluten-Free Vegan Sorghum Rice Bread – 1.5 lb.

Soft, sliceable, and perfect for toasting. A weekend staple in our home!
Prep Time 10 minutes
Cook Time 3 hours
Total Time 3 hours 10 minutes
Course Baking

Equipment

  • 1 Bread machine with gluten-free setting

Ingredients
  

Liquids

  • 1 1/4 cup water  room temperature (300 ml or 300 grams)
  • 2 1/2 tbsp olive oil
  • 2 tbsp maple syrup room temperature

Dry Ingredients

  • 199 grams potato starch 1 3/8 cups
  • 116 grams sorghum flour 7/8 cup
  • 65 grams brown rice flour 1/2 cup
  • 1 tsp salt
  • 1 3/4 tsp xanthan gum 5.3 grams
  • 1 tsp instant active yeast 3 grams

Instructions
 

Prep Like a Pro

  • Measure the maple syrup and water first, and allow them to come to room temperature. Cold ingredients can mess with the rise.
  • For best results, weigh your flours and starch using a digital kitchen scale. Trust me, it makes a huge difference in gluten-free baking!

Secure the Paddle

  • Double-check that the paddle is locked in place at the bottom of your bread maker’s pan. You don’t want to forget that step (I speak from experience).

Layer the Ingredients

  • First, the liquids: water, maple syrup, and olive oil.
  • Next, the dry ingredients: potato starch, sorghum flour, brown rice flour, salt, and xanthan gum.
  • Last but not least: sprinkle the yeast right in the center, on top of the flour. Avoid letting it touch the liquid—this helps control the rise time.

Set It and Forget It (Almost)

  • Select the gluten-free setting on your bread machine. Be sure to set it to a 1.5 lb loaf. I also like to choose the dark crust option for a little extra texture. Hit start and let your machine do the work: mix, rise, and bake!

Cool and Serve

  • When the cycle is complete, let the bread sit in the pan with the lid open for a few minutes. Carefully remove the pan using oven mitts—it's hot! Flip the pan and gently shake the loaf out. Use the metal hook (if provided) to remove the paddle from the bottom. Let the loaf cool completely on a wire rack before slicing or storing.

Notes

Store your cooled loaf in an airtight container at room temperature for up to 3 days.
After day 3, it starts to get a little dense—perfect time to cube it up for homemade croutons or toast!
Want a tighter crumb for sandwiches? Let the loaf cool completely before slicing, and use a serrated knife for clean, even cuts.
Keyword Bread

I hope you give this recipe a try! Whether you’re new to gluten-free baking or a seasoned pro, this bread is one of those staples you’ll want to make again and again. It’s reliable, delicious, and oh-so-easy thanks to the bread machine. If you bake it, I’d love to hear how it turns out for you. Drop a comment below or tag me on social—there’s nothing better than seeing your creations come to life. Happy baking!

Sweet Corn Chowder in the bowl

Easy Stovetop Corn Chowder – Quick and Delicious

There’s nothing better than a warm, creamy bowl of corn chowder on a chilly day. This Vegan, Vegetarian, Gluten-Free, Dairy-Free Corn Chowder is packed with hearty vegetables and rich flavors, making it the perfect comfort food. It’s easy to prepare on the stovetop, and I’ve created a step-by-step YouTube video to guide you through the process. Whether you’re looking for a quick weeknight meal or a cozy weekend dish, this chowder will satisfy you.

Fresh sweet corn makes all the difference in this recipe, adding natural sweetness and a crisp texture. If you can get your hands on fresh ears of corn, it’s worth the extra step of cutting the kernels from the cob. However, if fresh corn isn’t available, frozen or canned corn will work just fine in a pinch. Just be sure to drain and rinse canned corn before adding it to the soup to keep the flavors balanced.

Sweet Corn Chowder in the pot

Ingredients You’ll Need

This chowder is loaded with wholesome, simple ingredients that come together beautifully. You’ll need minced garlic and chopped shallots or white onion to create a flavorful base. For the main body of the soup, use fresh sweet corn (or substitute with frozen or canned), chopped sweet peppers, chopped carrots, chopped celery, and peeled and cubed white potatoes. To give it a creamy, rich texture, you’ll add coconut milk and vegetable broth. Season it perfectly with thyme, paprika, and salt.

Sweet Corn Chowder Ingredients

This corn chowder is naturally gluten-free and vegan, making it a great option for various dietary needs. The coconut milk creates a creamy texture without the need for dairy, and the hearty potatoes make the soup filling and satisfying. If you’d like to thicken the chowder even more, try adding your favorite type of rice—it works beautifully to soak up the flavors and give the soup even more body.

To make this recipe, I used some of my favorite kitchen tools, which make cooking so much easier:

Sweet Corn Chowder in the bowl

Creamy Sweet Corn Chowder – Stovetop & Instant Pot

There’s nothing better than a warm, hearty bowl of corn chowder to comfort you on a chilly day. This creamy corn chowder is packed with sweet corn, tender potatoes, and colorful veggies, all simmered in a rich coconut milk broth. The best part? You can make it on the stovetop or in the Instant Pot for a quick and easy meal. It’s cozy, satisfying, and naturally dairy-free—perfect for any time of year!
Prep Time 25 minutes
Cook Time 1 hour
Course Soup
Servings 8

Ingredients
  

  • 1 tbsp minced garlic
  • 1 cup shallots or white onion chopped
  • 6 ears sweet corn or 16 oz. frozen sweet corn
  • 2 cups sweet peppers chopped
  • 2 cups carrots chopped
  • 2 cups celery chopped
  • 2 lb. white potatoes peeled and cubed
  • 1 15 oz. can organic coconut milk
  • 5 cups vegetable broth
  • 1 tsp thyme
  • 1 tsp paprika
  • 1 tsp salt

Instructions
 

Prep Work

  • Prep the corn – If using fresh corn, clean the ears and remove the kernels. I like to break them in half and chop the kernels in five horizontal strokes.
  • Make the cream corn – Blend 1 cup of vegetable broth with the kernels from two cobs to create a creamy base. (Shortcut: You can use a can of cream-style corn instead!)
  • Prep the potatoes – Weigh, peel, and chop the potatoes. If you’re not cooking them right away, store them in water to prevent browning.
  • Chop the veggies – Clean and chop the carrots, celery, and peppers.
  • Prep the garlic and shallots – Peel and chop the shallots and garlic.

Stovetop Instructions

  • Sauté the aromatics – In a large pot, heat ¼ cup of water over medium heat. Add the garlic and shallots and sauté until the shallots are translucent (about 3–4 minutes).
  • Cook the vegetables – Add the chopped carrots, peppers, and celery. Cook for 8–10 minutes, stirring occasionally.
  • Add seasonings – Stir in the thyme, paprika, and salt. Let the flavors develop for 1–2 minutes.
  • Simmer the chowder – Add the coconut milk, vegetable broth, cream corn mixture, and potatoes. Bring to a boil, then reduce heat and simmer on low for 1 hour, stirring occasionally.
  • Serve and enjoy – Ladle into bowls and garnish with fresh herbs or a sprinkle of paprika.

Instant Pot Instructions

  • Sauté the aromatics – Turn on the Instant Pot to "Sauté" mode. Add ¼ cup of water, garlic, and shallots. Cook until the shallots are translucent (about 3–4 minutes).
  • Add the vegetables and seasonings – Stir in the carrots, peppers, and celery. Sauté for another 5 minutes, then add the thyme, paprika, and salt.
  • Pressure cook – Add the coconut milk, vegetable broth, cream corn mixture, and potatoes. Close the lid, set the valve to "Sealing," and cook on High Pressure for 10 minutes.
  • Natural release – Let the pressure release naturally for 10 minutes, then manually release any remaining pressure.
  • Serve and enjoy – Stir well and serve hot.

Notes

Thicken it up – If you want a thicker chowder, mash some of the potatoes with a fork or use an immersion blender.
Make it spicy – Add a pinch of cayenne or red pepper flakes for some heat.
Add protein – Toss in cooked chickpeas or white beans for extra protein.

I hope you give this Vegan Gluten-Free Corn Chowder a try! It’s creamy, hearty, and full of flavor—perfect for any season. Let me know what you think in the comments, and don’t forget to check out the YouTube video for step-by-step instructions. Happy cooking!