Back to Top

Category: Kitchen Hacks

How to Use a Plastic Tofu Press for Perfect Tofu: A Step-by-Step Guide

Tofu is a versatile ingredient that can be transformed into a variety of delicious dishes, but achieving the right texture often requires pressing out excess moisture. In this blog post, we’ll show you how to use a plastic tofu press to prepare perfect tofu for your favorite recipes. Let’s dive in!

Step 1: Choosing the Right Tofu Press

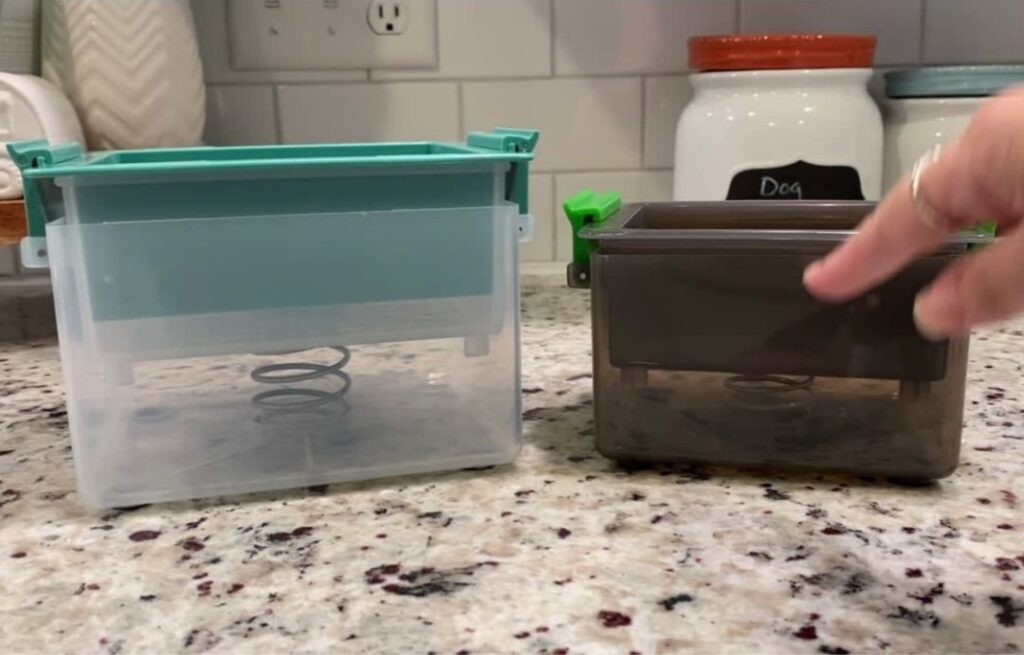
Before you begin, it’s important to select the appropriate tofu press for the size of your tofu block. Tofu presses typically come in two sizes:

  • Small Press: Suitable for blocks of tofu weighing 8-12 oz.
  • Large Press: Suitable for blocks of tofu weighing 12-16 oz.

Using the correct size press ensures effective moisture removal and better results. Avoid making the mistake of trying to fit a larger block into a small press, as this can hinder the pressing process.

Step 2: Understanding the Tofu Press Components

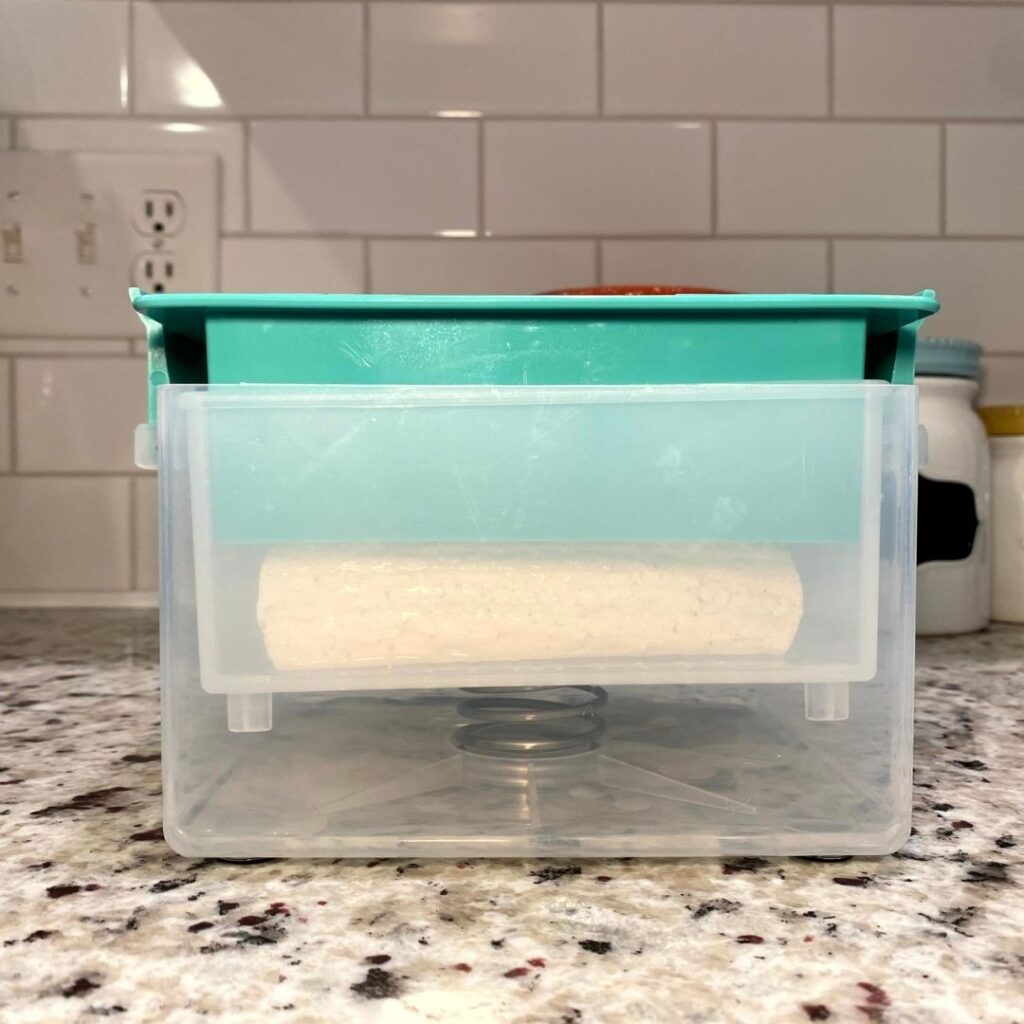
  • A typical plastic tofu press consists of four main parts:
  • Top Lid: Covers the tofu and applies pressure.
  • Large Strainer: Holds the tofu block and allows water to drain out.
  • Spring: Provides the pressing force.
  • Collection Tray: Catches the expelled water.

Familiarize yourself with these components to streamline the pressing process.

Step 3: Preparing the Tofu

  • Start by gathering your ingredients and tools:
  • A plastic tofu press
  • A block of tofu (extra firm House Foods and Wegmans are great choices)
  • A few paper towels
  • A knife
  • A timer

Unwrap the tofu over the sink, cut a few slits in the package, and gently squeeze out the excess liquid. If you prefer, you can rinse the tofu under cold water to remove any packaging residue.

Step 4: Setting Up the Tofu Press

Place the tofu block in the large strainer component of the press. Position the strainer over the spring, ensuring it sits securely. Then, place the top lid on the tofu block and push down until the handles lock into place. This setup ensures even pressure distribution across the tofu block.

Step 5: Pressing the Tofu

Set a timer for 15 to 30 minutes, depending on how firm you want your tofu. For most recipes, pressing for 15 minutes is sufficient to achieve a firmer texture without drying it out too much. Allow the tofu press to do its work while you prepare other ingredients or take a break.

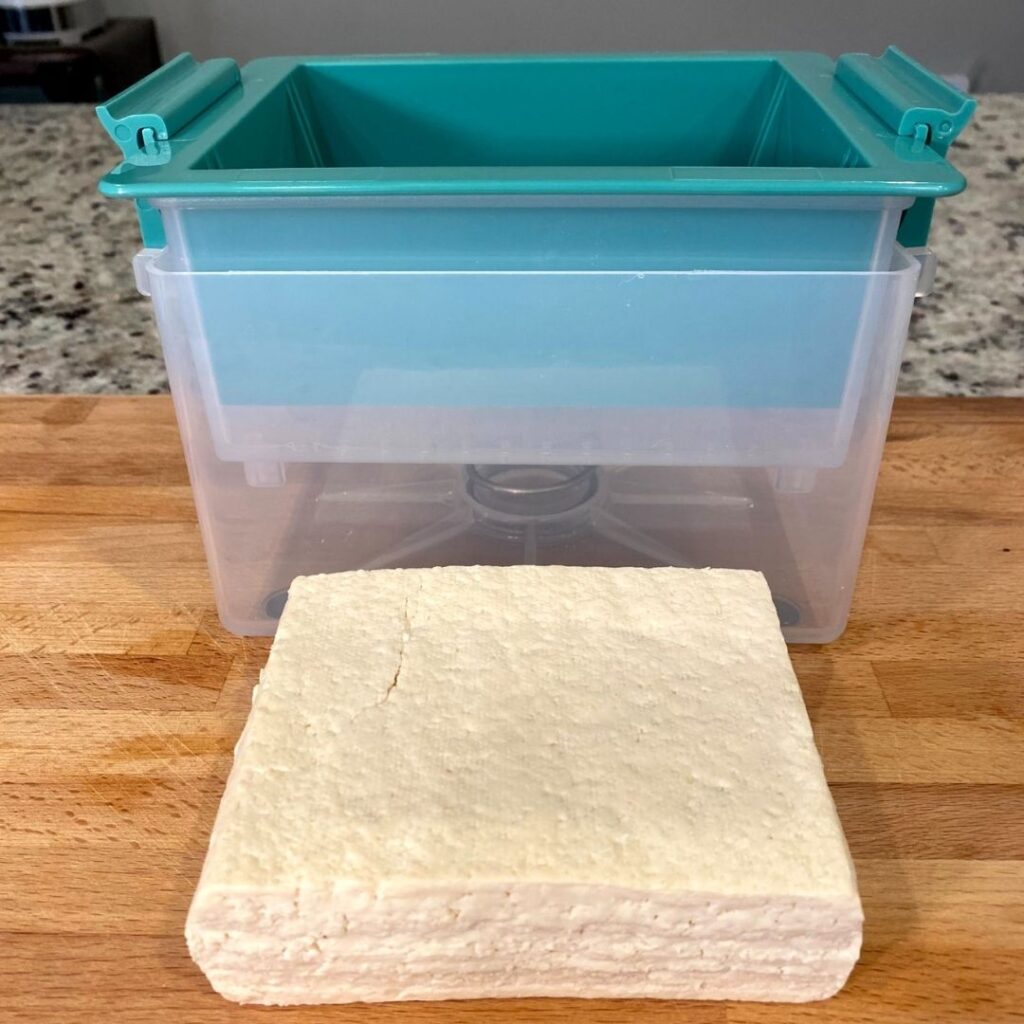
Step 6: Removing the Tofu from the Press

Once the timer goes off, carefully open the tofu press and remove the block of tofu. You’ll notice that the tofu is now firmer and ready for cooking. Use a paper towel to pat the tofu dry, removing any remaining moisture on the surface.

Step 7: Cooking the Tofu

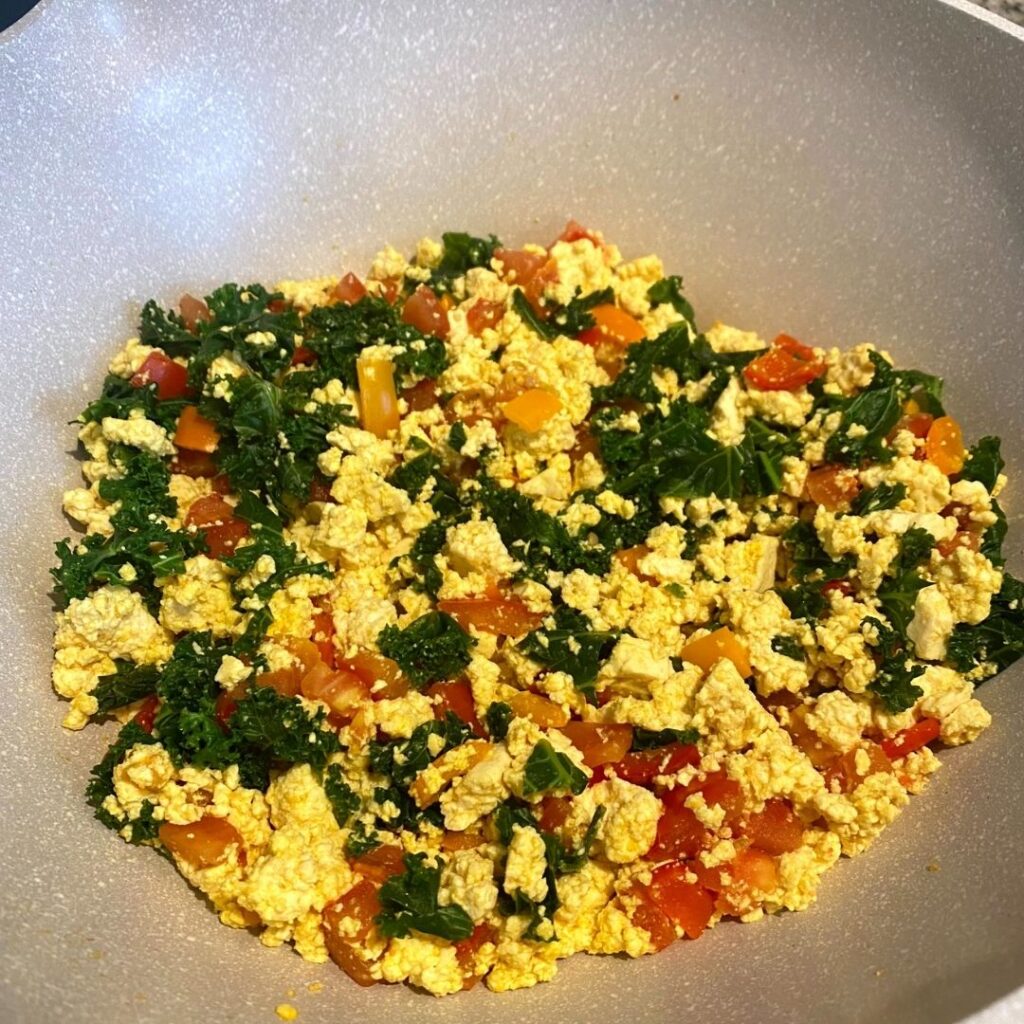
With your tofu perfectly pressed, you can now slice, dice, or crumble it according to your recipe needs. Pressed tofu is ideal for various cooking methods such as frying, baking, or adding directly to dishes.

Here are some of my favorite tofu recipes:

Tofu Scramble: Crumble the tofu and cook it with your favorite vegetables and spices for a delicious breakfast.

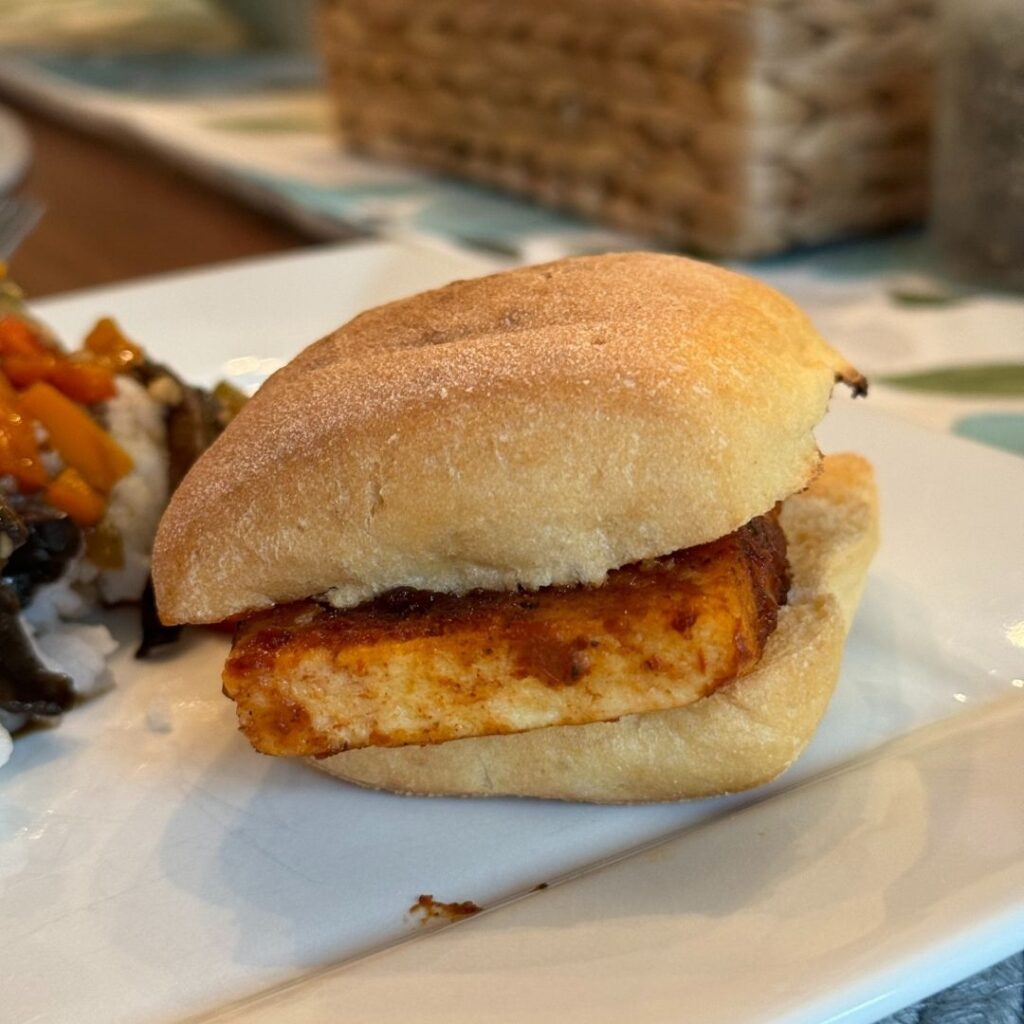
BBQ Tofu Burgers: Slice the tofu and marinate it in BBQ sauce before grilling.

Buffalo Tofu Bites: Cube the tofu, coat it in a buffalo sauce, and bake until crispy.

Conclusion

Pressing tofu is a simple yet essential step in many recipes, and using a plastic tofu press makes the process easy and effective. By following these steps, you’ll achieve the perfect tofu texture every time. For more cooking tips and delicious recipes, don’t forget to like and subscribe to our blog.

How to Keep Parsley Fresh for 30 Days in the Fridge + Health Benefits

Parsley is not only a versatile herb used in various cuisines but also packed with nutrients and health benefits. In this guide, we’ll show you how to keep parsley fresh for up to 30 days in the fridge while also highlighting its incredible health properties.

Health Benefits of Parsley

Rich in vitamins and minerals: Parsley is a good source of vitamin K, vitamin C, vitamin A, and folate, which are essential for overall health and well-being.

Antioxidant properties: Parsley contains antioxidants like flavonoids and carotenoids, which help protect cells from damage caused by free radicals and reduce the risk of chronic diseases.

Anti-inflammatory effects: Compounds found in parsley have been shown to have anti-inflammatory properties, which may help reduce inflammation in the body and alleviate symptoms of conditions like arthritis.

Supports digestion: Parsley contains fiber and enzymes that aid in digestion and promote gut health.

Freshens breath: Chewing on parsley leaves can help freshen breath naturally due to its high chlorophyll content.

Cook With Fresh Parsley 

Parsley is a versatile herb that adds a burst of fresh flavor and vibrant color to a wide range of vegan dishes. For starters, finely chopped parsley can be sprinkled over salads, soups, and roasted vegetables just before serving to elevate their taste and appearance. Additionally, parsley can be incorporated into vegan sauces and dressings, lending a refreshing herbal note. In plant-based pasta dishes, such as spaghetti aglio e olio, a generous handful of chopped parsley adds brightness and depth to the garlic-infused olive oil sauce. For a protein-packed option, parsley can be blended into vegan pesto along with basil and nuts, creating a fragrant and nutritious sauce for pasta, sandwiches, or grilled vegetables. Whether used as a garnish or a central ingredient, parsley is a must-have herb for enhancing the flavor and visual appeal of vegan cuisine.

How to Keep Parsley Fresh for 30 Days in the Fridge

In this guide, we'll show you how to keep parsley fresh for up to 30 days in the fridge.
Prep Time 15 minutes

Equipment

  • 1 colander
  • 1 airtight container

Ingredients
  

  • 1 bundle Fresh parsley

Instructions
 

  • Wash the parsley bundle thoroughly in a colander under cold running water. This step helps remove any dirt, debris, or pesticides.
  • After washing, gently pat the parsley dry with a clean cloth or paper towel. Alternatively, you can let it air dry for a few minutes.  Remove any wilted from the bunch.
  • Once dry, carefully pull the leaves from the stems. You can do this by holding the top of the stem with one hand and sliding your fingers down the stem to remove the leaves. Place the leaves in a pile until the entire bunch is finished.
  • Pat the leaves dry once more to ensure there's no excess moisture, which can lead to quicker spoilage.
  • Discard the stems as they are not typically used in cooking and can cause the parsley to wilt faster.
  • Take a glass or plastic storage container and line it with a paper towel. The paper towel helps absorb any remaining moisture and keeps the parsley fresh for longer.
  • Place the dried parsley leaves into the lined container, spreading them out evenly to avoid clumping.
  • Seal the container tightly with its lid and store it in the refrigerator.

Notes

Check the parsley periodically and remove any yellowed or wilted leaves to maintain freshness.
If the paper towel becomes damp or if your container is not airtight, replace the paper towel and ensure a tight seal to prolong the parsley’s freshness.
Keyword Parsley

With these simple steps, you can keep your parsley fresh for up to 30 days in the refrigerator, ensuring that you always have this nutritious herb on hand for your culinary creations. Incorporate parsley into your diet regularly to reap its numerous health benefits and add flavor and freshness to your dishes.

Elevate Your Rice Game: 3 Ways to Cook Perfect Jasmine Rice

Are you tired of bland, uninspired rice dishes? Say goodbye to boring meals and hello to a world of culinary excitement! Today, we’re diving deep into the art of cooking jasmine rice, and trust us, it’s going to be a game-changer. Buckle up and get ready to elevate your rice game like never before!

Stove Method: Ignite Your Taste Buds!

Anolon Advanced Home Hard Anodized Nonstick Pots and Pans
These are Amazon Affiliate links that incur no additional cost when clicked.

Picture this: fluffy, aromatic jasmine rice cooked to perfection on the stovetop. It’s the epitome of comfort food, and with good reason! The stove method brings out the best flavors and textures in your rice, leaving you craving more with every bite.

  • Pros: The rice turns out irresistibly fluffy, creating a mouthwatering experience that’s hard to beat. Plus, it’s ready in just 15 minutes – talk about a time-saver!
  • Cons: But wait, there’s a catch! This method demands your full attention. Keep an eye on the pot to prevent any mishaps, and trust us, it’s worth every second!

Microwave Ready Rice: Fast, Convenient, Delicious!

BEN’S ORIGINAL Ready Rice Jasmine Rice
These are Amazon Affiliate links that incur no additional cost when clicked.

Short on time but craving that perfect bowl of jasmine rice? Enter microwave ready rice – your new best friend in the kitchen! In just 90 seconds, you can enjoy fluffy, flavorful rice without breaking a sweat.

  • Pros: Convenience is the name of the game here. With microwave ready rice, you’ll have a piping hot meal ready to enjoy in no time. Perfect for those busy weeknights or when hunger strikes!
  • Cons: But hold your chopsticks! While convenient, this method tends to yield smaller portions and might not deliver the same level of fluffiness as its stovetop counterpart. Still, it’s a small price to pay for the ultimate convenience!

Instant Pot: Set It and Forget It!

Instant Pot Duo 7-in-1 Electric Pressure Cooker
These are Amazon Affiliate links that incur no additional cost when clicked.

Ready to take your rice game to the next level? Say hello to the Instant Pot – your ticket to hands-off cooking perfection! With just a few simple steps, you can achieve fluffy, flavorful jasmine rice with minimal effort.

  • Pros: The Instant Pot revolutionizes rice cooking. Set it and forget it – seriously! This method produces fluffy, delicious rice without requiring constant monitoring. It’s a game-changer for busy cooks everywhere!
  • Cons: But patience is key! Compared to other methods, cooking rice in the Instant Pot takes a bit longer due to the time it takes to build pressure and release it. However, trust us when we say the results are well worth the wait!

Conclusion: Unleash Your Inner Chef!

There you have it, folks – three ways to cook perfect jasmine rice, each with its own unique flair. Whether you prefer the traditional stove method, the convenience of microwave ready rice, or the hands-off approach of the Instant Pot, there’s no wrong choice here!

So, what are you waiting for? It’s time to unleash your inner chef and take your rice game to new heights. Experiment with these methods comment below which one works best for your lifestyle and preferences. Happy cooking!

Mastering Jasmine Rice on the Stove Top

In my YouTube video I will show how to cook jasmine rice to perfection! Whether you’re a seasoned chef or a beginner in the kitchen, mastering the art of cooking rice is a valuable skill. In this blog post, we’ll walk you through the a quick step-by-step process of cooking jasmine rice on the stove. Get ready to impress your taste buds and elevate your culinary repertoire!

Benefits of Jasmine Rice

Jasmine rice isn’t just delicious—it’s also packed with health benefits. This fragrant rice variety is naturally gluten-free, making it a great option for those with gluten sensitivities or celiac disease. Additionally, jasmine rice is low in fat and cholesterol, making it a heart-healthy choice. It’s also a good source of complex carbohydrates, providing a steady release of energy to keep you feeling satisfied and energized throughout the day.

Versatility in Cooking

One of the best things about jasmine rice is its versatility in cooking. While this blog post focuses on cooking jasmine rice on the stove, there are countless other ways to enjoy this aromatic grain. You can use jasmine rice as a base for stir-fries, pilafs, rice bowls, and more. It pairs perfectly with a wide range of flavors and ingredients, making it a staple in cuisines around the world.

Incorporating Jasmine Rice into Your Meal Prep Routine

Jasmine rice is also a fantastic option for meal prep. Cook a big batch of rice at the beginning of the week and use it as a base for quick and easy meals throughout the week. Pair it with roasted vegetables, grilled chicken, tofu, or beans for a balanced and nutritious meal. You can also use leftover jasmine rice to make delicious fried rice or rice pudding for a tasty treat.

Jasmine Rice on the Stove Top

I will walk you through the step-by-step process of cooking jasmine rice on the stove.
Course Side Dish
Servings 8

Equipment

  • 1 Kitchen Colander Bowl Combo Strainer
  • 1 3-quart saucepan with lid
  • 1 Measuring cup

Ingredients
  

  • 2 cups jasmine rice
  • 4 cups water

Instructions
 

  • Begin by soaking the jasmine rice in water. Then, rinse it thoroughly under cold water until the water runs clear.
  • Drain the soaked rice using a kitchen colander or fine mesh strainer.
  • In a 3-quart saucepan, combine the rinsed rice and water.
  • Set the stove to high heat and bring the mixture to a boil.
  • Once the water is boiling, give the rice a quick stir and reduce the heat to low.
  • Keep an eye on the pot to prevent overflow, removing the lid if necessary.
  • Allow the rice to simmer on low heat for 10 minutes. You'll notice a hole developing in the rice when it's done.
  • Turn off the heat and let the rice sit for an additional 5 minutes with the lid off.
  • After 5 minutes, fluff the rice with a fork to separate the grains.
  • Your perfectly cooked jasmine rice is now ready to serve!
Keyword Rice

Congratulations! You’ve successfully cooked jasmine rice on the stove. With this simple yet delicious recipe, you’ll be able to enjoy fluffy and fragrant rice every time. Whether you’re serving it alongside your favorite curry or enjoying it as a simple side dish, there’s nothing quite like a bowl of perfectly cooked jasmine rice. Experiment with flavors and enjoy the culinary journey!

Prep Soups Fast with Veggie Freezer Packs

Today, we’re sharing a genius trick for speeding up soup prep: Veggie Freezer Packs. Carrots, onions, and celery form the essential trio of ingredients, a fundamental base found in the majority of soup recipes. Say goodbye to last-minute chopping and hello to two pots’ worth of conveniently prepared ingredients. Let’s dive into the details of creating these handy packs!

Learn how to prepare Veggie Freezer Packs that will revolutionize your meal prep routine.  Whether you’re a busy parent or just looking to save time in the kitchen, these packs are a game-changer. Stock up and buy the carrots, onions, and celery when on sale to save money. In this video, we guide you through the step-by-step process of creating these convenient freezer packs. The trifecta of soup ingredients—carrots, onions, and celery—becomes your secret weapon for whipping up delicious soups without the fuss.

✅ No more last-minute chopping!

✅ Save time on busy weekdays!

✅ Enjoy homemade soups with ease!

These Veggie Freezer Packs are not only a time-saver but also a budget-friendly solution to elevate your soup game. Say goodbye to kitchen stress and hello to effortless meals!  If you found this video helpful, give it a thumbs up, and don’t forget to subscribe for more kitchen tips and hacks. Share this video with your fellow food enthusiasts who love the idea of making mealtime a breeze. Let us know in the comments if you try this hack or if you have any other time-saving kitchen tricks you’d like to share. Happy cooking!

Prep Soups Fast with Veggie Freezer Packs

Today, we're sharing a genius trick for speeding up soup prep: Veggie Freezer Packs. Carrots, onions, and celery form the essential trio of ingredients, a fundamental base found in the majority of soup recipes.
Prep Time 20 minutes
Course Soups
Servings 2 packs

Ingredients
  

  • 1 1 lb. Bag of Baby Carrots
  • 1 stalk Celery
  • 2 medium White Onions
  • 2 gallon Freezer Bags
  • 2 pint Freezer Bags

Instructions
 

  • Prep Your Workspace: Before we start chopping, clear your workspace. Make sure you have a clean cutting board, a sharp knife, and a food processor if you have one.
  • Chop, Chop, Chop: Begin by cleaning and chopping all your veggies. For a time-efficient solution, use a food processor to finely chop the onions. I like to chop the celery first because it is easier to clean when chopped. I also like to cut the baby carrots in groups of four in four pieces. This allows me to cut the whole bag faster.
  • Separate the Onions: Onions have a strong flavor, and it's best to keep them separate to maintain their individual taste and typically go in the soup first. Place the finely chopped onions into a pint-size freezer bag. Then put half the carrots and celery in the freezer bags. Lastly, place the pint size bags of onions in gallon freezer bags.
  • Assemble Your Packs: Seal the bags tightly, ensuring no air is trapped inside. If you have a vacuum sealer, this is the perfect time to put it to use. Label each bag with the contents and the date of preparation.
  • Freeze for Future Comfort: Pop these Veggie Freezer Packs into the freezer, and you're done! These packs will stay fresh for up to two months, providing you with a hassle-free solution for quick and delicious homemade soups.

Notes

For speedy use, run them under warm water to remove the plastic bag. Then defrost in the pot.

Congratulations! You’ve just created your own kitchen shortcut that will save you time and effort on those busy days. The next time you crave a comforting bowl of soup, simply grab one of these Veggie Freezer Packs, and you’ll be on your way to a hearty meal in no time. Happy cooking!