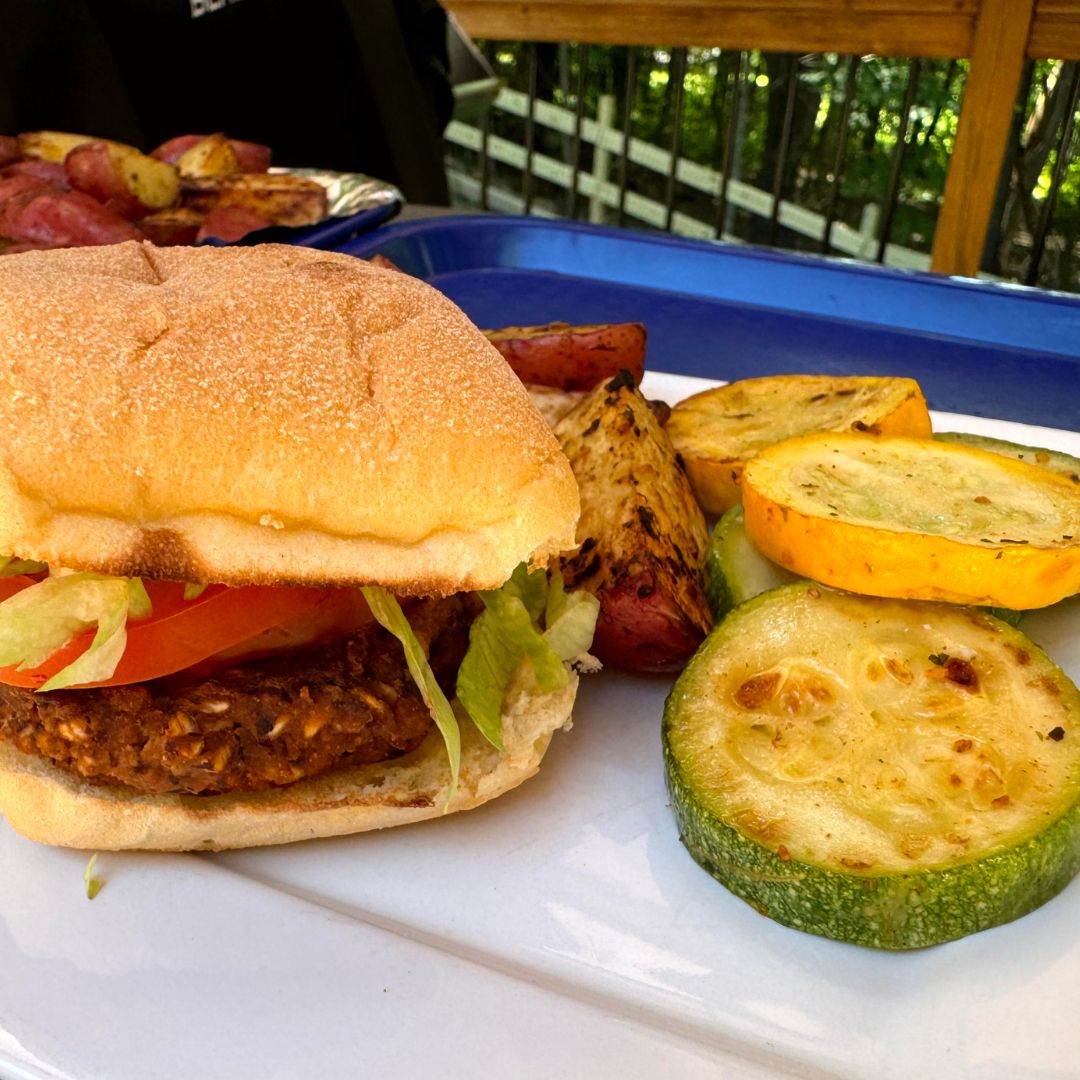
If you’re looking for a delicious and easy-to-make gluten free vegan meal, this Black Bean Tofu Burger with Grilled Veggies …
Gluten Free Vegan Made Easy
Gluten Free Vegan Made Easy
If you’re looking for a delicious and easy-to-make gluten free vegan meal, this Black Bean Tofu Burger with Grilled Veggies …
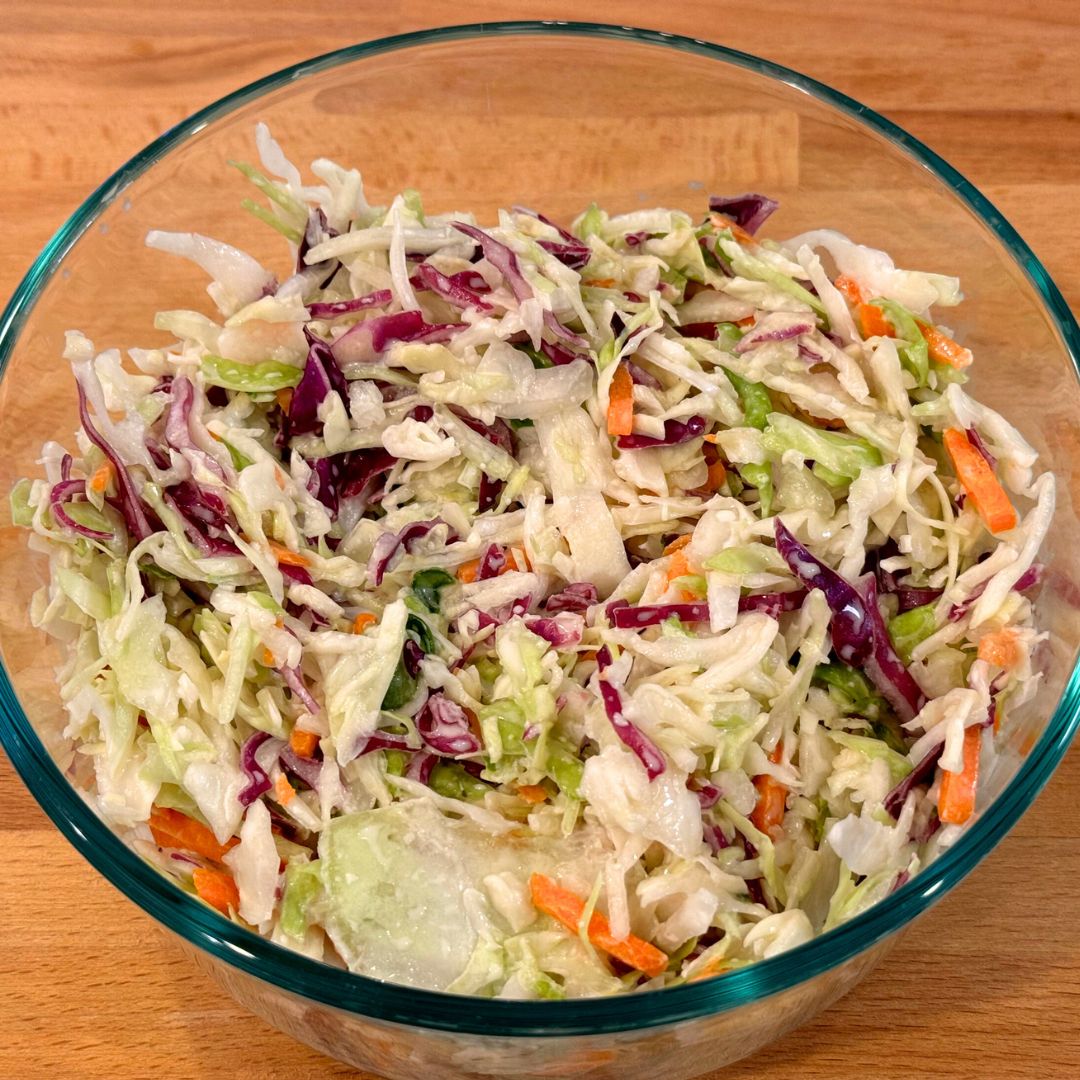
Are you ready to make the crunchiest, easiest, and most delicious vegan coleslaw ever? Our Super Crunchy Vegan Coleslaw recipe …
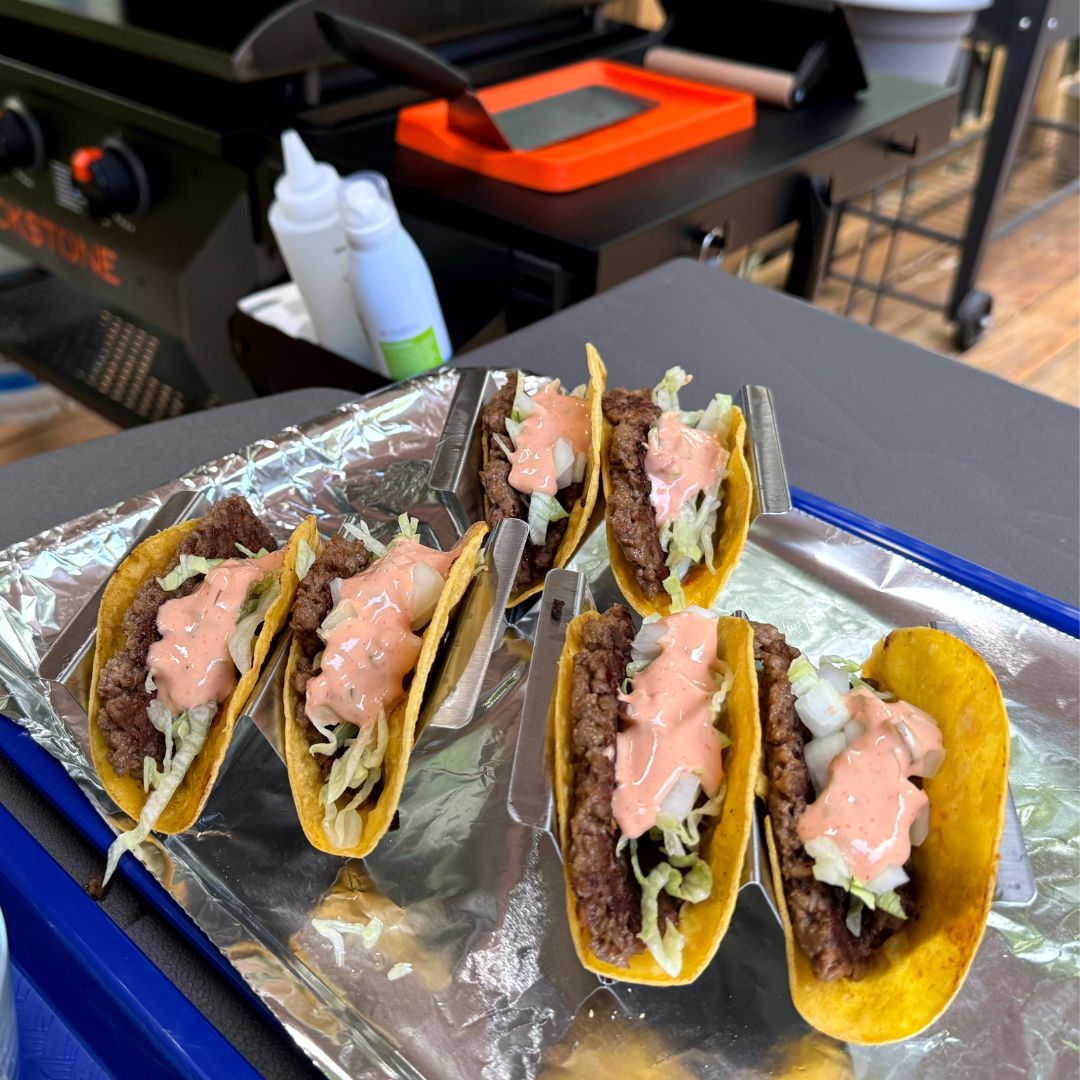
If you’re looking for an easy and delicious vegan recipe that will impress both vegans and meat-lovers alike, look no …
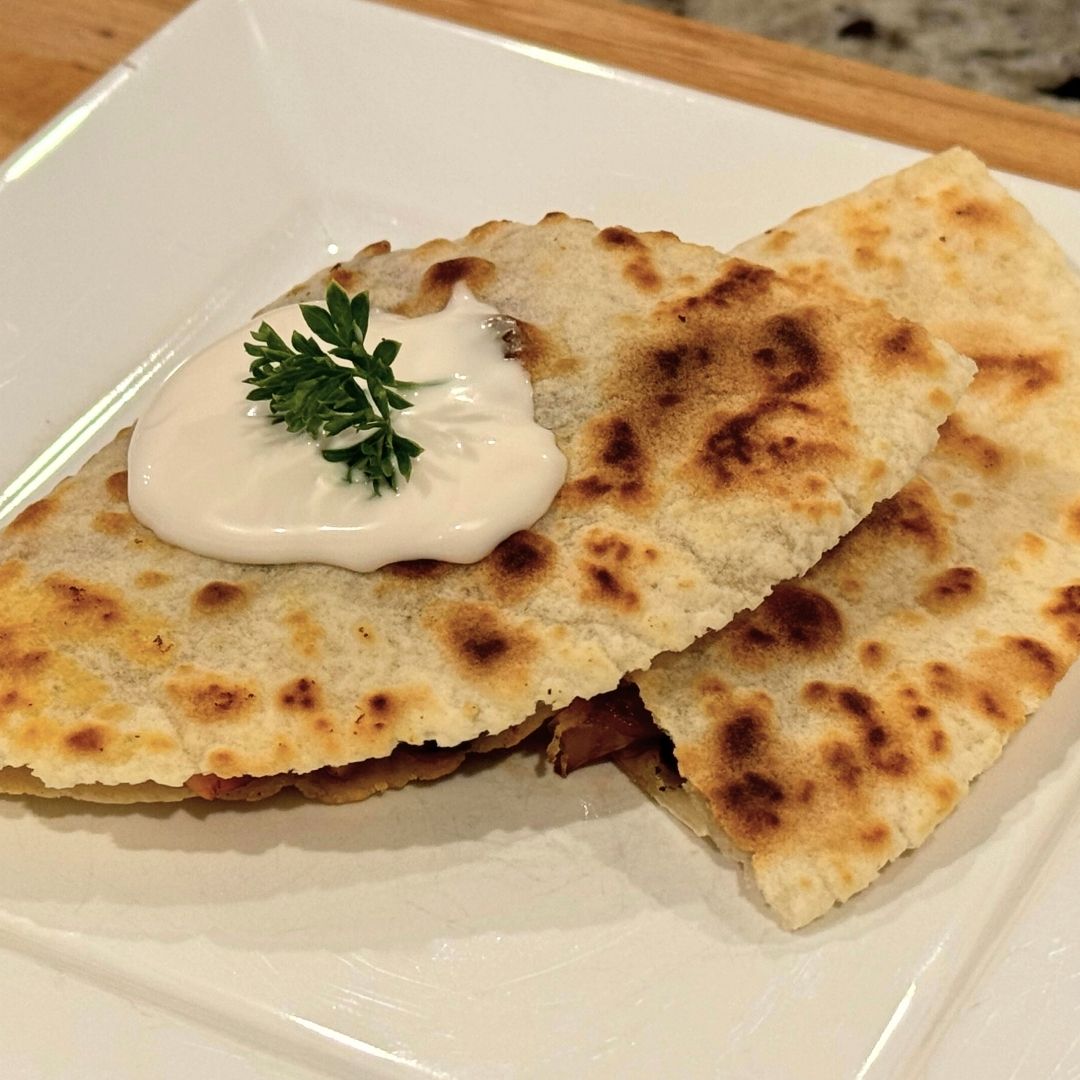
If you’re looking for a simple and delicious meal, these Southwest Quesadillas are a breeze to cook on your Blackstone …
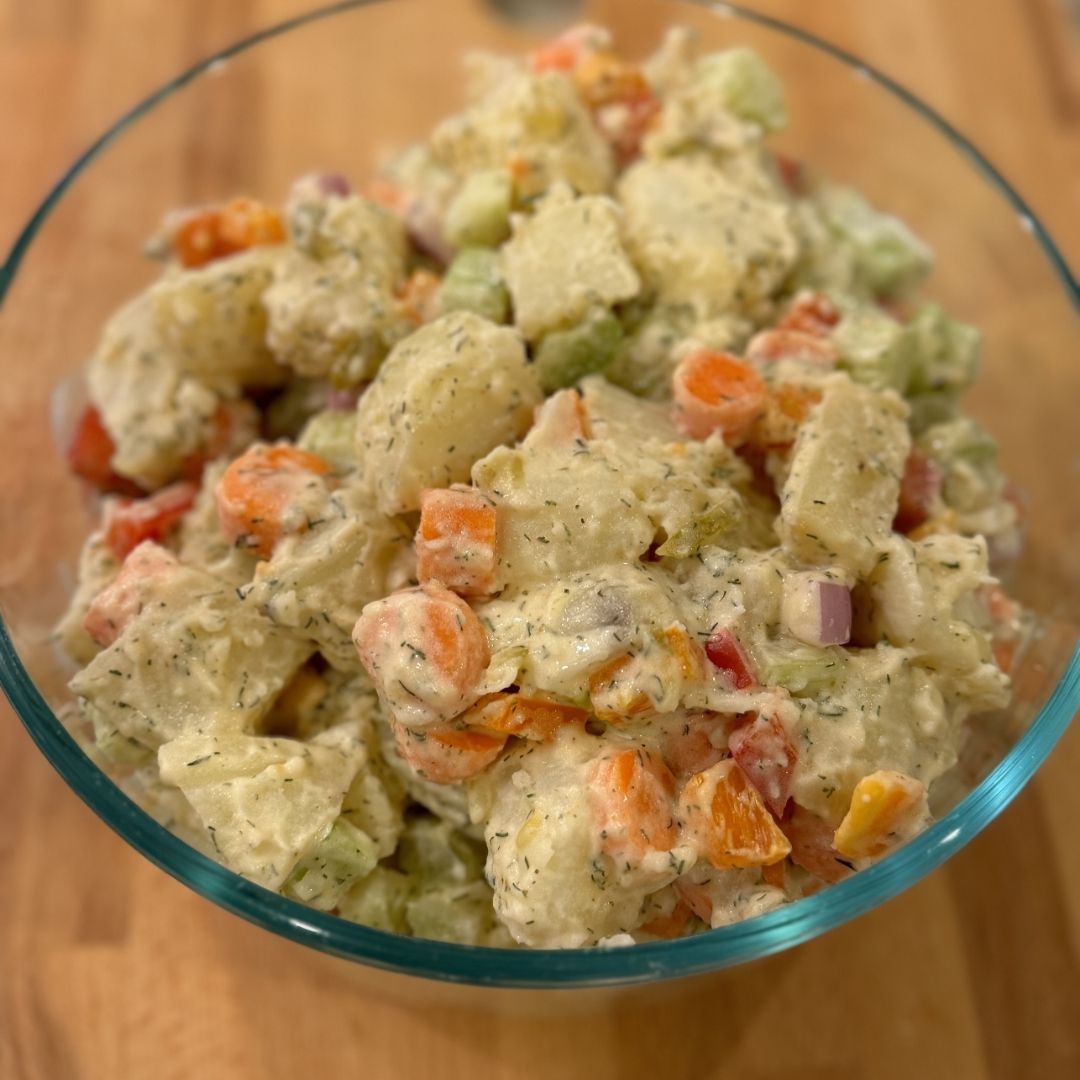
If you’re looking for a delicious and creamy vegan potato salad that’s perfect for any occasion, you’ve come to the …
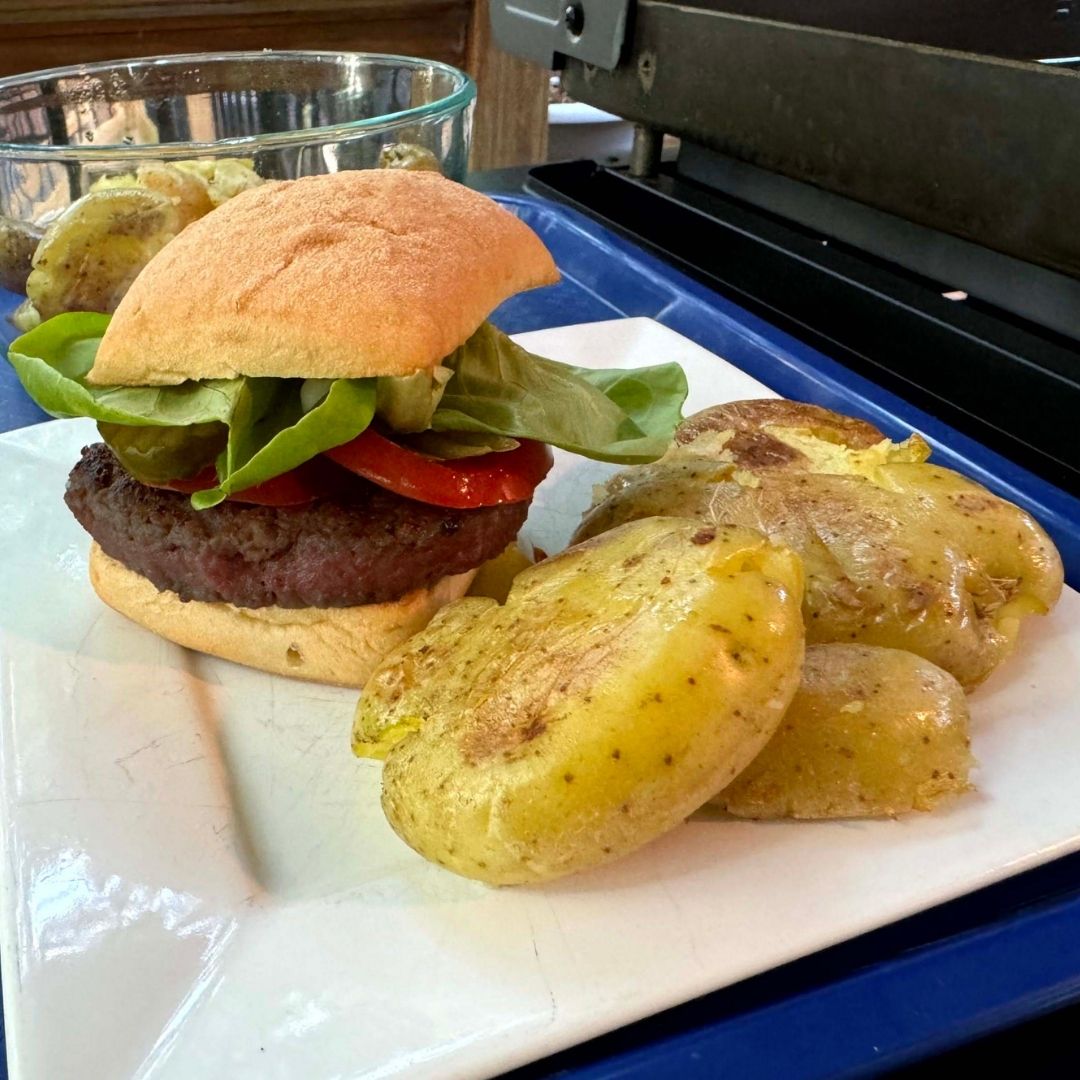
Today, I’m bringing veganism to the Blackstone Griddle with a delicious meal of Impossible Burgers and Smashed Potatoes. Let’s get …
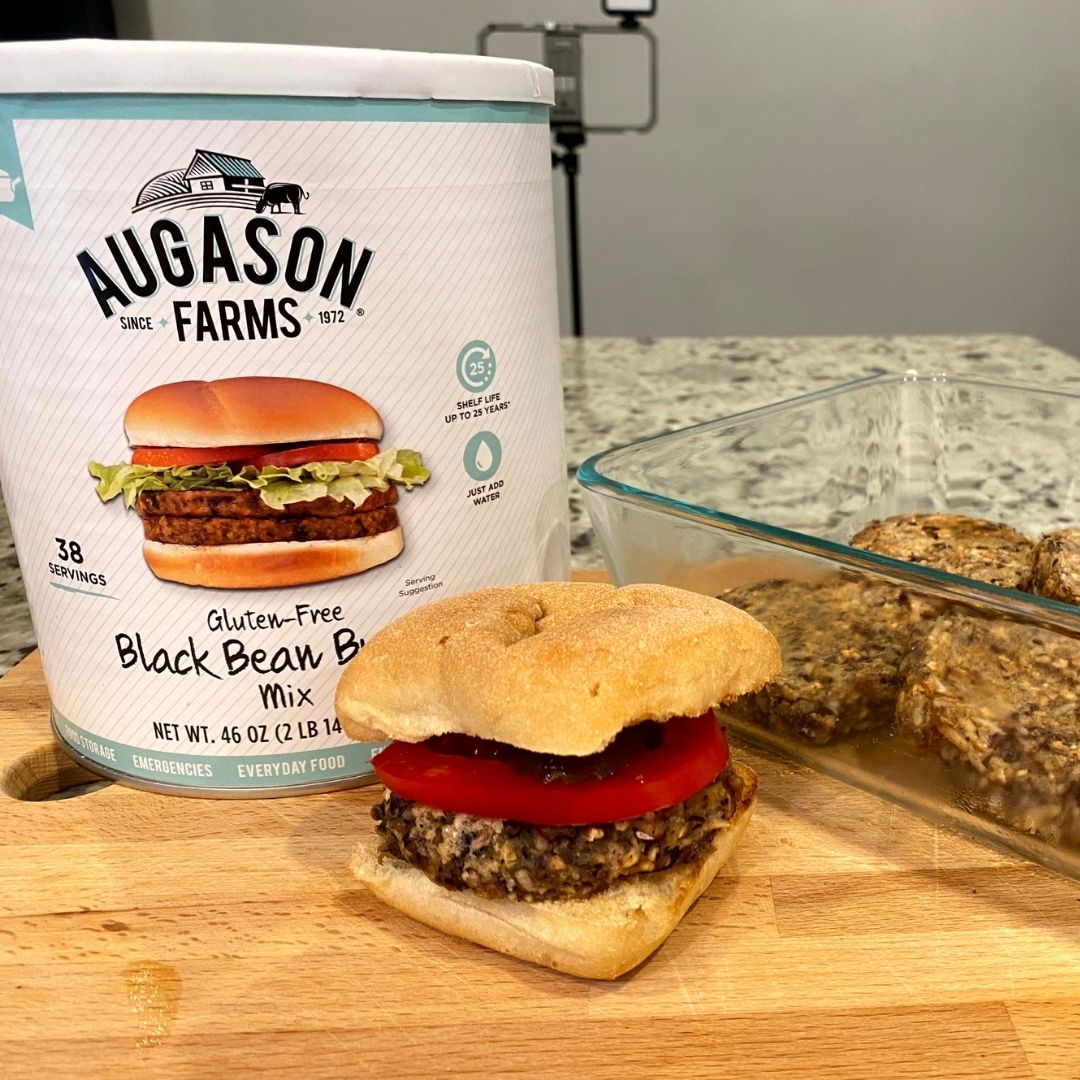
When I first transitioned to a vegan lifestyle, I searched for convenient, nutritious, and delicious meal options. The first product …
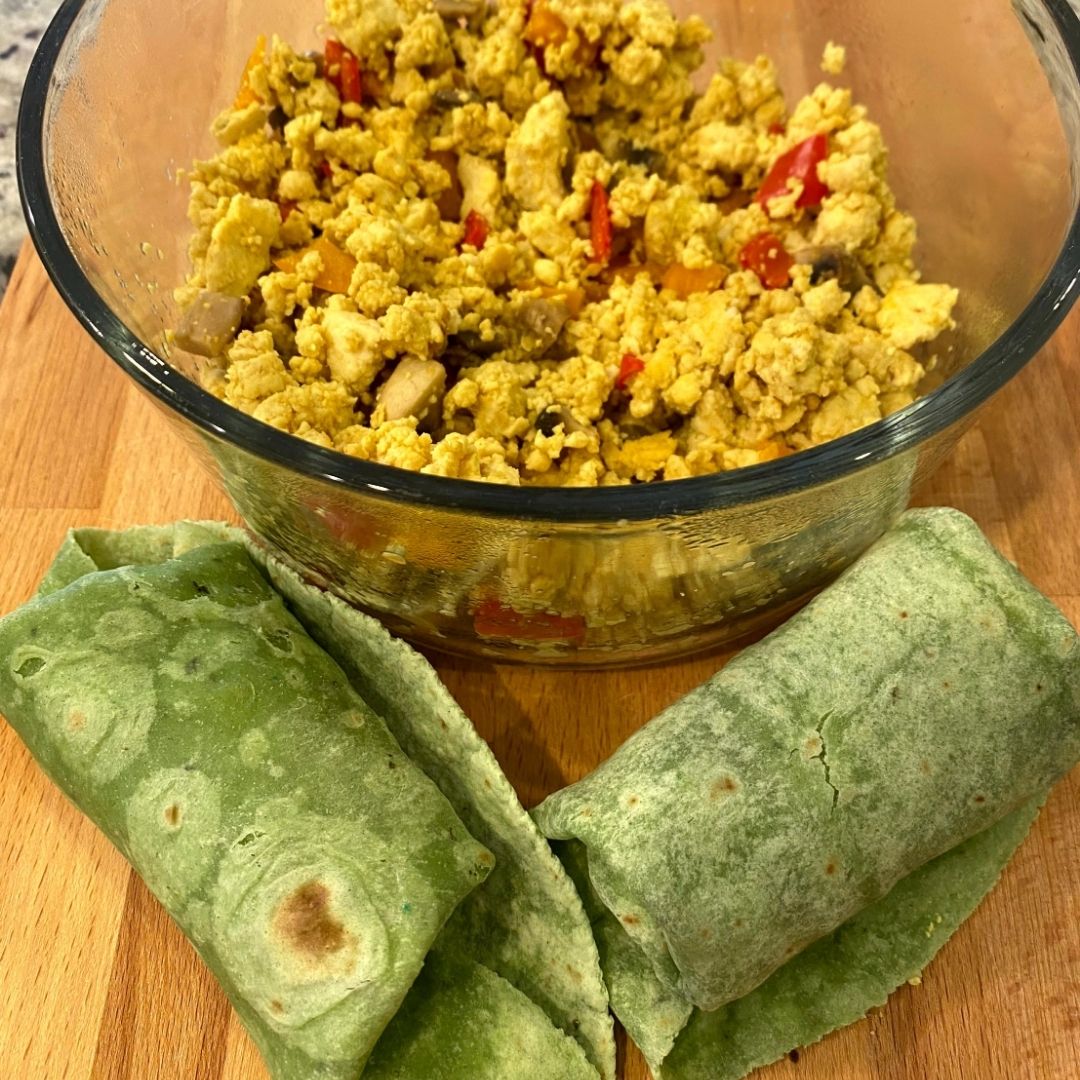
Welcome to our kitchen! Today, we’re going to show you how to make a delicious and easy tofu scramble. This …
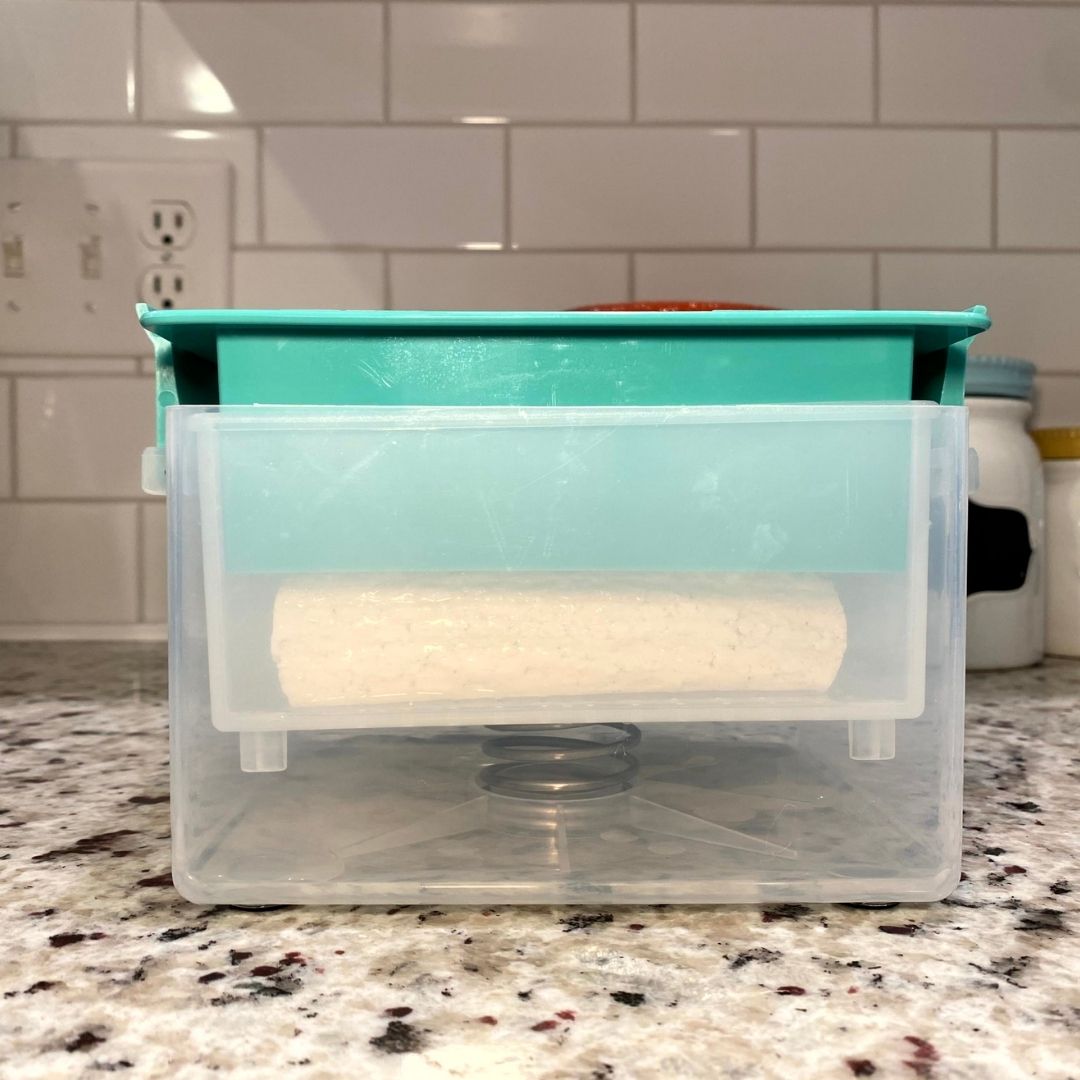
Tofu is a versatile ingredient that can be transformed into a variety of delicious dishes, but achieving the right texture …
Welcome, foodies and health enthusiasts alike, to our culinary adventure today! We’re about to embark on a journey to discover …